BING MAPS IN SILVERLIGHT VERWENDEN Marian Grzesik Software

BING MAPS IN SILVERLIGHT VERWENDEN. Marian Grzesik, Software 2 Business Gmb. H

Agenda 1. Bing Maps Accont erstellen 2. Bing Maps SDK downloaden 3. Beispiele a. „Basic“ Applikation b. Navigation c. Formen hinzufügen d. Route berechnen

1. Bing Maps Account erstellen. Einen Bing Maps Account kann man unter der Adresse https: //www. bingmapsportal. com/ einrichten. Man braucht dazu eine gültige Windows Live ID.

Bing Maps SDK downloaden. Um Bing Maps in Silverlight verwenden zu können, muss man das Bing Maps Silverlight Control SDK laden. http: //www. microsoft. com/downloads/details. aspx? displaylang=e n&Family. ID=beb 29 d 27 -6 f 0 c-494 f-b 028 -1 e 0 e 3187 e 830 Das Control kann man auch unter https: //www. bingmapsportal. com/ -> Bing Maps SDKs finden.

Beispiel – „Basic“ Applikation 1. Silverlight Applikation erstellen. 2. Das Bing Maps Silverlight Control als Referenz zum Projekt hinzufügen.

3. Das Silverlight Control zu der Main. Page. xaml hinzufügen. <User. Control x: Class="Bing. Maps. Basic. Main. Page„ xmlns="http: //schemas. microsoft. com/winfx/2006/xaml/presentation" xmlns: x="http: //schemas. microsoft. com/winfx/2006/xaml" xmlns: m="clr-namespace: Microsoft. Maps. Map. Control; assembly=Microsoft. Maps. Map. Control"> <Grid x: Name="Layout. Root"> <m: Map Credentials. Provider="your key“ /> </Grid> </User. Control>
 <User. Control. Resources> <m:")
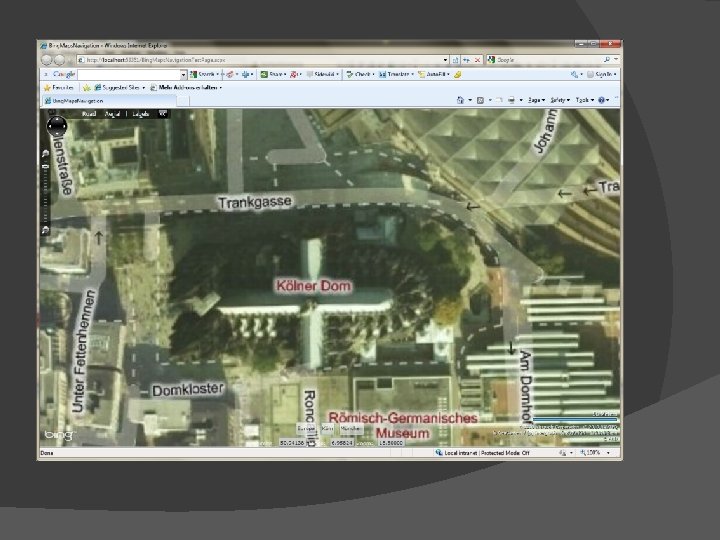
Beispiel - Navigation v Silverlight Control hinzufügen (als Credential Provider) <User. Control. Resources> <m: Application. Id. Credentials. Provider x: Key="Bing. Storage. Cred" Application. Id=„your key" /> </User. Control. Resources> …. <m: Map x: Name="view. Map" Credentials. Provider="{Static. Resource Bing. Storage. Cred}" Mode="Aerial. With. Labels„ Center="51. 34436, 18. 98441" Zoom. Level="4"/> v Map View Eine Bing Karte wird über die Set. View(Location center, double zoom) angezeigt. Die Location definiert die geographische Breite und Länge (die Mitte der Karte), Zoom definiert die Vergrößerung (1. . 20).

v Navigation-Elemente hinzufügen <User. Control x: Class="Bing. Maps. Navigation. Main. Page" xmlns="http: //schemas. microsoft. com/winfx/2006/xaml/presentation" xmlns: x="http: //schemas. microsoft. com/winfx/2006/xaml" xmlns: m="clr-namespace: Microsoft. Maps. Map. Control; assembly=Microsoft. Maps. Map. Control" xmlns: d="http: //schemas. microsoft. com/expression/blend/2008" xmlns: mc="http: //schemas. openxmlformats. org/markup-compatibility/2006" mc: Ignorable="d" d: Design. Width="640" d: Design. Height="480"> <User. Control. Resources> <m: Application. Id. Credentials. Provider x: Key="Bing. Storage. Cred" Application. Id=„your key" /> </User. Control. Resources> <Grid x: Name="Layout. Root" Background="White"> <Grid. Row. Definitions> <Row. Definition Height="*" /> <Row. Definition Height="40" /> <Row. Definition Height="20" /> </Grid. Row. Definitions> <m: Map x: Name="view. Map" Credentials. Provider="{Static. Resource Bing. Storage. Cred}" Mode="Aerial. With. Labels" Grid. Column="0" Grid. Row. Span="3" Padding="5“ Center="51. 34436, 18. 98441" Zoom. Level="4"/> <Stack. Panel Orientation="Horizontal" Opacity="0. 7" Grid. Column="0" Grid. Row="1" Horizontal. Alignment="Center"> <Button x: Name="btn. Europa" Click="Change. Map. View_Click" Tag="51. 34436, 18. 98441, 0. 0000 4“ Margin="5"> <Text. Block>Europa</Text. Block> </Button> <Button x: Name="btn. Cologne" Click="Change. Map. View_Click " Tag="50. 94138, 6. 95824, 0. 0000 18. 5" Margin="5"> <Text. Block>Köln</Text. Block> </Button> <Button x: Name="btn. Munic" Click="Change. Map. View_Click " Tag="48. 13828, 11. 57369, 0. 0000 18" Margin="5"> <Text. Block>München</Text. Block> </Button> </Stack. Panel> <Stack. Panel Orientation="Horizontal" Opacity="0. 9" Grid. Column="0" Grid. Row="2" Horizontal. Alignment="Center"> <Text. Block Text="Breite: " Padding="5" Foreground="White"/> <Text. Box x: Name="txt. Latitude" Text="" Is. Read. Only="True" Background="Light. Gray"/> <Text. Block Text="Länge: " Padding="5" Foreground="White" /> <Text. Box x: Name="txt. Longitude" Text="" Is. Read. Only="True" Background="Light. Gray"/> <Text. Block Text="Zoom: " Padding="5" Foreground="White" /> <Text. Box x: Name="txt. Zoom" Text="" Is. Read. Only="True" Background="Light. Gray"/> </Stack. Panel> </Grid> </User. Control>
 { Initialize. Component(); // Displays the current latitude and longitude as")
public Main. Page() { Initialize. Component(); // Displays the current latitude and longitude as the map animates. view. Map. View. Change. On. Frame += new Event. Handler<Map. Event. Args>(view. Map_View. Change. On. Frame); // The default animation level: navigate between different map locations. view. Map. Animation. Level = Animation. Level. Full; } private void view. Map_View. Change. On. Frame(object sender, Map. Event. Args e) { // Gets the map object that raised this event. Map map = sender as Map; // Determine if we have a valid map object. if (map != null) { // Gets the center of the current map view for this particular frame. Location map. Center = map. Center; // Updates the latitude and longitude values, in real time, // as the map animates to the new location. txt. Latitude. Text = string. Format(Culture. Info. Invariant. Culture, "{0: F 5}", map. Center. Latitude); txt. Longitude. Text = string. Format(Culture. Info. Invariant. Culture, "{0: F 5}", map. Center. Longitude); txt. Zoom. Text = string. Format(Culture. Info. Invariant. Culture, "{0: F 5}", map. Zoom. Level); } } private void Change. Map. View_Click(object sender, Routed. Event. Args e) { // Parse the information of the button's Tag property string[] tag. Info = ((Button)sender). Tag. To. String(). Split(' '); Location center = (Location)loc. Converter. Convert. From(tag. Info[0]); double zoom = System. Convert. To. Double(tag. Info[1], Culture. Info. Invariant. Culture); // Set the map view. Map. Set. View(center, zoom); }

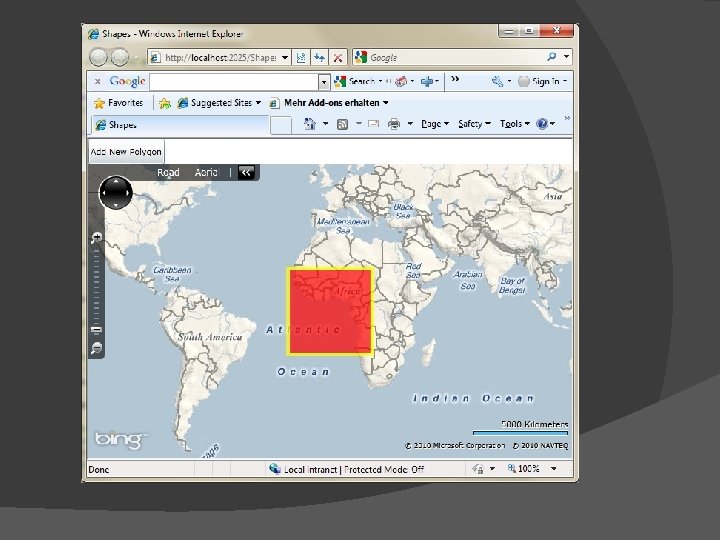
Beispiel – Formen hinzufügen Ein Polygon hinzufügen � Das Silverlight Bing Maps Control kann Polygons und Polylines über die Karte darstellen. Die Map. Plygon definiert die geographische Position und das Aussehen eines Polygons. Die Position wird als Location. Collection definiert, die einzelne geographische Positionen (Location) beinhaltet void Add. New. Polygon() { Map. Polygon polygon = new Map. Polygon(); polygon. Fill = new System. Windows. Media. Solid. Color. Brush(System. Windows. Media. Colors. Red); polygon. Stroke = new System. Windows. Media. Solid. Color. Brush(System. Windows. Media. Colors. Yellow); polygon. Stroke. Thickness = 5; polygon. Opacity = 0. 7; polygon. Locations = new Location. Collection() { new Location(20, -20), new Location(20, 20), new Location(-20, -20) }; Map. With. Polygon. Children. Add(polygon); }

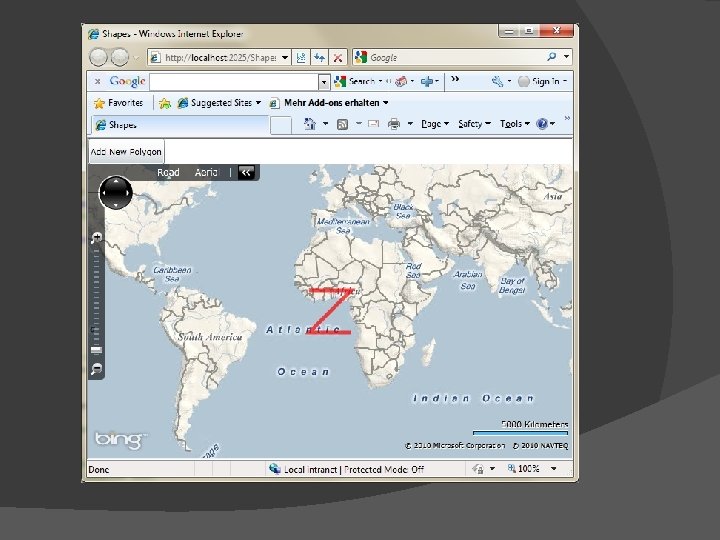
� Ein Polyline hinzufügen Die Map. Polyline definiert die geographische Position und das Aussehen einer Polyline. Die Position wird als Location. Collection definiert, die einzelne geographische Positionen (Location) beinhaltet. void Add. New. Polyline() { Map. Polyline polyline = new Map. Polyline(); polyline. Stroke = new Solid. Color. Brush(Colors. Red); polyline. Stroke. Thickness = 5; polyline. Opacity = 0. 7; polyline. Locations = new Location. Collection() { new Location(10, -10), new Location(10, 10), new Location(-10, -10), new Location(-10, 10) }; Map. With. Polygon. Children. Add(polyline); }

� Arbeiten mit Map. Layer Eine Polyline oder ein Polygon kann man direkt in das Bing Maps Silverlight Control hinzufügen oder, in ein neues Layer, das über die Karte legt. Ein Map. Layer kann man in XAML definieren: <m: Map x: Name="Map. With. Polygon" Credentials. Provider="{Static. Resource Bing. Storage. Cred}" Mode="Road" Grid. Column="0" Grid. Row="1"> <m: Map. Layer x: Name="New. Polygon. Layer"> </m: Map. Layer> </m: Map> oder im Code: Map. Layer polygon. Point. Layer = new Map. Layer(); New. Polygon. Layer. Children. Add(polygon. Point. Layer); Die Map. Layer‘s können verschachtelt werden. In dem Shapes Beispiel werden zuerst kleine Rechtecke auf der Karte in das polygon. Point. Layer hinzugefügt , das wieder im New. Polygon. Layer hinzugefügt wurde und das wieder im Silverlight Bing Maps Control liegt.
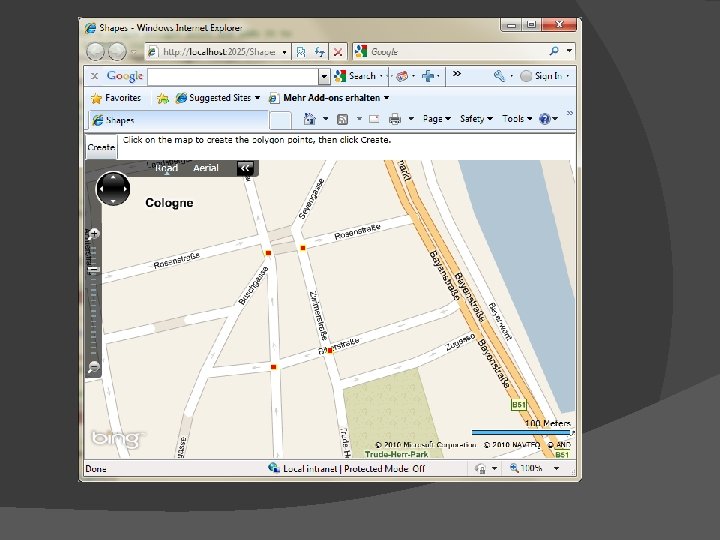

Jetzt kann man das Layer mit den kleinen Rechtecken separat bearbeiten und alle Elemente (Children) von dem Layer löschen polygon. Point. Layer. Children. Clear(); Gleichzeitig kann man in das New. Polygon. Layer die gesammelte Polygons hinzufügen: New. Polygon. Layer. Children. Add(new. Polygon);

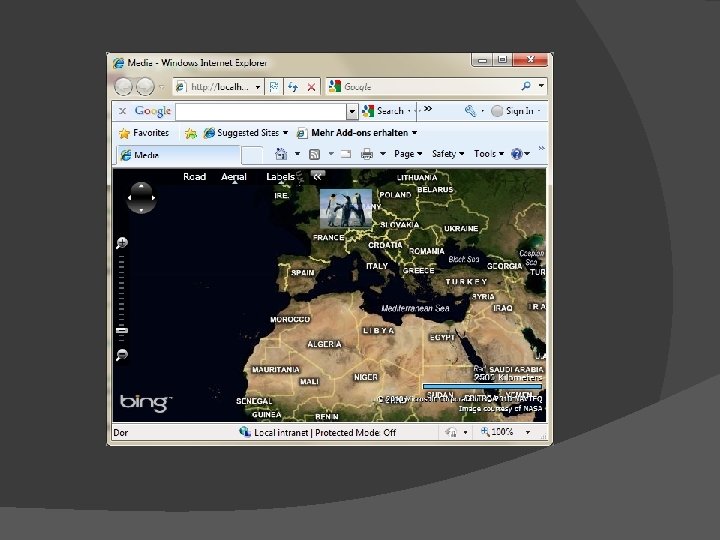
Beispiel – Media Controls Das Silverlight Bing Maps Control kann mit allen skalierbaren und nicht skalierbaren Bilder und Videos darstellen. Man kann eigentlich alle UIElement‘s hinzufügen. Es ist aber ratsam sie auf separaten Map. Layer‘s zu plazieren. Bilder hinzufügen: � public void Add. Image. To. Map() { Map. Layer image. Layer = new Map. Layer(); Image image = new Image(); //Define the URI location of the image. Source = new System. Windows. Media. Imaging. Bitmap. Image(new Uri("Images/Penguins. jpg", Uri. Kind. Relative)); //Define the image display properties image. Opacity = 0. 8; image. Stretch = System. Windows. Media. Stretch. Uniform; image. Height = 70; image. Width = 70; //The map location to place the image at Location location = new Location() { Latitude = 50. 94138, Longitude = 6. 95824 }; //Center the image around the location specified Position. Origin position = Position. Origin. Center; //Add the image to the defined map layer image. Layer. Add. Child(image, location, position); //Add the image layer to the map Map. With. Pushpins. Children. Add(image. Layer); }
 { Map. Layer image. Layer")
� Videos hinzufügen: public void Add. Video. To. Map() { Map. Layer image. Layer = new Map. Layer(); Media. Element video = new Media. Element(); //Define the URI location of the video. Source = new Uri(@"http: //mschnlnine. vo. llnwd. net/d 1/ch 9/9/2/9/9/1/4/TCS 2 NBCOlympics_ch 9. wmv", Uri. Kind. Relative. Or. Absolute); //Define the video display properties video. Opacity = 0. 8; video. Width = 250; video. Height = 200; //The map location to place the video at Location location = new Location() { Latitude = 50. 94138, Longitude = 6. 95824 }; //Center the video around the location specified Position. Origin position = Position. Origin. Center; //Add the video to the defined map layer image. Layer. Add. Child(video, location, position); //Add the video layer to the map Map. With. Pushpins. Children. Add(image. Layer); }

Push. Pins hinzufügen � private void Map. With. Pushpins_Mouse. Double. Click(object sender, Map. Mouse. Event. Args e) { // Disables the default mouse double-click action. e. Handled = true; // The location to place the pushpin at on the map. Location pin. Location = Map. With. Pushpins. Viewport. Point. To. Location(e. Viewport. Point); // The pushpin to add to the map. Pushpin = new Pushpin(); pin. Location = pin. Location; // Adds the pushpin to the map. Map. With. Pushpins. Children. Add(pin); } Der Pushpin kann auch im XAML definiert werden: <m: Map x: Name="Map. With. Pushpins" Credentials. Provider="{Static. Resource Bing. Storage. Cred}" Mode="Aerial. With. Labels“> <m: Pushpin m: Map. Layer. Position="50. 94138, 6. 95824" /> </m: Map> oder als Image: <m: Map x: Name="Map. With. Pushpins" Credentials. Provider="{Static. Resource Bing. Storage. Cred}" Mode="Aerial. With. Labels“> <Canvas Width="50" Height="50" m: Map. Layer. Position="50. 94138, 6. 95824" m: Map. Layer. Position. Origin="Center" > <Image Source="Images/Penguins. jpg" Stretch="Fill" Height="50" Width="50" /> </Canvas> </m: Map>

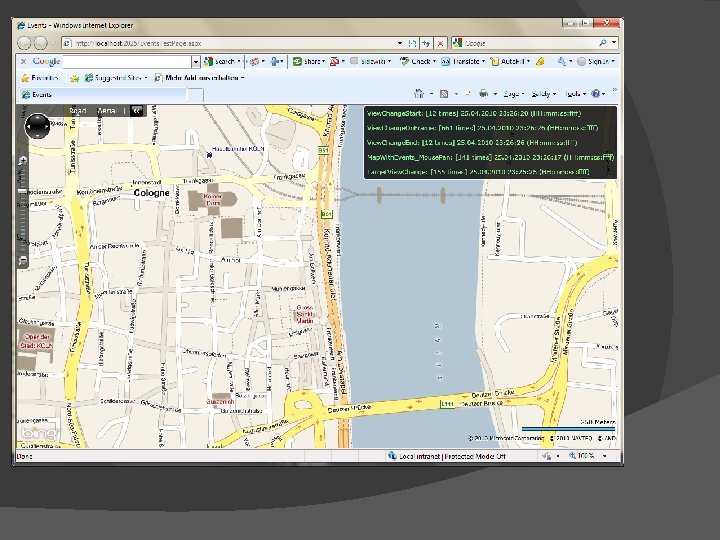
Events � Das Bing Maps Silverlight Control reagiert auf viele Events: 1. Loading: 1. 2. Map Mode Änderung: 1. 3. 2. 3. 4. Target. View. Changed View. Change. End View. Change. On. Frame View. Change. Start Mouse: 1. 2. 3. 4. 5. Mode. Changed Navigation: 1. 4. Loaded Loading. Error Mouse. Click Mouse. Double. Click Mouse. Drag. Box Mouse. Pan Mouse. Wheel Keyboard: 1. 2. Key. Held Key. Press

Map Modes � � Das Map. Mode Property des Bing Maps Silverlight Controls repräsentiert eine 2 D Projektion der Erde. Es gibt zwei Arten der Projektion: � Flat. Map. Mode – eine flache Repräsentation der Erde � Mercator. Mode – eine zylinderförmige Repräsentation der Erde Das Control implementiert nur zwei Arten der Projektion, die leiten von Mercator. Mode ab, Road. Mode und Aerial. Mode. Nur die beide Klassen haben so genannte „Tile Layer“, die Bilder Erde beinhalten. (Mehr über Tilesets unter http: //www. microimages. com/documentation/Tech. Guides/76 Bing. Structure. pdf) Der Mercator. Mode beinhaltet keine Bilder Erde (keine Tile Layer). Eine Ableitung der Map. Mode ermöglicht, dass man eine Funktionalität erreicht, wie Bergenzug der Anzeige und des Zooms, andere Reaktion auf Events. Beispiel Map. Modes.

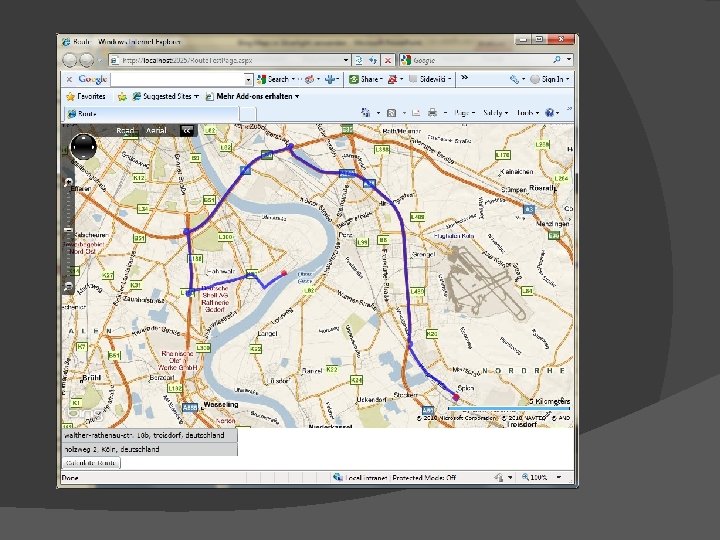
Route berechnen Das Bing Maps Silverlight Control beinhaltet mehrere Web Services: � Geocode Service – findet die geographische Position zu einer Adresse und umgekehrt � Imagery Service – Info über Bilder und URI‘s dazu (z. B. eine Karte mit Push. Pins) � Route Service – berechnet eine Route � Search Service – Suche nach Schlüsselworten Beispiel – Route berechnen. Um eine Route berechnen zu können braucht man folgende Elemente: � Die Ziel -/und Startadresse � Geocode Service (http: //dev. virtualearth. net/webservices/v 1/geocodeservice. svc) � Route Service (http: //dev. virtualearth. net/webservices/v 1/routeservice. svc)

Links & Literatur 1. 2. 3. 4. 5. http: //silverbing. codeplex. com/ http: //www. bing. com/developers/appids. aspx http: //msdn. microsoft. com/en-us/library/ee 681884(v=MSDN. 10). aspx http: //www. microimages. com/documentation/Tech. Guides/76 Bing. Structure. pdf „Bing Maps für Webentwickler“, T. Richling, entwickler. press 2009
- Slides: 27