Beginners Guide for Teachers Contents Page Inviting students

Beginner’s Guide for Teachers

Contents Page • Inviting students to join FIZX Slides 3 – 10 • Responding to a FIZX invitation Slides 11 – 19 • Accepting a FIZX invitation without a wikidot account Slides 20 – 26 • Creating a wikidot account Slides 27 – 35 • Editing your school’s FIZX page Slides 36 – 42 • Uploading a file to FIZX Slides 43 – 52 • Including a website link in FIZX Slides 53 – 57 • Contributing to a forum discussion on FIZX Slides 58 – 64 • Creating a forum thread on FIZX Slides 65 – 71

Beginner’s Guide for Teachers Inviting students to join

Step One: Login to your account

Step Two: Go to the bottom of the side panel and click on the moderators link

Step Three: Click on the manage memberships link

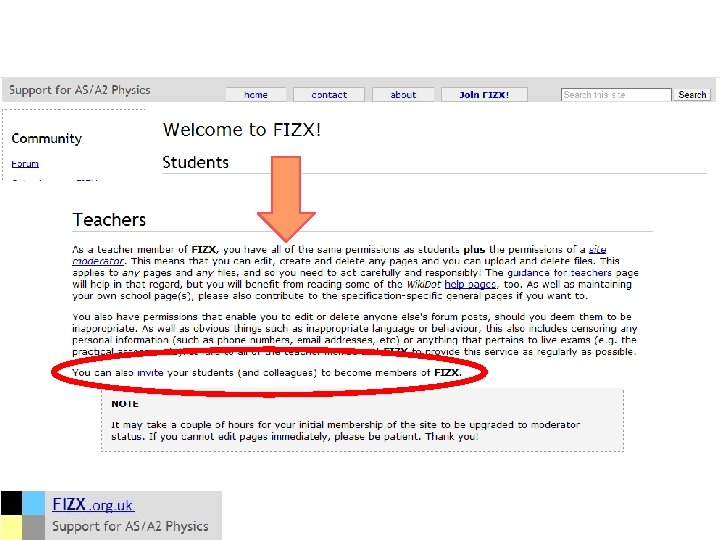
Step Four: Click on the Send invitations now link
 you")
Step Five: Add the names and email addresses of any students (or colleagues) you wish to invite

Step Six: You may add a short message to accompany your invitations. Click on the Send invitations button when you are finished

Step Seven: You will then see a list of all the invitations you have sent. You can also remove invitations by clicking on the Delete link Back to Contents Page

Beginner’s Guide for Teachers Responding to a invitation

Step One: invitations will be sent to the specified email address. Login to your chosen email account. Click on the emailed link to accept the invitation

Step Two: If you already have a account login using the Sign In link. If you don’t, follow the instructions to create a new account.

Step Three: Enter your account details to login

Step Four: Click on the Accept Invitation link

Step Five: Click on the fizx. wikidot. com link to enter the website

Step Six: Congratulations! You are now a member of the website. You can now use your new membership to explore all areas of the site!!!

Step Seven: If you are a teacher and wish to have full moderator status for the website, please email the site administrators admin@fizx. org. uk so that you can edit your school’s page, upload resources and invite students!

Back to Contents Page Step Three: Once you have been given moderator status by the site administrators you will receive a notification. Congratulations!! You can now start editing your school’s page and uploading resources!

Beginner’s Guide for Teachers Accepting a invitation without a account

Step One: invitations are sent to your email account from a colleague or the site administrators Click on the emailed link to accept the invitation

Step Two: If you do not have a account create a new account using the Create a new account link.

Step Three: Enter your full name and proper email address to create you new account. You will need these to login to the website. Choose a password that you will remember.

Step Three: Once you have been given moderator status by the site administrators you will receive a notification. Congratulations!! You can now start editing your school’s page and uploading resources!

Step Three: Once you have been given moderator status by the site administrators you will receive a notification. Congratulations!! You can now start editing your school’s page and uploading resources! Back to Contents Page

Beginner’s Guide for Teachers Creating a account

Step One: Go to www. wikidot. com to create your account. Choose create account using the Create account link.

Step Two: Enter your full name and email address to create your wikidot account. You will need these to login to the website. Choose a password you will remember.

Step Three: will now send you an invitation to the email address you specified.

Step Four: invitations will be sent to the specified email address. Login to your chosen email account. Click on the emailed link to accept the invitation

Step Five: Congratulations! You are now a member of the website. You can now use your new membership to join the community!!!

Step Six: Go to www. fizx. org. uk and the Join FIZX! tab and follow the instructions to join the website

Step Seven: If you are a teacher and wish to join the community, please use your school email address to email your school details and account details to the site administrators join@fizx. org. uk

Back to Contents Page Step Eight: Use the www. fizx. org. uk and the Join FIZX! Tab and follow the instructions to join the website

Beginner’s Guide for Teachers Editing your school’s page

Step One: Login to your account

Step Two: Find your school’s page through the Schools using FIZX sidebar and click on your school’s link

Step Three: Go to the bottom of your page and click on the Edit link

You can use this toolbox to help with wiki syntax Step Four: Insert your wiki code here. You can Preview the page before you Save any edits. You can use these links to help with wiki syntax

You can add your stuff for each module in the spaces provided Step Five: Your school will have a default template which outlines the units and modules for your designated exam specification. Feel free to change this to suit!

Back to Contents Page Alternatively, you can ‘borrow’ code from other school’s pages by ‘editing’ their page and ‘copying & pasting’ any useful code CAUTION: Take care not to overwrite or delete anyone else’s code!!! Step Six: Wikidot has useful reference pages to help with wiki syntax for your code

Beginner’s Guide for Teachers Uploading a file to

Step One: Login to your account

Step Two: Find your school’s page through the Schools using FIZX sidebar and click on your school’s link

Step Three: Go to the bottom of your page and click on the Files link

Step Four: Scroll down and click on the Upload a file from your computer link

This link is useful for adding multiple files Step Five: Click on the Select Files button to find the file you wish to upload

Step Six: Browse to select the file you wish to upload. Click on the Open button to upload the file. Click on the refresh file list link

Step Seven: Right click on the newly uploaded file and select Copy link address Now click Edit to add the uploaded file to your school’s page
![This [. . ] syntax displays the uploaded file as Radiation Dose Chart and](http://slidetodoc.com/presentation_image_h/b02c5836ba869783a3aef2d0824be02f/image-51.jpg "This [. . ] syntax displays the uploaded file as Radiation Dose Chart and")
This [. . ] syntax displays the uploaded file as Radiation Dose Chart and the * in front of the copied address will open the file in a new window Co pie da dd r es sl ink Step Eight: Edit your page and paste the copied address link where you wish to access the uploaded file.

Back to Contents Page Step Nine: Check your page to see if the link for the newly uploaded file works

Beginner’s Guide for Teachers Including a website link in

Step One: Login to your account

Step Two: Find your school’s page through the Schools using FIZX sidebar and click on your school’s link

Step Three: Go to the bottom of your page and click on the Edit link

Step Four: You can use the URL Link button on the code wizard menu or simply type the web address directly Using the URL Link format [] hides the ‘messy’ web address with a simple description Using the *http format opens the web address in a new window Back to Contents Page

Beginner’s Guide for Teachers Contributing to a forum discussion on

Step One: Login to your account

Step Two: Click on the Forum link at the top of the sidebar. Click on the link for the forum category you would like to add to

Step Three: Click on the Forum thread that you would like to add to

Step Four: Click on Reply to contribute to the discussion

Step Five: Add your reply in the space provided. Use wiki syntax for //italics// or **bold** comments. You can preview your reply. Click Post It when you are finished

Step Six: Your reply will now appear in the forum discussion thread Back to Contents Page

Beginner’s Guide for Teachers Creating a forum thread on

Step One: Login to your account

Step Two: Click on the Forum link at the top of the sidebar. Click on the link for the forum category you would like to add to

Step Three: Click on Create a new thread to make a new discussion thread

Step Four: Add the details for your thread in the spaces provided. Use wiki syntax for //italics// or **bold** comments. You can preview your reply. Click Post It when you are finished

Step Five: Your new thread will now appear in the forum discussion

Step Six: Your new thread summary will also appear in the forum discussion contents Back to Contents Page
- Slides: 71