Auxiliary Views Understanding Auxiliary Views An auxiliary view
- Slides: 26

Auxiliary Views

Understanding Auxiliary Views • An auxiliary view is an orthographic view that is not a standard projection • Auxiliary views allow principal faces of features that are not parallel to the standard planes of projection to appear true shape and size. – This is very important when dimensioning apart.

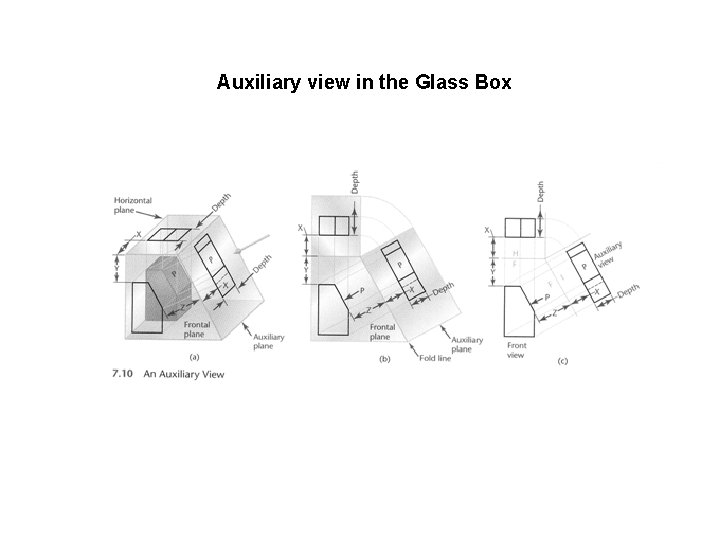
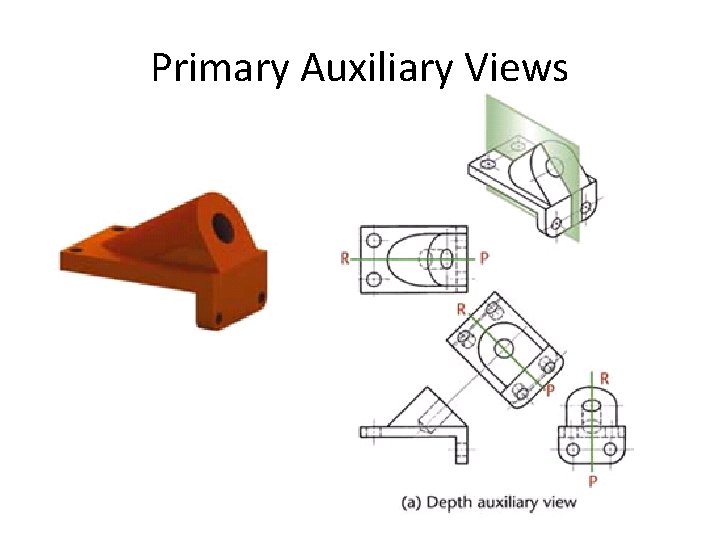
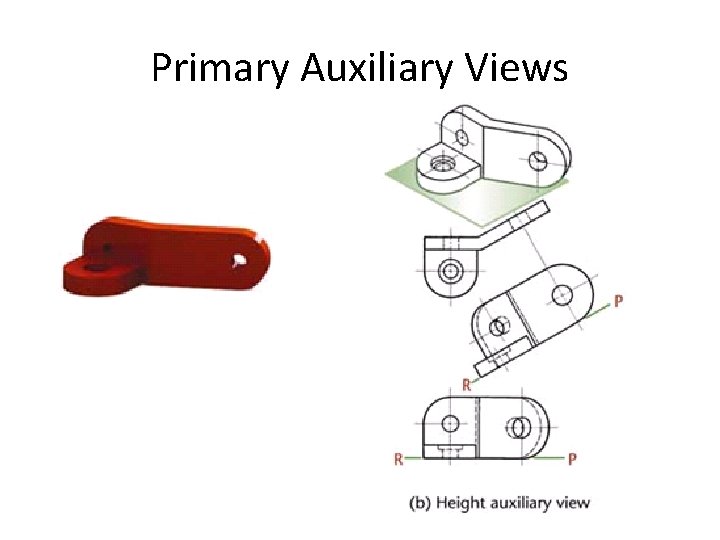
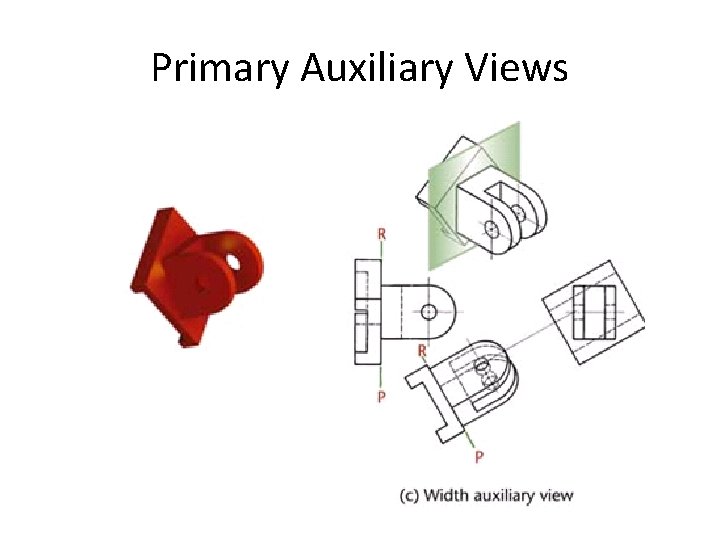
Primary Auxiliary Views • A primary auxiliary view is projected onto a plane that is perpendicular to one of the principal planes of projection and is inclined to the other two

Auxiliary view in the Glass Box

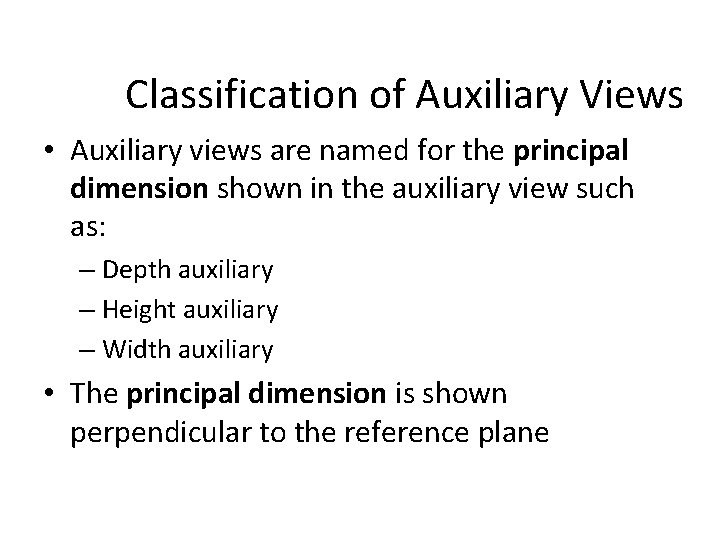
Classification of Auxiliary Views • Auxiliary views are named for the principal dimension shown in the auxiliary view such as: – Depth auxiliary – Height auxiliary – Width auxiliary • The principal dimension is shown perpendicular to the reference plane

Primary Auxiliary Views

Primary Auxiliary Views

Primary Auxiliary Views

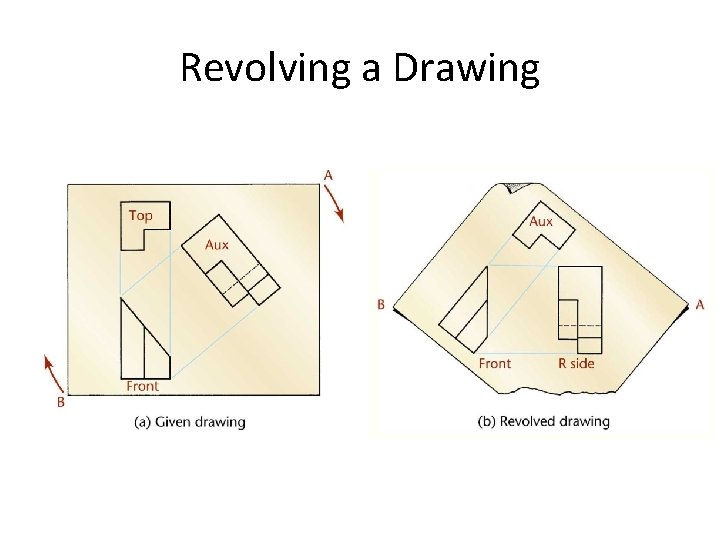
Revolving a Drawing • Some times it is easier to visualize and draw and auxiliary view when revolved to the position of a regular view – It should be understood that an auxiliary view basically is like any other view

Revolving a Drawing

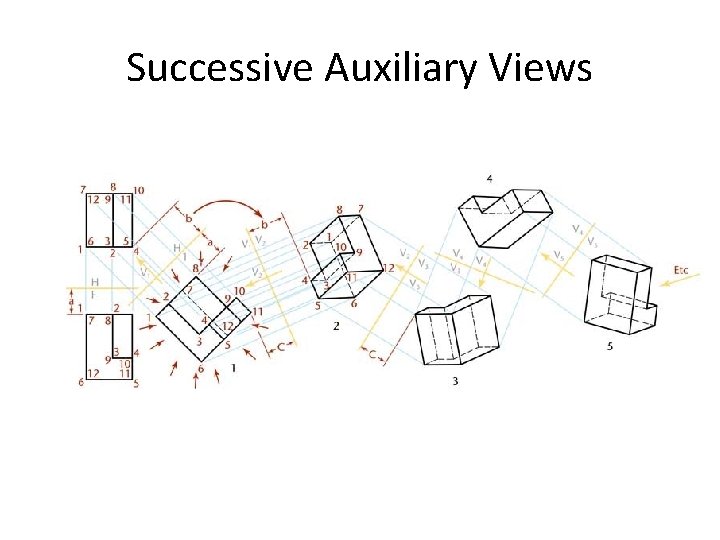
Successive Auxiliary Views • From primary auxiliary views, a secondary auxiliary view can be drawn • Third auxiliary views can be projected from secondary views – An infinite number of successive auxiliary views may be drawn

Successive Auxiliary Views

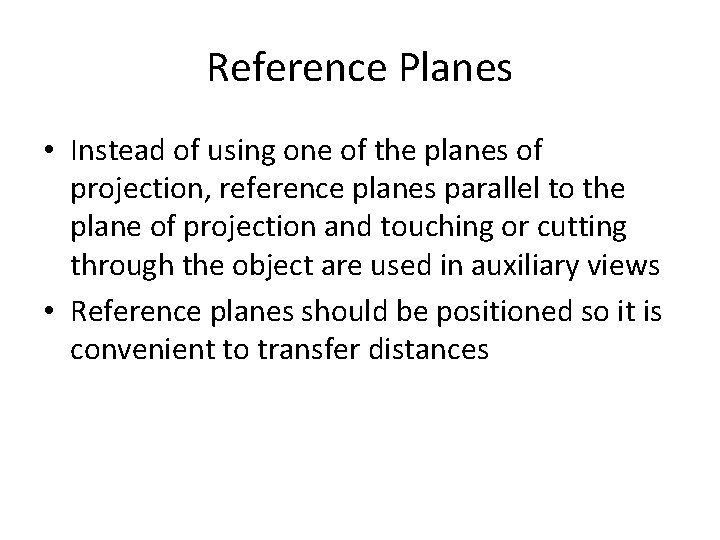
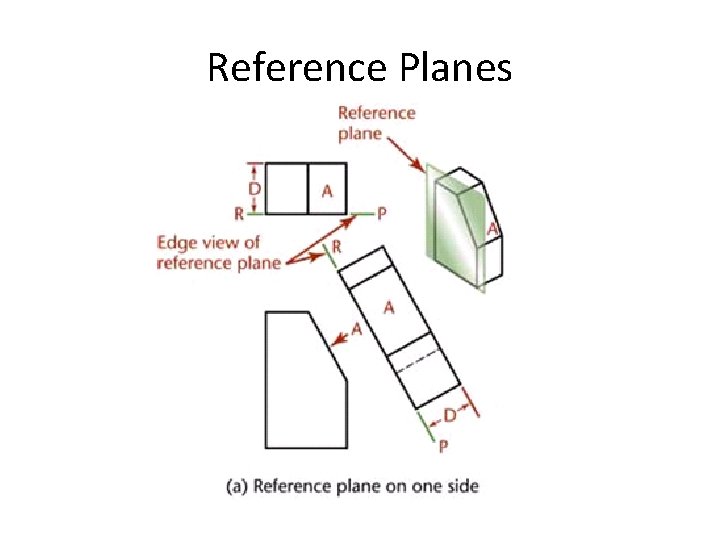
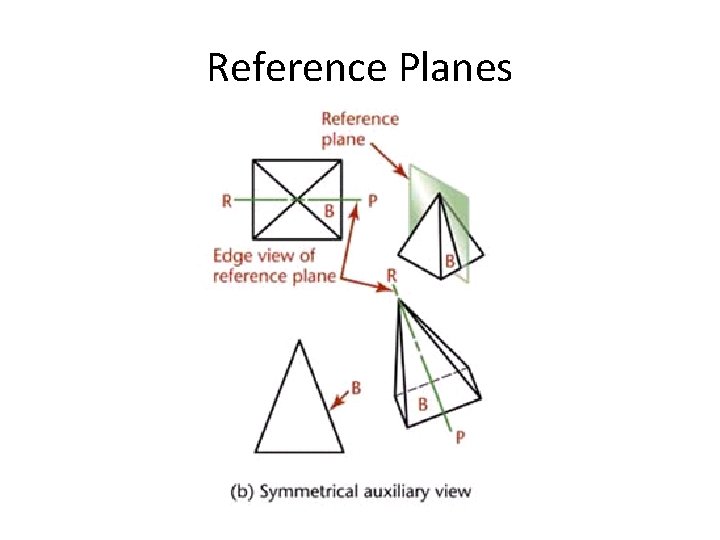
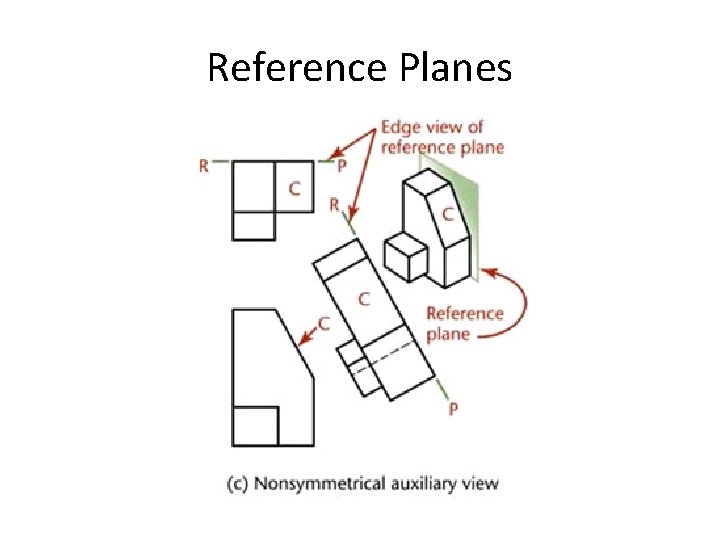
Reference Planes • Instead of using one of the planes of projection, reference planes parallel to the plane of projection and touching or cutting through the object are used in auxiliary views • Reference planes should be positioned so it is convenient to transfer distances

Reference Planes

Reference Planes

Reference Planes

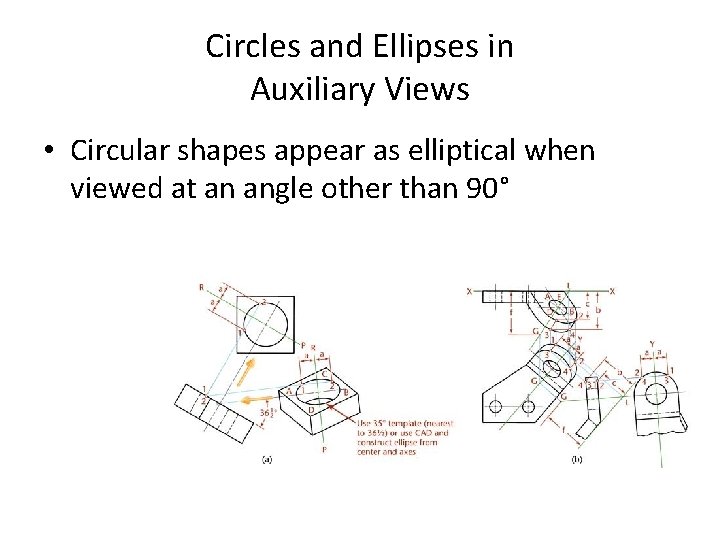
Circles and Ellipses in Auxiliary Views • Circular shapes appear as elliptical when viewed at an angle other than 90°

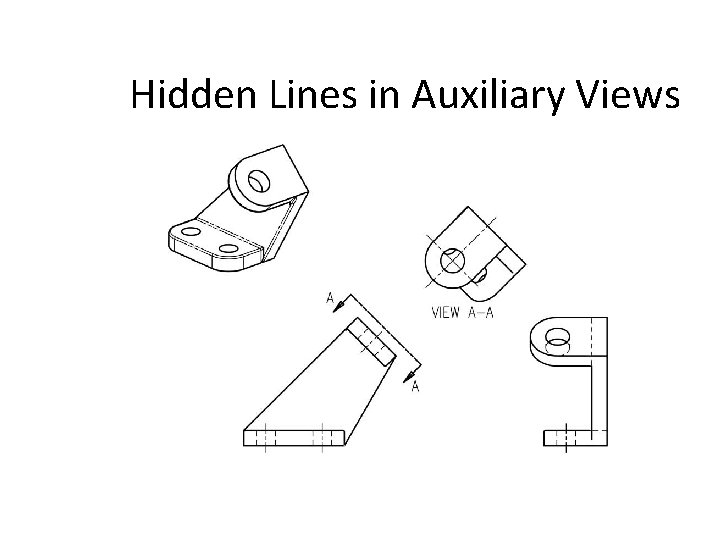
Hidden Lines in Auxiliary Views • Generally hidden lines should be omitted in auxiliary views unless they are needed to clearly communicate the drawing’s intent

Hidden Lines in Auxiliary Views

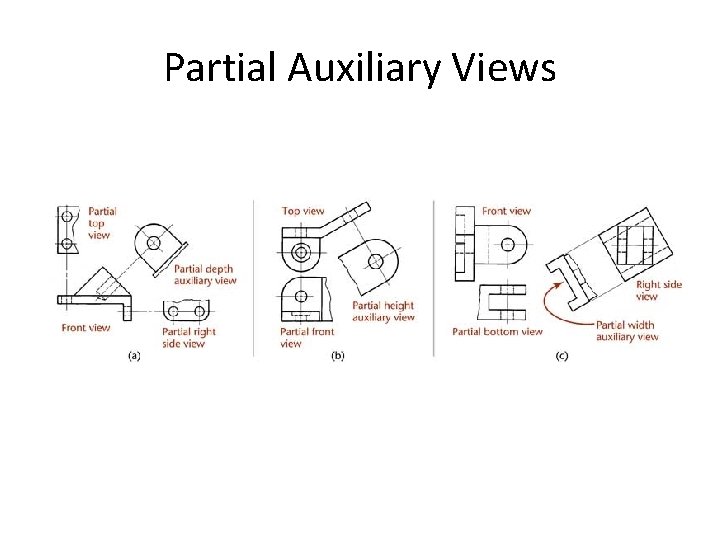
Partial Auxiliary Views • Partial auxiliary views are often sufficient to convey information and may be easier to read – Usually a break line is used to indicate the imaginary break in the views

Partial Auxiliary Views

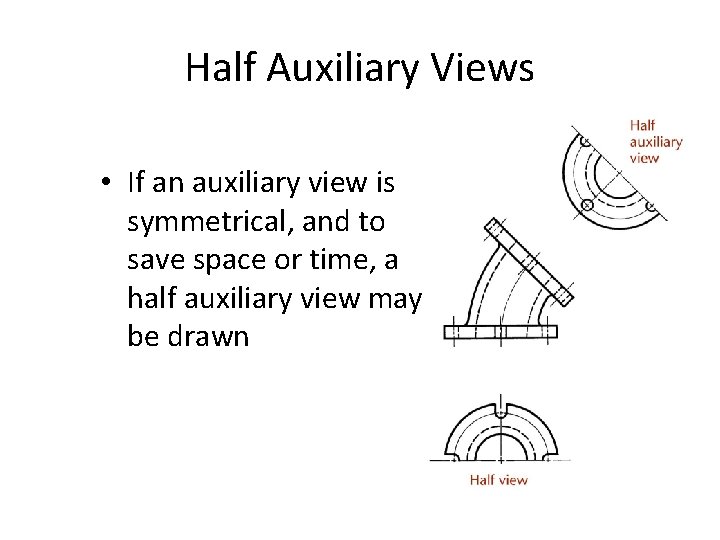
Half Auxiliary Views • If an auxiliary view is symmetrical, and to save space or time, a half auxiliary view may be drawn

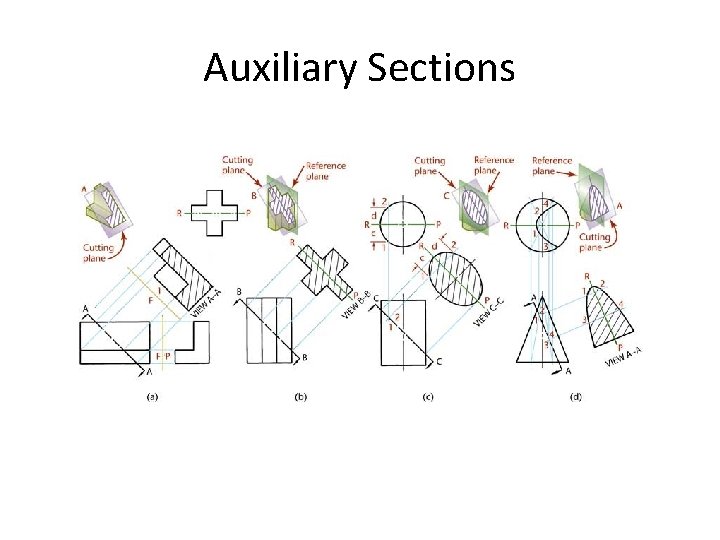
Auxiliary Sections • An auxiliary section is simply an auxiliary view in section • The cutting plane line indicates both the location of the cutting plane and the direction of sight for the auxiliary section

Auxiliary Sections

Uses of Auxiliary Views • Auxiliary views are used to show: – True length of a line – Point view of a line – Edge view of a plane – True size of a plane

Steps for drawing Auxiliary Views 1. Determine the direction of viewing. 2. Number the vertices on the inclined plane if needed. 3. Draw projectors along the direction of sight. The projectors will be perpendicular to the inclined edge. 4. Pick an appropriate folding line or reference plane. 5. Transfer measurements from the adjacent view onto the projectors. 6. Join the projected points to get true shape of inclined plane. 7. Transfer rest of the object onto the Auxiliary view if required to do so. Omit hidden lines in Auxiliary views.