Automated Machine Guidance Electronic Files and Design Data

- Slides: 26

Automated Machine Guidance: Electronic Files and Design Data AASHTO Subcommittee on Construction Meeting August 18, 2010 – Burlington, VT Mark Taylor 1

Cross-Sections vs. Surfaces • We traditionally design and build accurately at each cross-section • We now have the capability to design and build accurately everywhere • However, construction can only be as accurate as the survey data and controls • Construction control tolerance is not any more precise than the design 3 D surface model 2

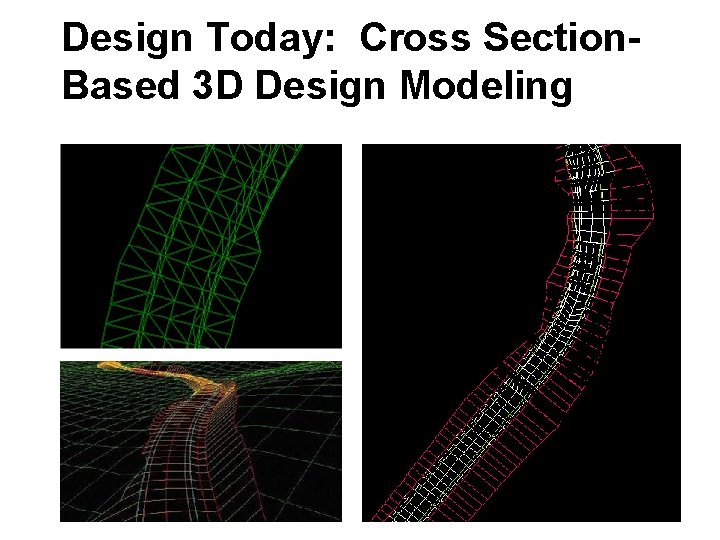
Design Today: Cross Section. Based 3 D Design Modeling 3

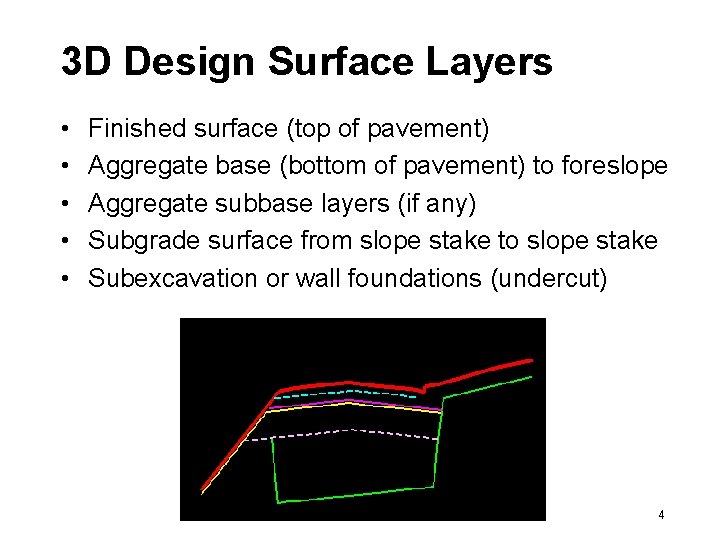
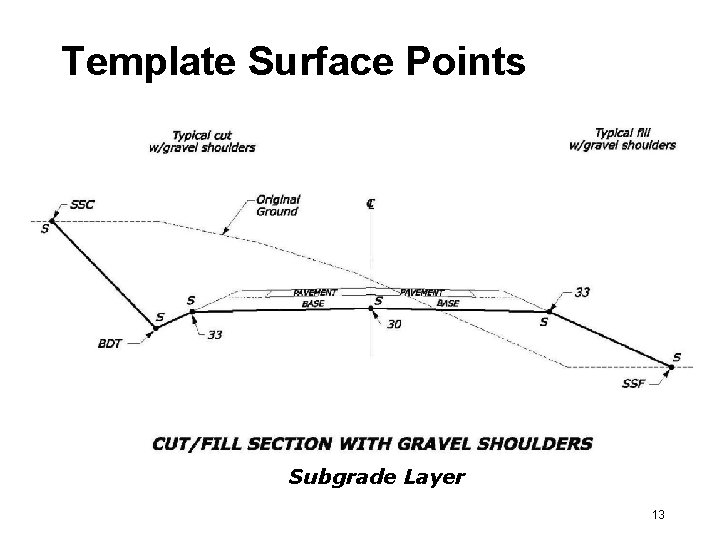
3 D Design Surface Layers • • • Finished surface (top of pavement) Aggregate base (bottom of pavement) to foreslope Aggregate subbase layers (if any) Subgrade surface from slope stake to slope stake Subexcavation or wall foundations (undercut) 4

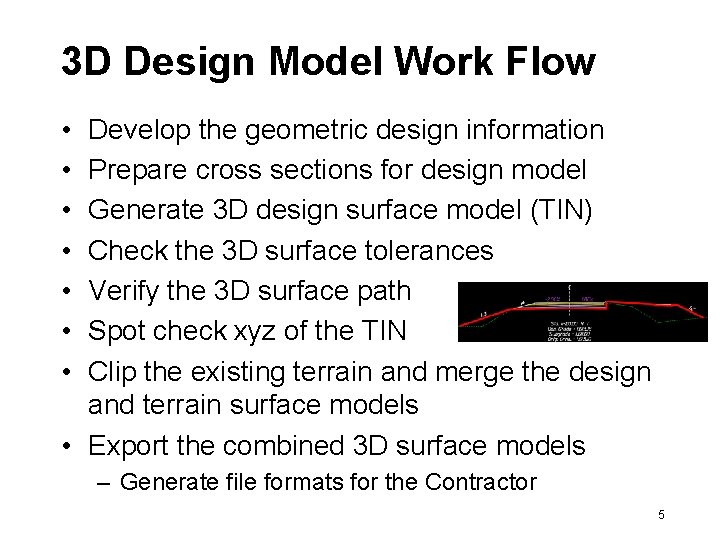
3 D Design Model Work Flow • • Develop the geometric design information Prepare cross sections for design model Generate 3 D design surface model (TIN) Check the 3 D surface tolerances Verify the 3 D surface path Spot check xyz of the TIN Clip the existing terrain and merge the design and terrain surface models • Export the combined 3 D surface models – Generate file formats for the Contractor 5

Electronic File Formats • ASCII (generic software) • Land XML (Topcon software) • Trimble (Trimble Terramodel and Sitevision software) – Trimble. TTM format 6

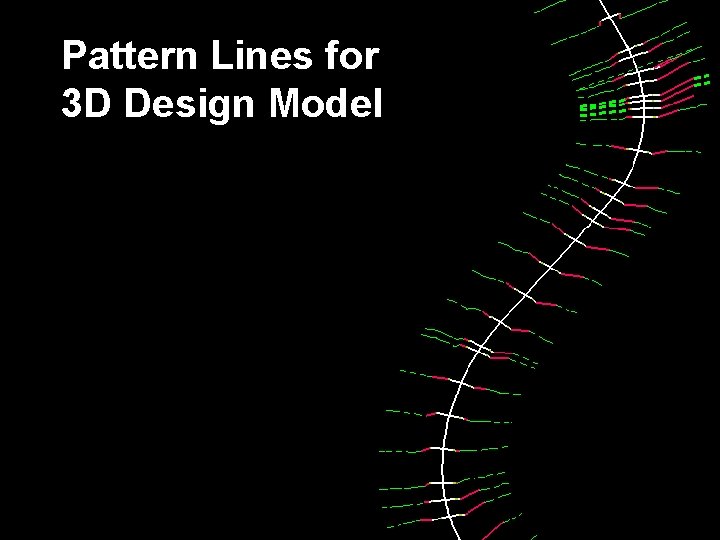
Pattern Lines for 3 D Design Model 7

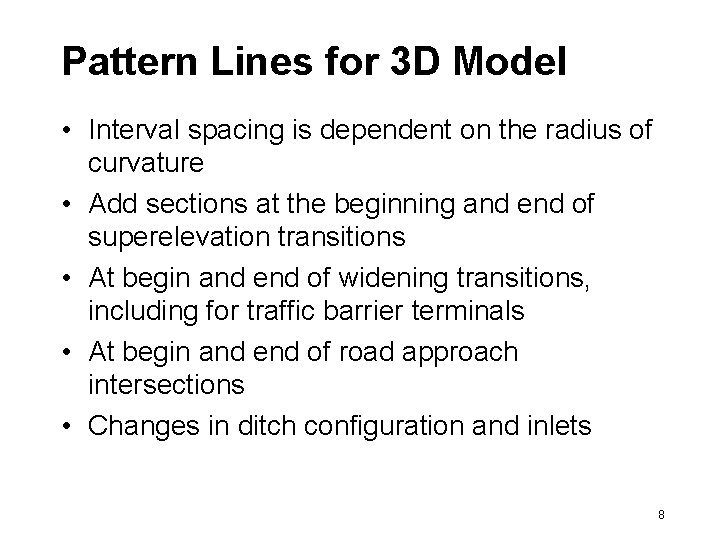
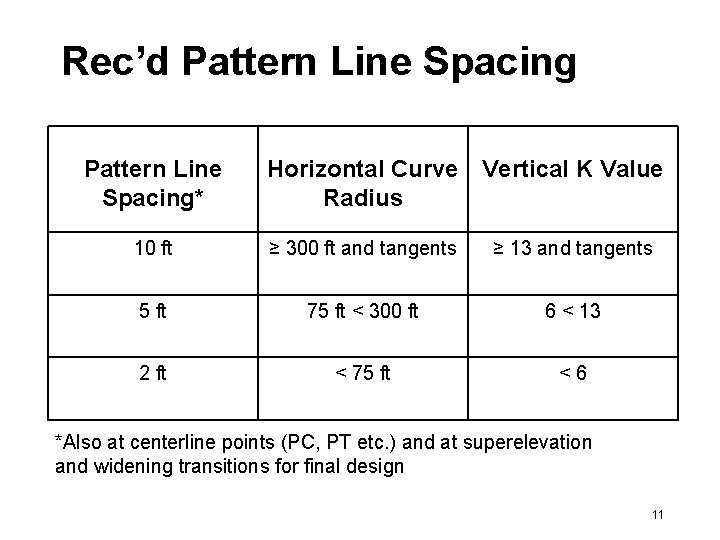
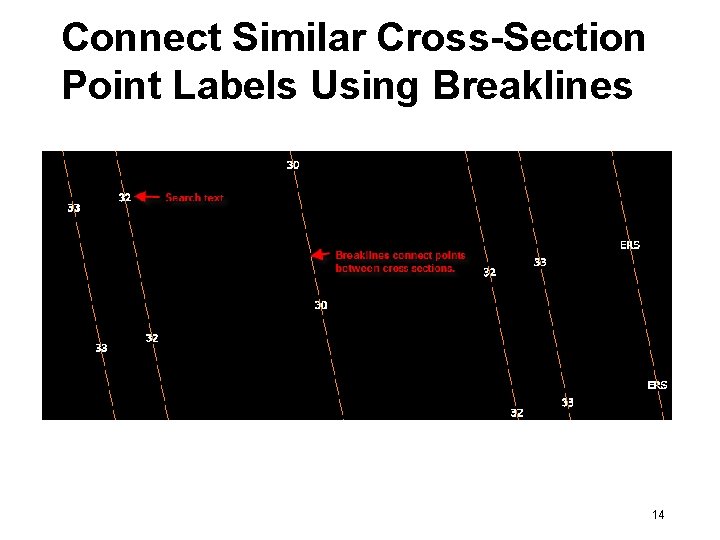
Pattern Lines for 3 D Model • Interval spacing is dependent on the radius of curvature • Add sections at the beginning and end of superelevation transitions • At begin and end of widening transitions, including for traffic barrier terminals • At begin and end of road approach intersections • Changes in ditch configuration and inlets 8

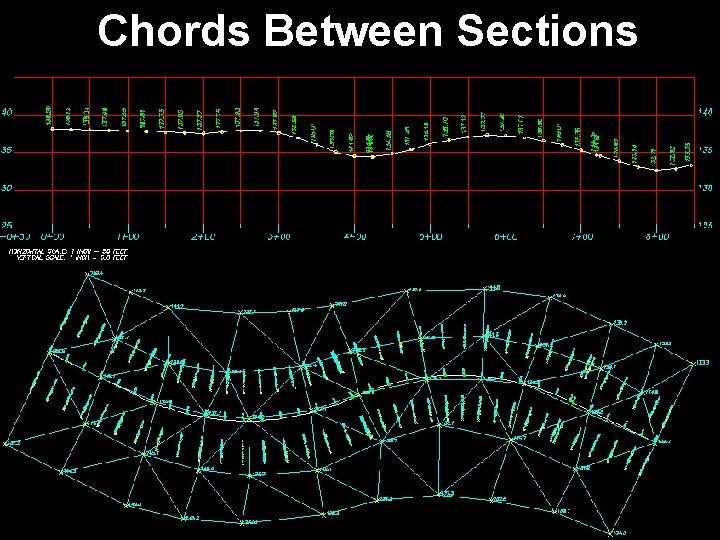
Chords Between Sections 9

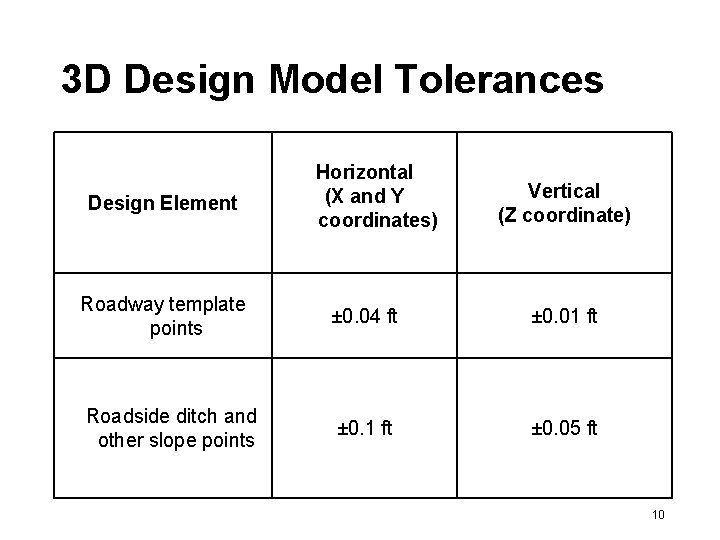
3 D Design Model Tolerances Design Element Horizontal (X and Y coordinates) Vertical (Z coordinate) Roadway template points ± 0. 04 ft ± 0. 01 ft Roadside ditch and other slope points ± 0. 1 ft ± 0. 05 ft 10

Rec’d Pattern Line Spacing* Horizontal Curve Vertical K Value Radius 10 ft ≥ 300 ft and tangents ≥ 13 and tangents 5 ft 75 ft < 300 ft 6 < 13 2 ft < 75 ft <6 *Also at centerline points (PC, PT etc. ) and at superelevation and widening transitions for final design 11

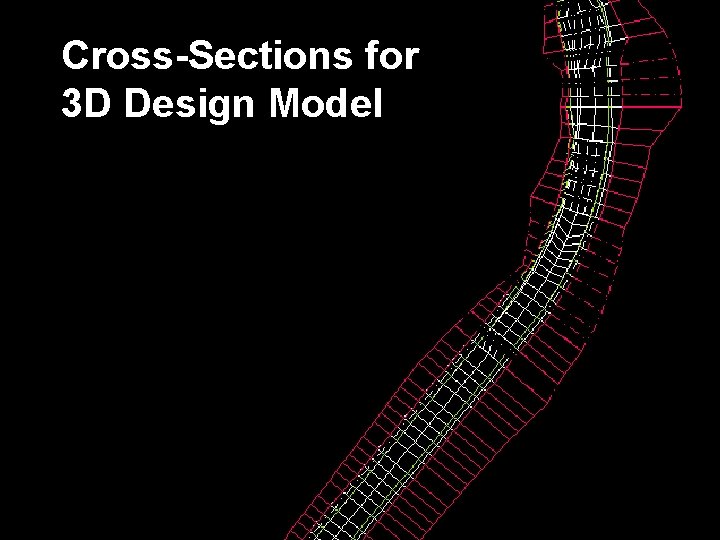
Cross-Sections for 3 D Design Model 12

Template Surface Points Subgrade Layer 13

Connect Similar Cross-Section Point Labels Using Breaklines 14

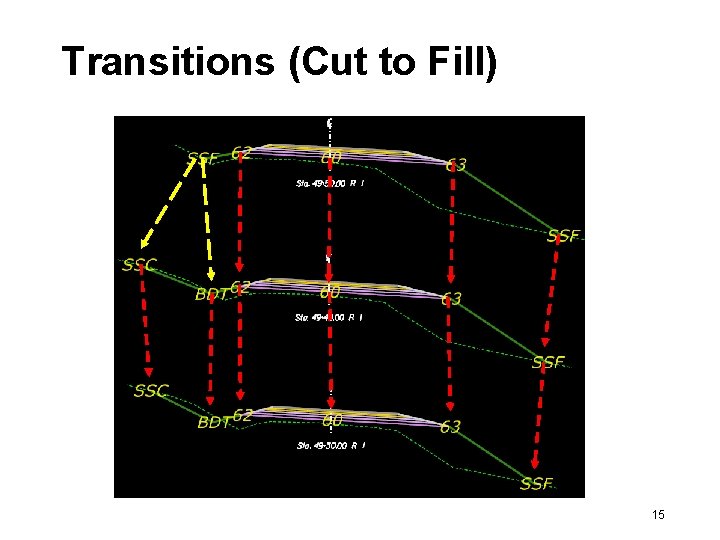
Transitions (Cut to Fill) 15

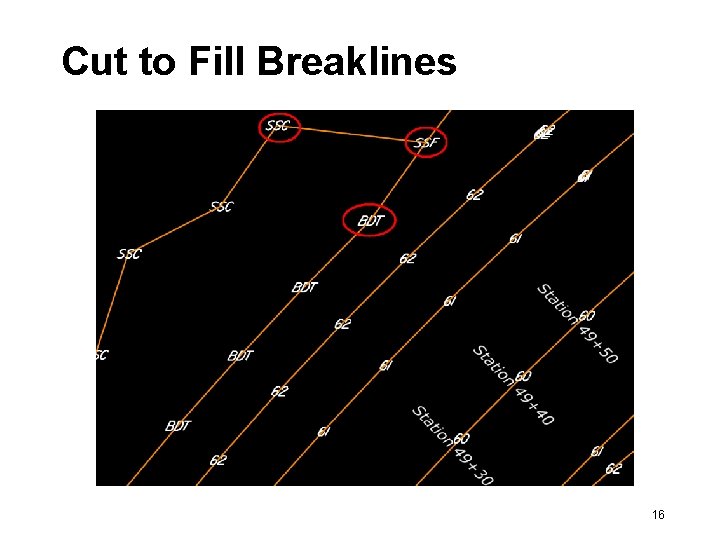
Cut to Fill Breaklines 16

An Ideal World • The Design engineer provides the Contractor a complete 3 D model that fits site conditions • Contractor easily loads 3 D surface model directly into the machine guidance system • The Contractor builds project accurately to the plans, specifications, and tolerances • Any changes or revisions are updated in the 3 D surface model by the project engineer • As-built 3 D surface model is given back to the owner (State DOT) 17

The Real World • Existing ground data does not match to site conditions or with 3 D design surface model • Missing data, information and details about exceptions to the model – Lack of detail at intersections and culvert inlets and outlets requires manual adjustments and warping – Ditch profiles do not match with culvert inlets or site conditions – Special ditch information is shown in the plans profile but is not in the 3 D design surface model • Specifications do not fully address the work 18

Design Changes for 3 D/AMG • Cross section pattern lines at closer intervals (typically 10 -feet instead of 50 -feet) to achieve the required accuracy in the 3 D surface • Proficiency with special applications of the design software to generate the 3 D surface • Time-intensive activities associated with these new applications are: – Hand–editing any cross-sections that cannot be drawn with standard criteria (modify text search) – QC checks of the 3 D surface between pattern lines 19

Changes for 3 D/AMG cont’d • Contract special provisions – How to resolve discrepancies between the electronic data and the contract plans – Responsibility for changes to electronic data • Achieving a common understanding of the concepts and limitations in the design model – Exceptions (what is not modeled) – Degree of accuracy and precision – Discontinuities (linear changes and transitions) 20

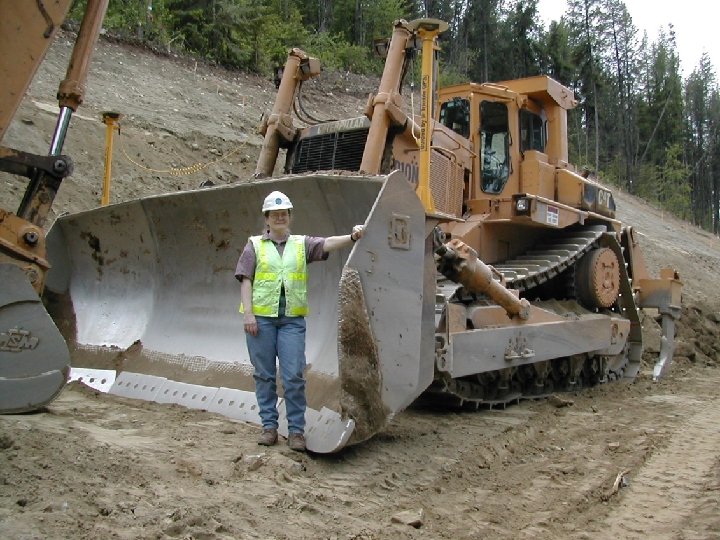
Construction Changes for AMG • Understanding the concepts and limitations of the electronic 3 D design model (exceptions, degree of accuracy) • Understanding the AMG accuracy limitations • Performing the necessary layout, inspection activities with less “wood in the ground” • Using suitable survey equipment and methods for layout, inspection activities, and for independent QA of the Contractor’s AMG methods 21

22

Challenges for 3 D Design • Modeling guidance and training is needed • Standards for the 3 D model deliverables – Design data files that are provided – Electronic data formats • • • Professional liability/Engineer of record Consistency, uniformity, quality control Quantities calculation and documentation QA/QC of 3 D data (DTM, design data files) Field verification and changes to design data Documentation of as-built project features 23

RRR Projects: Challenges for 3 D Design Modeling • Procedures and specifications for using design models derived from resource-grade survey and mapping technologies • Develop end-result, performance based methods and specifications for control, rather than strict line and grade position • Allow flexibility and foster innovation • Expedite production and reduce costs 24

Standards and Procedures • When to develop 3 D design models for AMG? • How to develop the model? – What features to include? – How many layers? – What level of detail? • What format to provide the model for others to use? • How to manage changes to the as-built design model? • How to document and retain electronic records? 25

Caution: Automated Computer Design Plus Machine Guidance 26