Auto CAD 2002 CAD stands for ComputerAided Design


- Slides: 11

Auto. CAD 2002 • CAD stands for Computer-Aided Design. An Auto. CAD drawing is made up of objects. These can be either simple graphic objects (such as lines, arcs, circles, text, etc. ) or blocks (which are groups of objects). • Each object also has certain attributes associated with it, such as line style, text font, or colour.

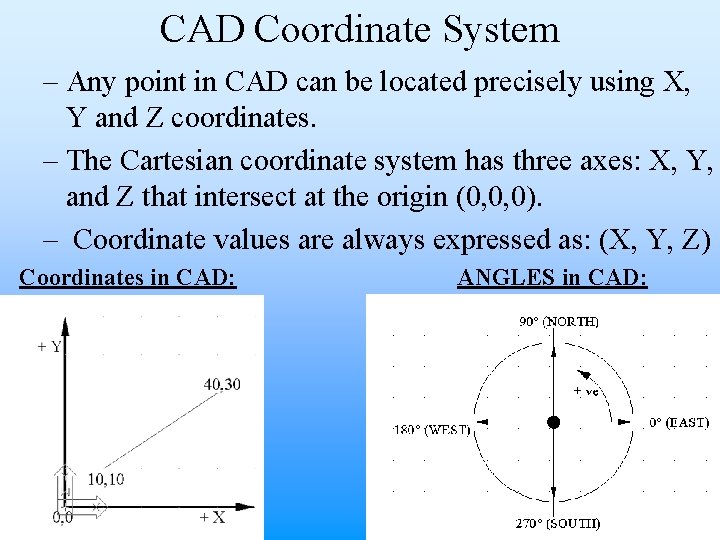
CAD Coordinate System – Any point in CAD can be located precisely using X, Y and Z coordinates. – The Cartesian coordinate system has three axes: X, Y, and Z that intersect at the origin (0, 0, 0). – Coordinate values are always expressed as: (X, Y, Z) Coordinates in CAD: ANGLES in CAD:

Basic CAD Rules – Draw everything FULL SIZE, (i. e. 1: 1) – Setup the Drawing Limits based on the Drawing in Hand. – Plot/ Print to Scale if Necessary.

Setting up CAD 1. Switch from the TODAY Dialogue to the Traditional Startup Dialogue. Ø On opening Auto. CAD, close the Today Dialogue, leaving Auto. CAD open.

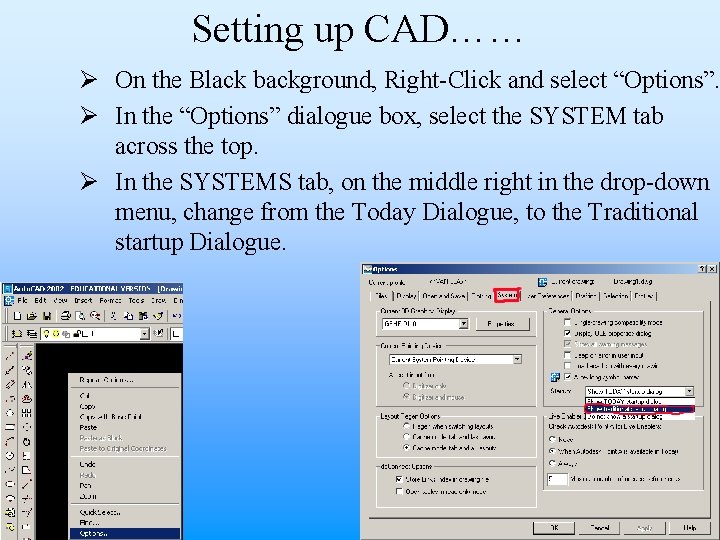
Setting up CAD…… Ø On the Black background, Right-Click and select “Options”. Ø In the “Options” dialogue box, select the SYSTEM tab across the top. Ø In the SYSTEMS tab, on the middle right in the drop-down menu, change from the Today Dialogue, to the Traditional startup Dialogue.

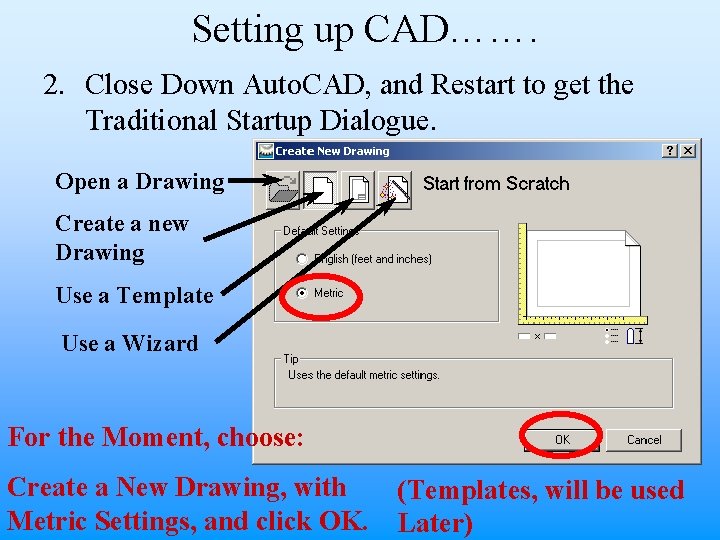
Setting up CAD……. 2. Close Down Auto. CAD, and Restart to get the Traditional Startup Dialogue. Open a Drawing Create a new Drawing Use a Template Use a Wizard For the Moment, choose: Create a New Drawing, with (Templates, will be used Metric Settings, and click OK. Later)

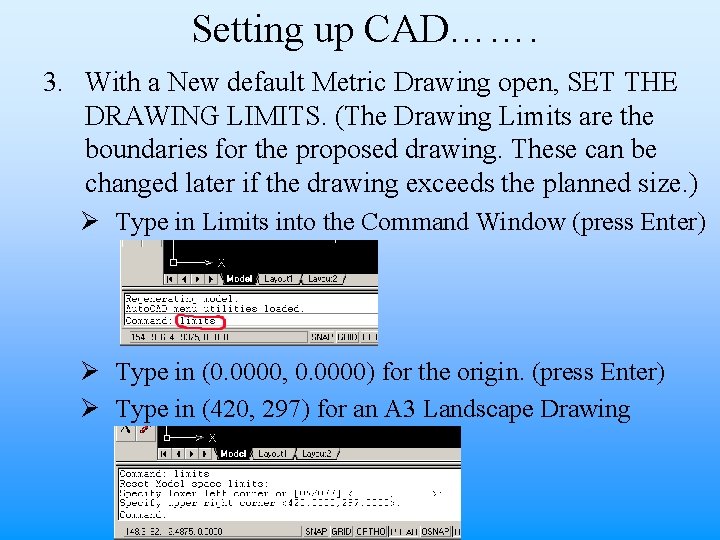
Setting up CAD……. 3. With a New default Metric Drawing open, SET THE DRAWING LIMITS. (The Drawing Limits are the boundaries for the proposed drawing. These can be changed later if the drawing exceeds the planned size. ) Ø Type in Limits into the Command Window (press Enter) Ø Type in (0. 0000, 0. 0000) for the origin. (press Enter) Ø Type in (420, 297) for an A 3 Landscape Drawing

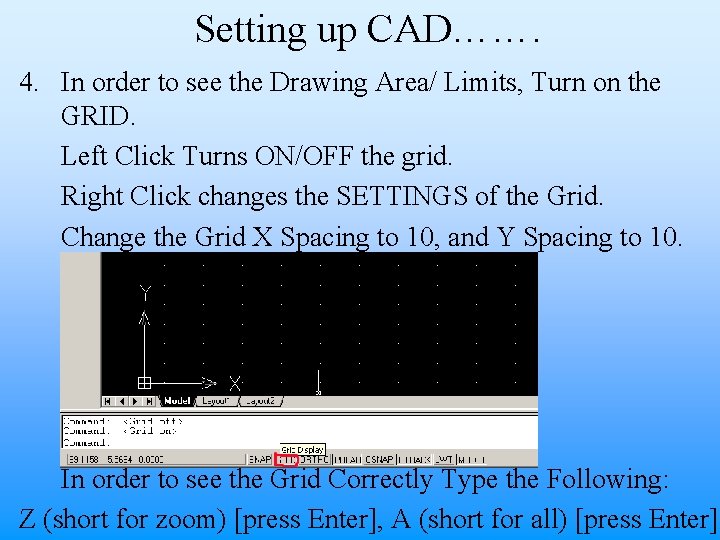
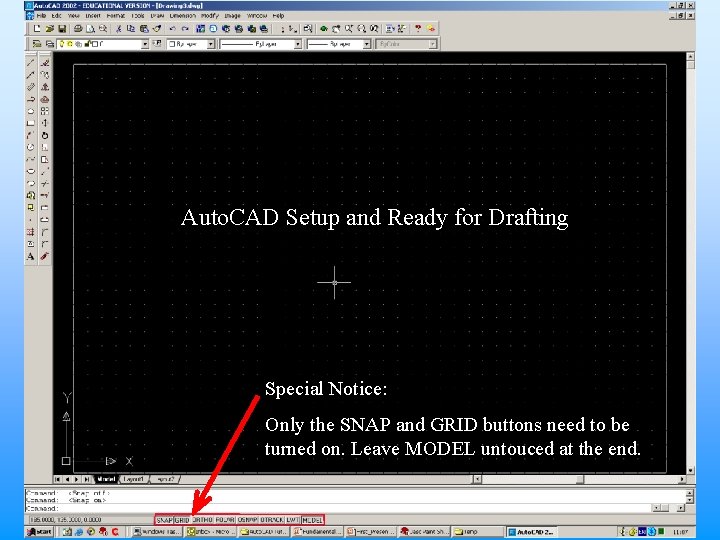
Setting up CAD……. 4. In order to see the Drawing Area/ Limits, Turn on the GRID. Left Click Turns ON/OFF the grid. Right Click changes the SETTINGS of the Grid. Change the Grid X Spacing to 10, and Y Spacing to 10. In order to see the Grid Correctly Type the Following: Z (short for zoom) [press Enter], A (short for all) [press Enter]

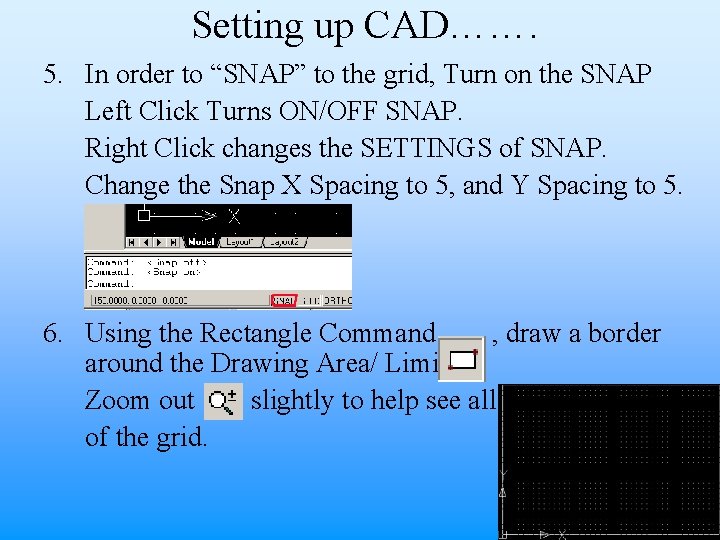
Setting up CAD……. 5. In order to “SNAP” to the grid, Turn on the SNAP Left Click Turns ON/OFF SNAP. Right Click changes the SETTINGS of SNAP. Change the Snap X Spacing to 5, and Y Spacing to 5. 6. Using the Rectangle Command , draw a border around the Drawing Area/ Limits. Zoom out slightly to help see all of the grid.

Auto. CAD Setup and Ready for Drafting Special Notice: Only the SNAP and GRID buttons need to be turned on. Leave MODEL untouced at the end.

ASSIGNMENTS • Attempt Exercises 1 a, 1 b, 1 c, and Assignment 3 (Toaster).