Assessment Drawing Standards Technical Drawings Requ Flra Hajdu
- Slides: 36

Assessment, Drawing Standards, Technical Drawings Requ Flóra Hajdu B 406 hajdfl@sze. hu

Content • • Assesment of course Engineering drawing Drawing standards Technical drawing format requirements 2020. 11. 24. Hajdu Flóra

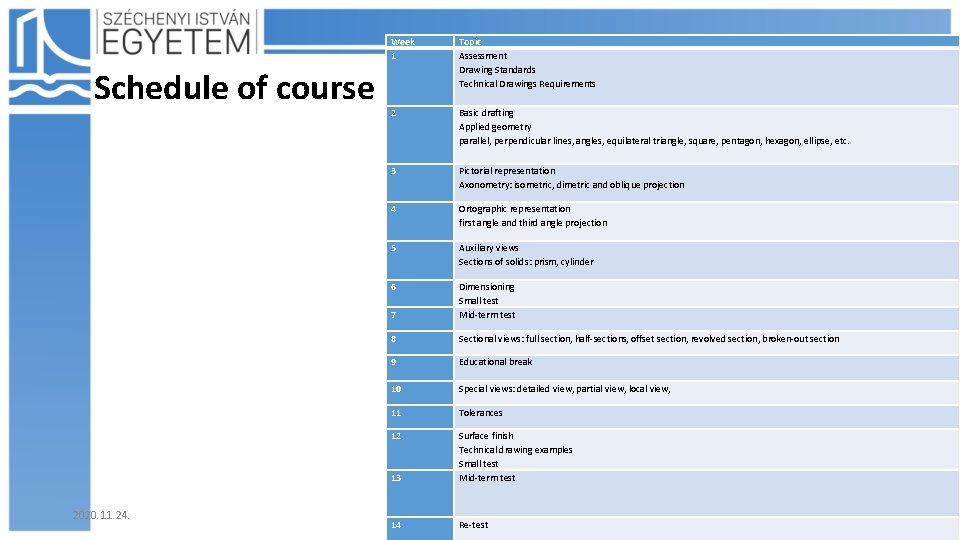
Schedule of course Week 1 Topic Assessment Drawing Standards Technical Drawings Requirements 2 Basic drafting Applied geometry parallel, perpendicular lines, angles, equilateral triangle, square, pentagon, hexagon, ellipse, etc. 3 Pictorial representation Axonometry: isometric, dimetric and oblique projection 4 Ortographic representation first angle and third angle projection 5 Auxiliary views Sections of solids: prism, cylinder 6 7 Dimensioning Small test Mid-term test 8 Sectional views: full section, half-sections, offset section, revolved section, broken-out section 9 Educational break 10 Special views: detailed view, partial view, local view, 11 Tolerances 12 Surface finish Technical drawing examples Small test Mid-term test 13 2020. 11. 24. 14 Hajdu Flóra Re-test

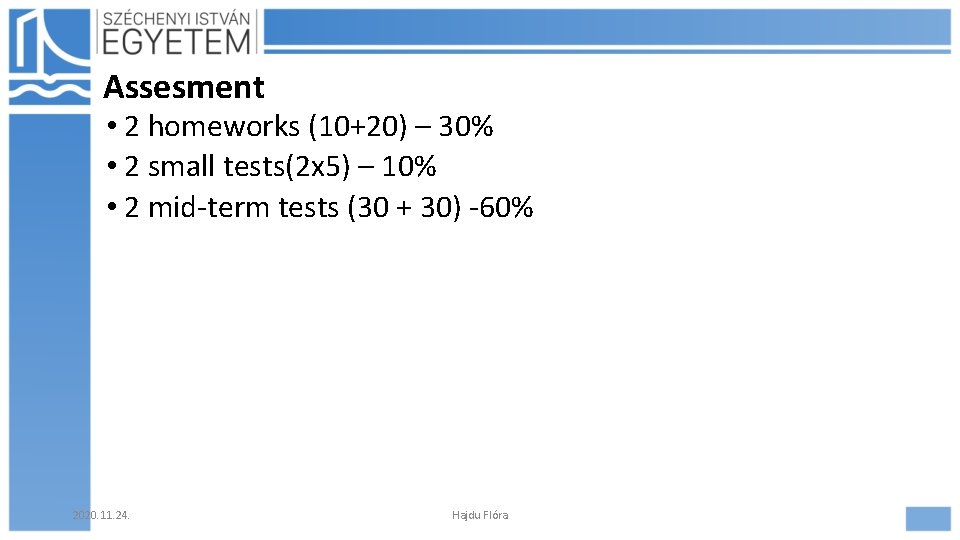
Assesment • 2 homeworks (10+20) – 30% • 2 small tests(2 x 5) – 10% • 2 mid-term tests (30 + 30) -60% 2020. 11. 24. Hajdu Flóra

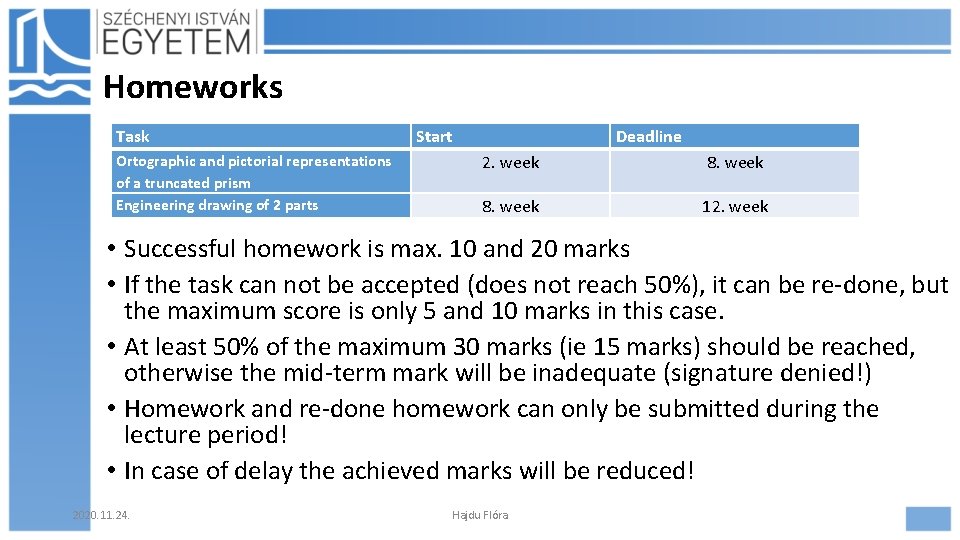
Homeworks Task Ortographic and pictorial representations of a truncated prism Engineering drawing of 2 parts Start Deadline 2. week 8. week 12. week • Successful homework is max. 10 and 20 marks • If the task can not be accepted (does not reach 50%), it can be re-done, but the maximum score is only 5 and 10 marks in this case. • At least 50% of the maximum 30 marks (ie 15 marks) should be reached, otherwise the mid-term mark will be inadequate (signature denied!) • Homework and re-done homework can only be submitted during the lecture period! • In case of delay the achieved marks will be reduced! 2020. 11. 24. Hajdu Flóra

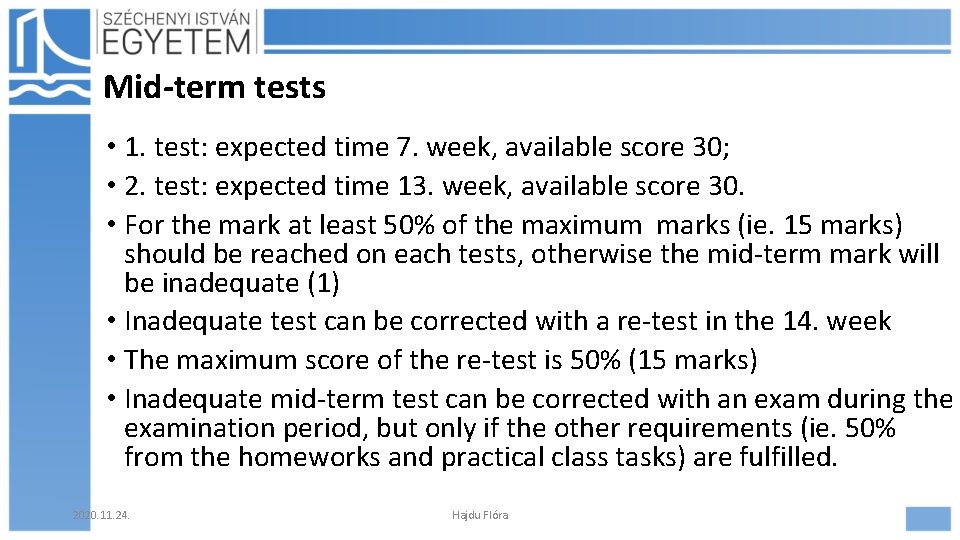
Mid-term tests • 1. test: expected time 7. week, available score 30; • 2. test: expected time 13. week, available score 30. • For the mark at least 50% of the maximum marks (ie. 15 marks) should be reached on each tests, otherwise the mid-term mark will be inadequate (1) • Inadequate test can be corrected with a re-test in the 14. week • The maximum score of the re-test is 50% (15 marks) • Inadequate mid-term test can be corrected with an exam during the examination period, but only if the other requirements (ie. 50% from the homeworks and practical class tasks) are fulfilled. 2020. 11. 24. Hajdu Flóra

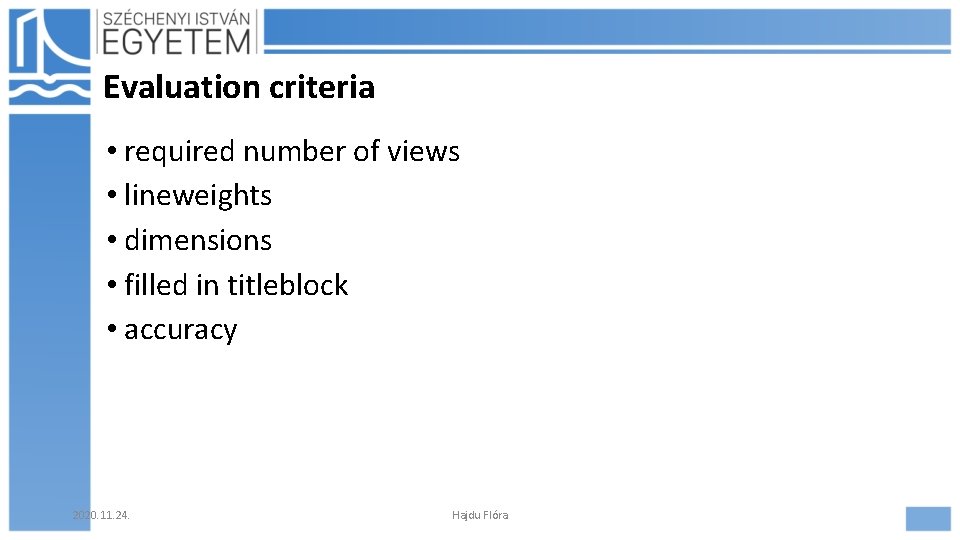
Evaluation criteria • required number of views • lineweights • dimensions • filled in titleblock • accuracy 2020. 11. 24. Hajdu Flóra

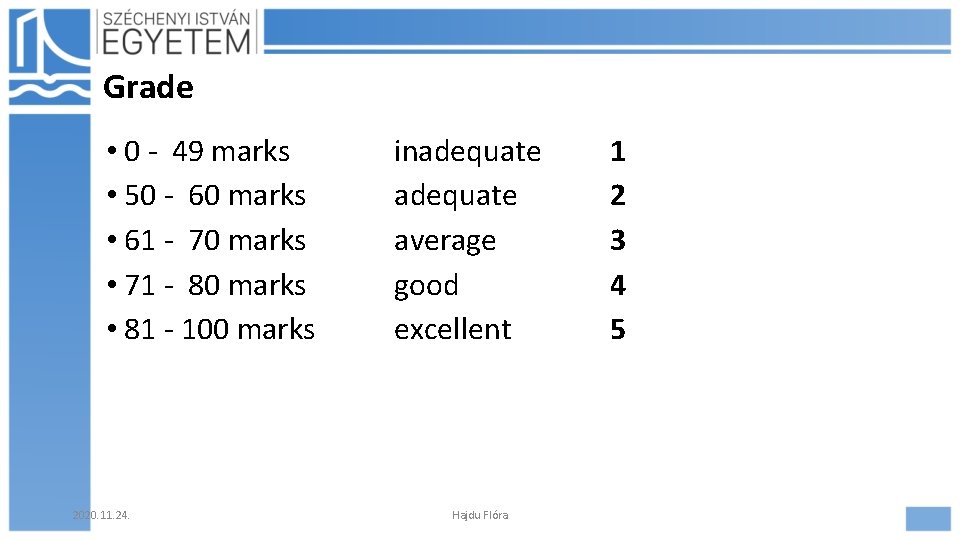
Grade • 0 - 49 marks • 50 - 60 marks • 61 - 70 marks • 71 - 80 marks • 81 - 100 marks 2020. 11. 24. inadequate average good excellent Hajdu Flóra 1 2 3 4 5

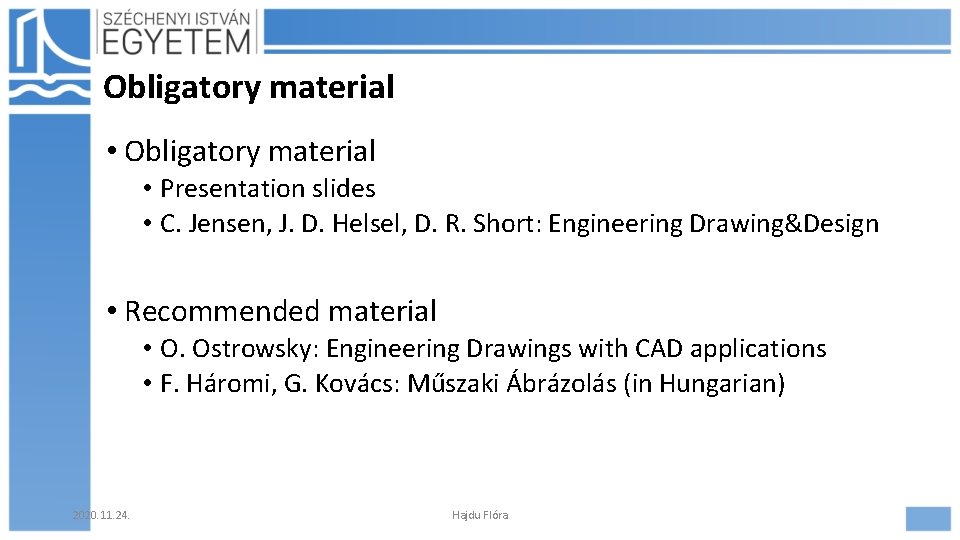
Obligatory material • Presentation slides • C. Jensen, J. D. Helsel, D. R. Short: Engineering Drawing&Design • Recommended material • O. Ostrowsky: Engineering Drawings with CAD applications • F. Háromi, G. Kovács: Műszaki Ábrázolás (in Hungarian) 2020. 11. 24. Hajdu Flóra

Homepages • rs 1. sze. hu/~hajdfl • rs 1. sze. hu/~kgaborne 2020. 11. 24. Hajdu Flóra

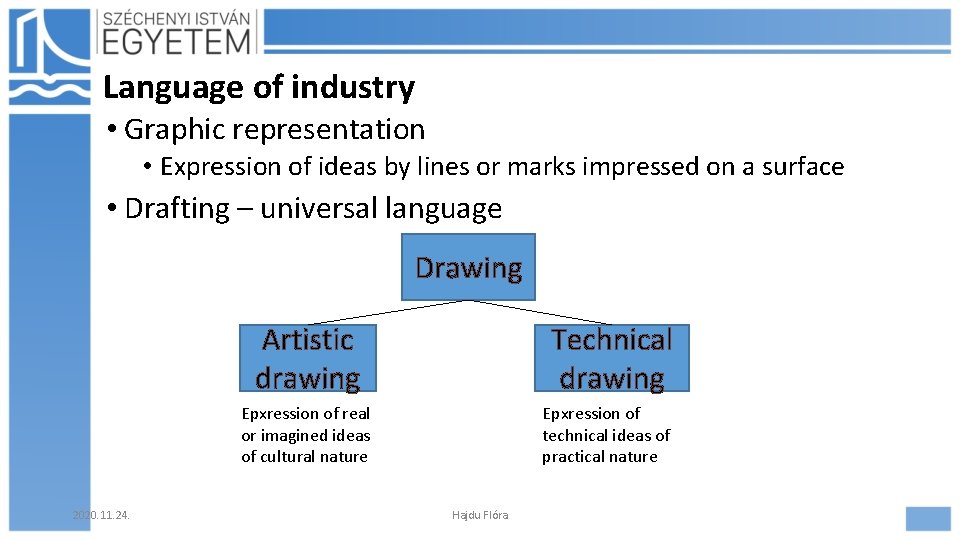
Language of industry • Graphic representation • Expression of ideas by lines or marks impressed on a surface • Drafting – universal language Drawing Artistic drawing Technical drawing Epxression of real or imagined ideas of cultural nature 2020. 11. 24. Epxression of technical ideas of practical nature Hajdu Flóra

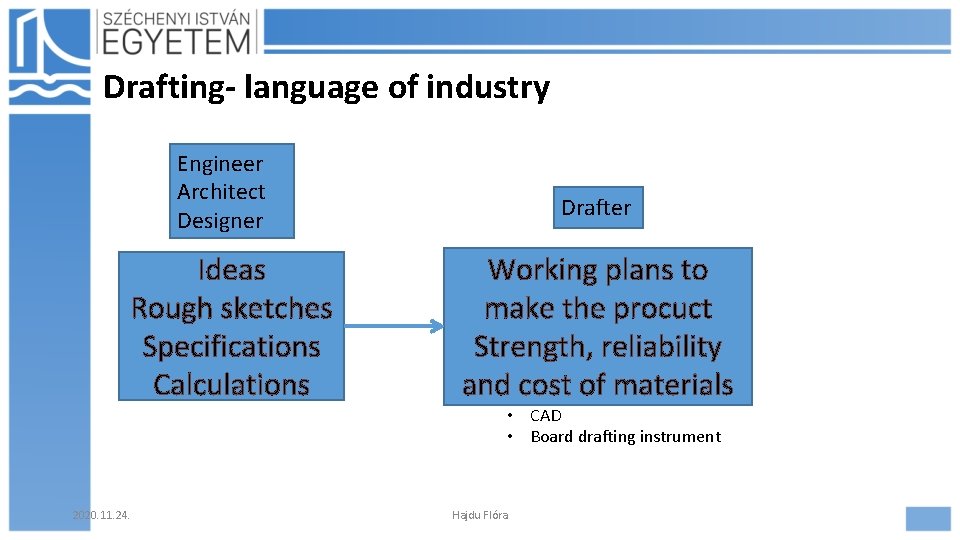
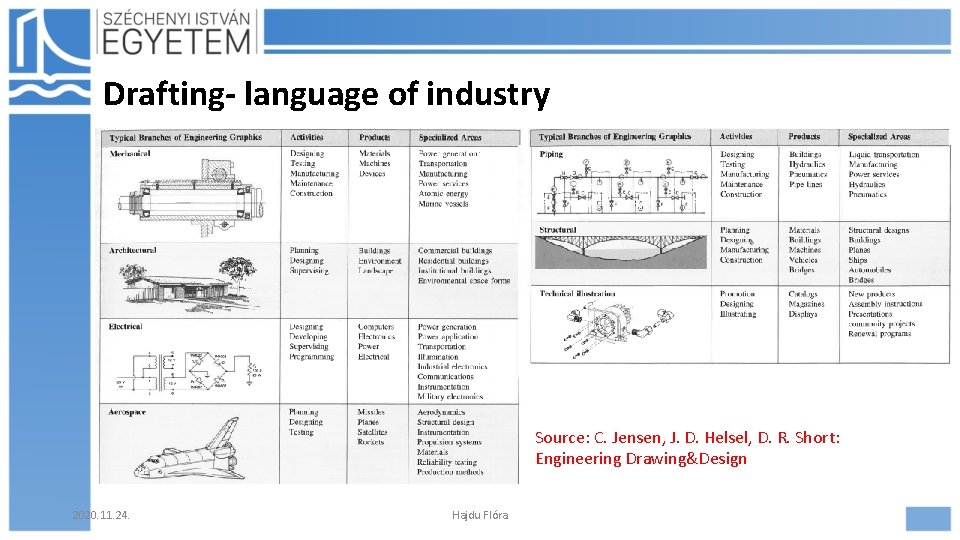
Drafting- language of industry Engineer Architect Designer Ideas Rough sketches Specifications Calculations Drafter Working plans to make the procuct Strength, reliability and cost of materials • CAD • Board drafting instrument 2020. 11. 24. Hajdu Flóra

Drafting- language of industry • Scan könyv Source: C. Jensen, J. D. Helsel, D. R. Short: Engineering Drawing&Design 2020. 11. 24. Hajdu Flóra

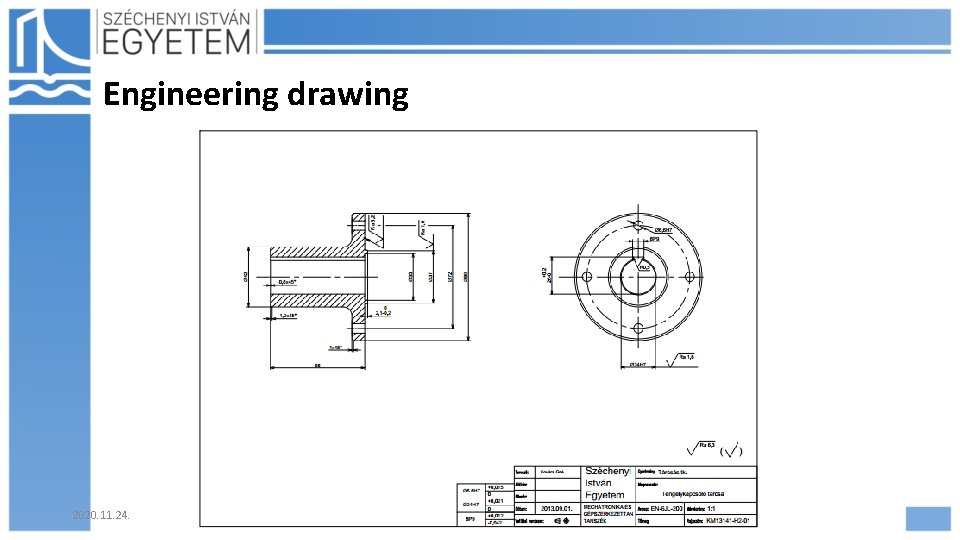
Engineering drawing • International language of engineering • System of communication in which ideas are expressed exactly • Information is conveyed completely and unambiguosly • Even the most complicated shapes are specially described 2020. 11. 24. Hajdu Flóra

Engineering drawing 2 D visual representationss of 3 D objects. Used as universal means of communication in industry They must be clear, concise and accurate They should convey, when required • Information about the shapes, sizes and position of components • Material requirements • Instruction about the method of manufacture All information must be complete and specified once only 2020. 11. 24. Hajdu Flóra

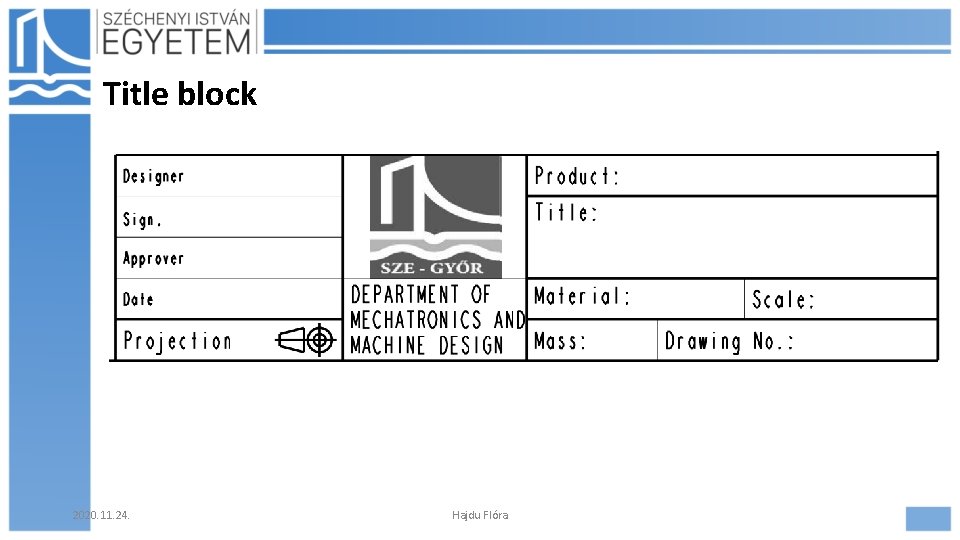
Engineering drawing In general a formal engineering drawing consists of 3 main parts • One or more views of an engineering component (object) or an assembly of components • Dimensions, symbols, explanatory and instruction notes • Title block 2020. 11. 24. Hajdu Flóra

Engineering drawing 2020. 11. 24. Hajdu Flóra

Drawing standards • Many conventions, terms, abbreviatons and practices have come into common use • Essential that different drafters use the same practices – communicating technical theories and ideas • 1946: International Organization of Standardization (ISO) • ISO TCIO: develop a universally accepted set of drawing standards • American Society of Mechanical Engineers (ASME): establishes the standards for the US through its ASME Y 14. 5 comittee (ANSI) • European Committee for Standardization- CEN • Hungary: Hungarian Standards Institution (Magyar Szabványügyi Testület - MSZT) 2020. 11. 24. Hajdu Flóra

Technical drawing formal requirements • Standard drawing sizes • Drawing format • Line types • Lettering • Scale 2020. 11. 24. Hajdu Flóra

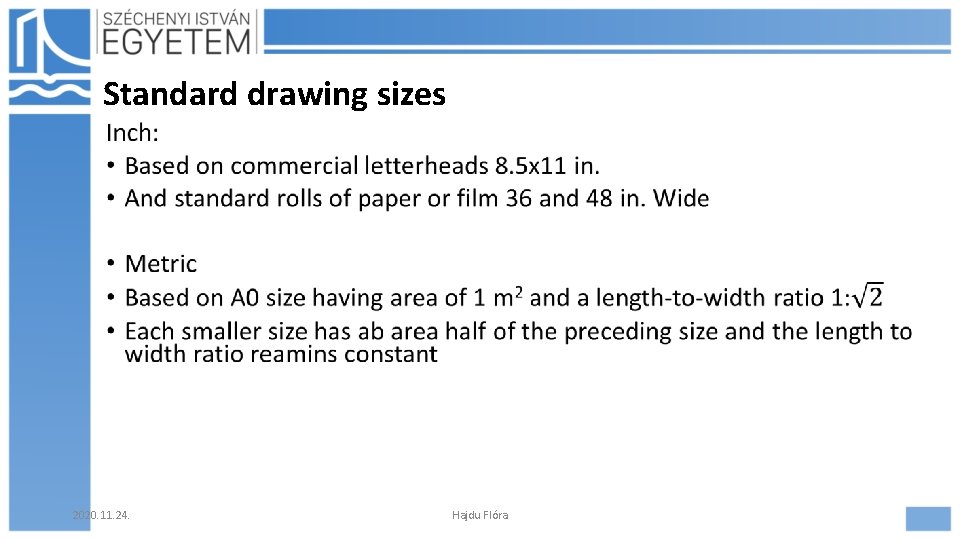
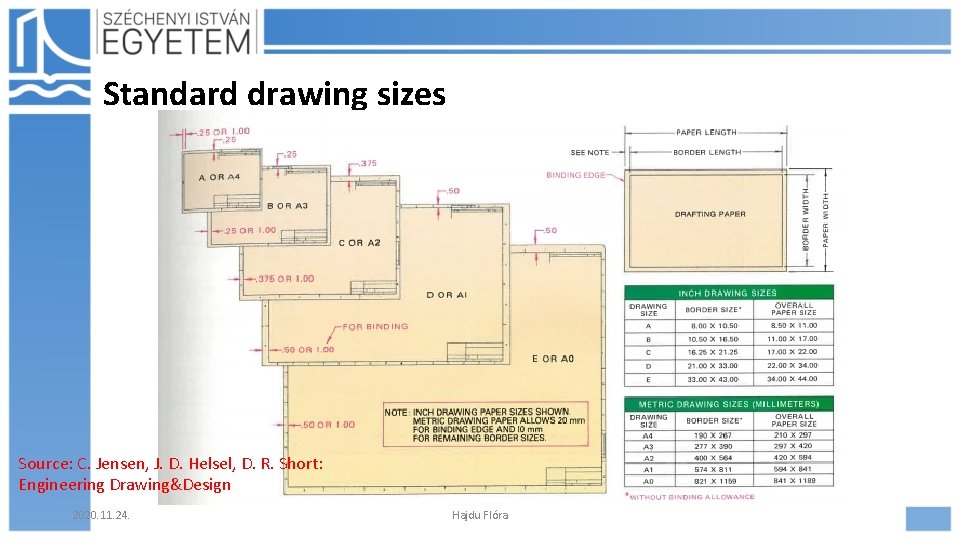
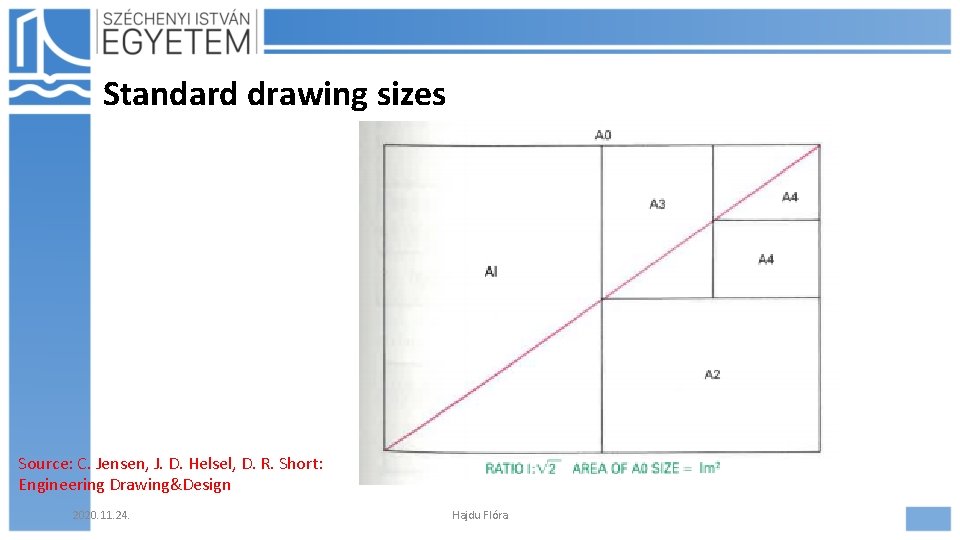
Standard drawing sizes 2020. 11. 24. Hajdu Flóra

Standard drawing sizes Source: C. Jensen, J. D. Helsel, D. R. Short: Engineering Drawing&Design 2020. 11. 24. Hajdu Flóra

Standard drawing sizes Source: C. Jensen, J. D. Helsel, D. R. Short: Engineering Drawing&Design 2020. 11. 24. Hajdu Flóra

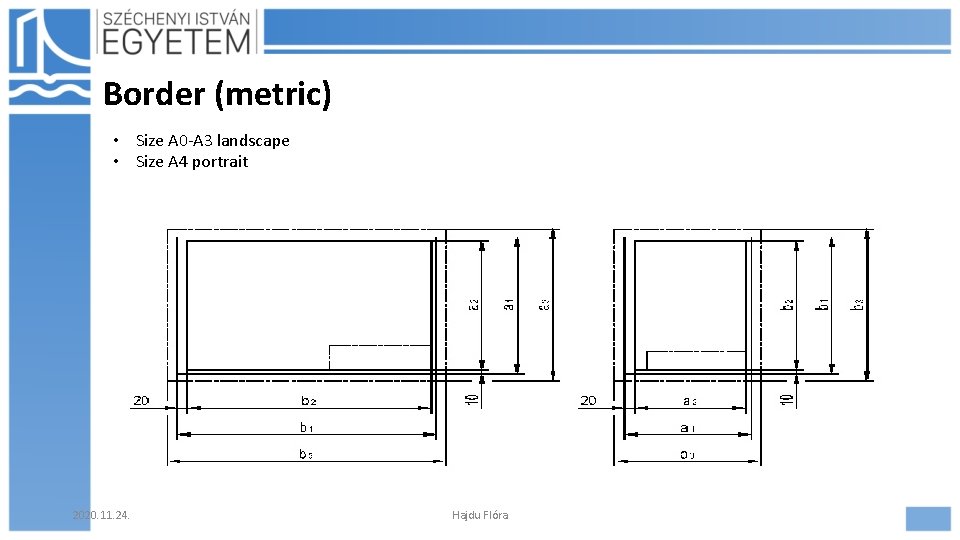
Border (metric) • Size A 0 -A 3 landscape • Size A 4 portrait 2020. 11. 24. Hajdu Flóra

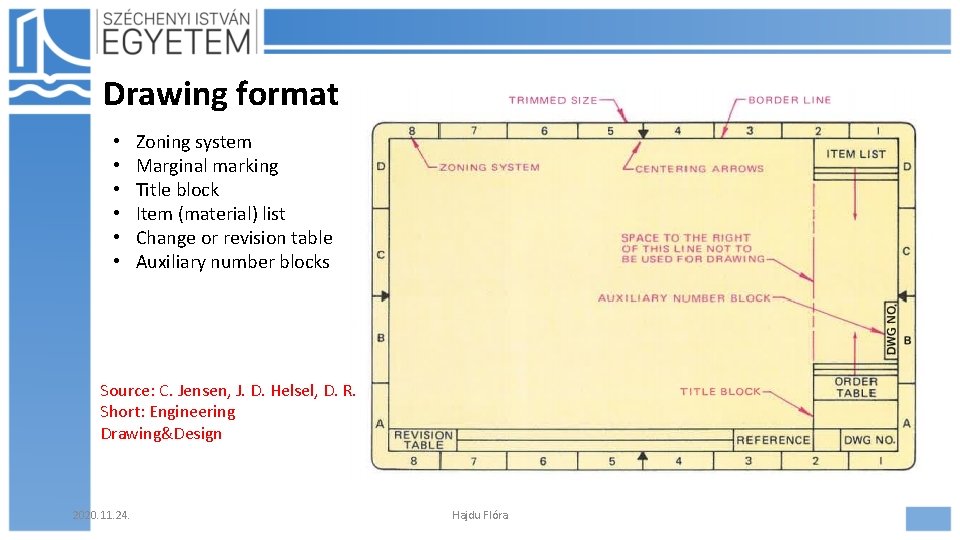
Drawing format • • • Zoning system Marginal marking Title block Item (material) list Change or revision table Auxiliary number blocks Source: C. Jensen, J. D. Helsel, D. R. Short: Engineering Drawing&Design 2020. 11. 24. Hajdu Flóra

Title block 2020. 11. 24. Hajdu Flóra

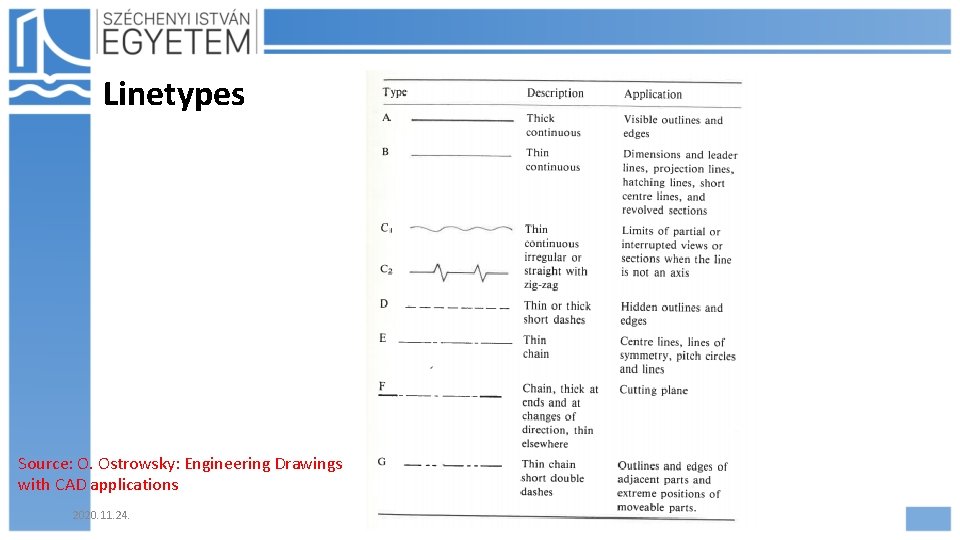
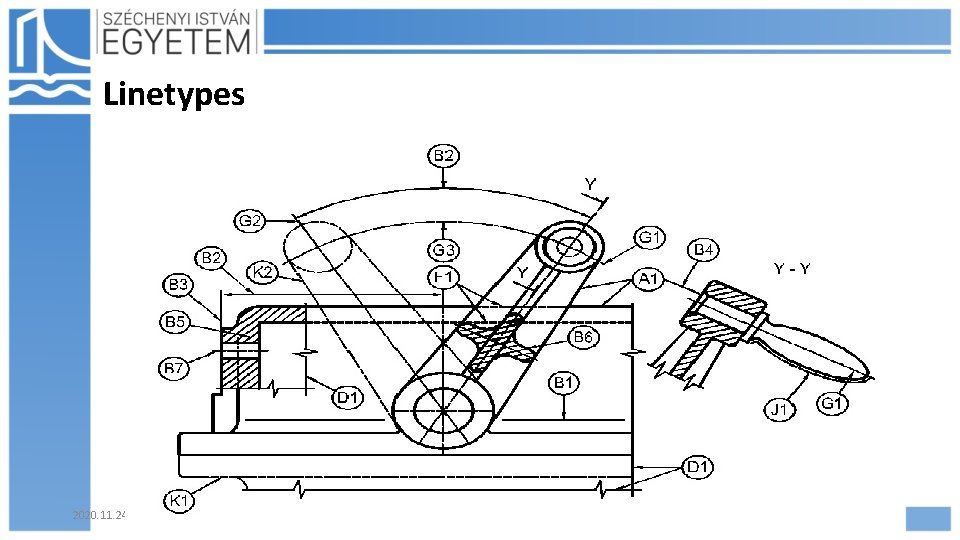
Linetypes Source: O. Ostrowsky: Engineering Drawings with CAD applications 2020. 11. 24. Hajdu Flóra

Linetypes scan 2020. 11. 24. Hajdu Flóra

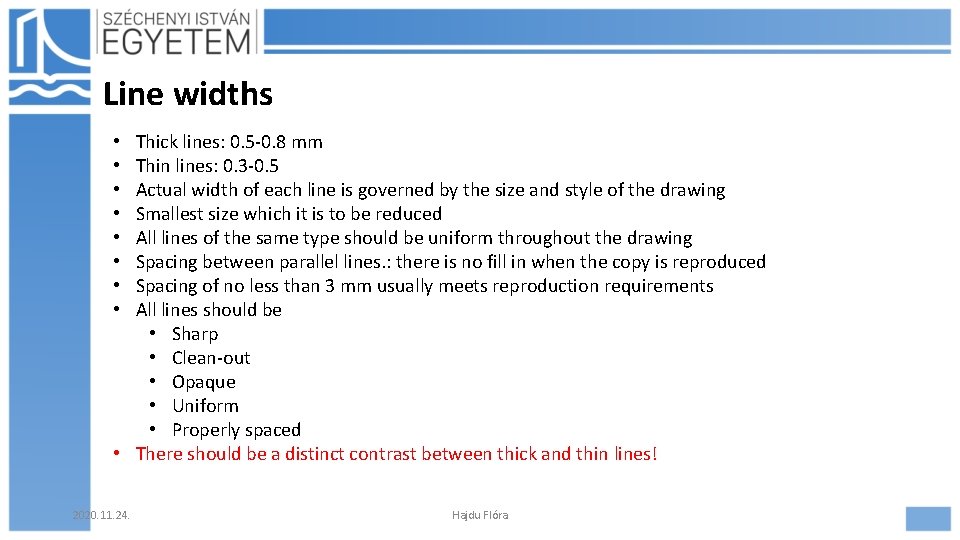
Line widths Thick lines: 0. 5 -0. 8 mm Thin lines: 0. 3 -0. 5 Actual width of each line is governed by the size and style of the drawing Smallest size which it is to be reduced All lines of the same type should be uniform throughout the drawing Spacing between parallel lines. : there is no fill in when the copy is reproduced Spacing of no less than 3 mm usually meets reproduction requirements All lines should be • Sharp • Clean-out • Opaque • Uniform • Properly spaced • There should be a distinct contrast between thick and thin lines! • • 2020. 11. 24. Hajdu Flóra

Lettering • Requirements • Legibility • Reproducibility • Ease of execution • Avoid faults • Unnecessairily fine detail • Poor spacing of details • Carelessly drawn figures and letters • Inconsístent delineation • Incomplete erasures that leave ghost images 2020. 11. 24. Hajdu Flóra

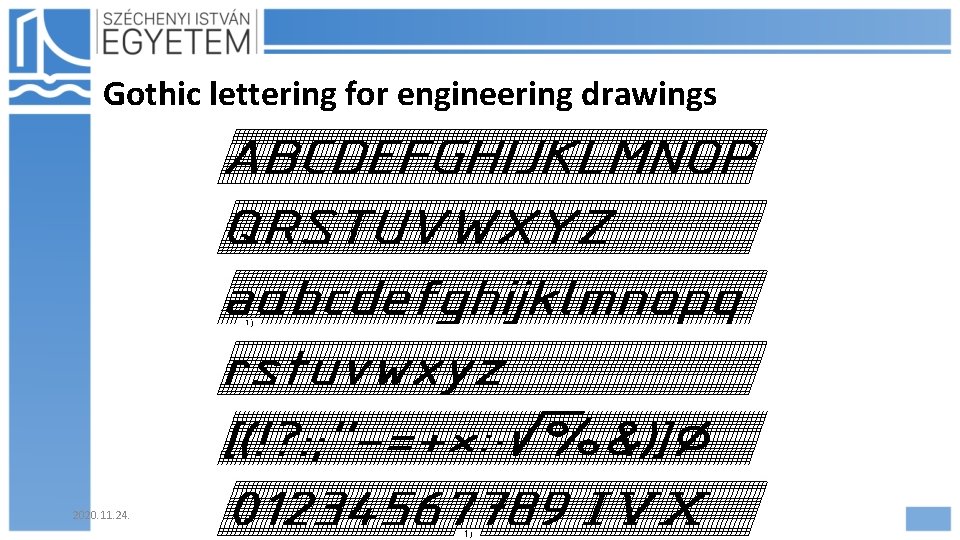
Gothic lettering for engineering drawings 2020. 11. 24. Hajdu Flóra

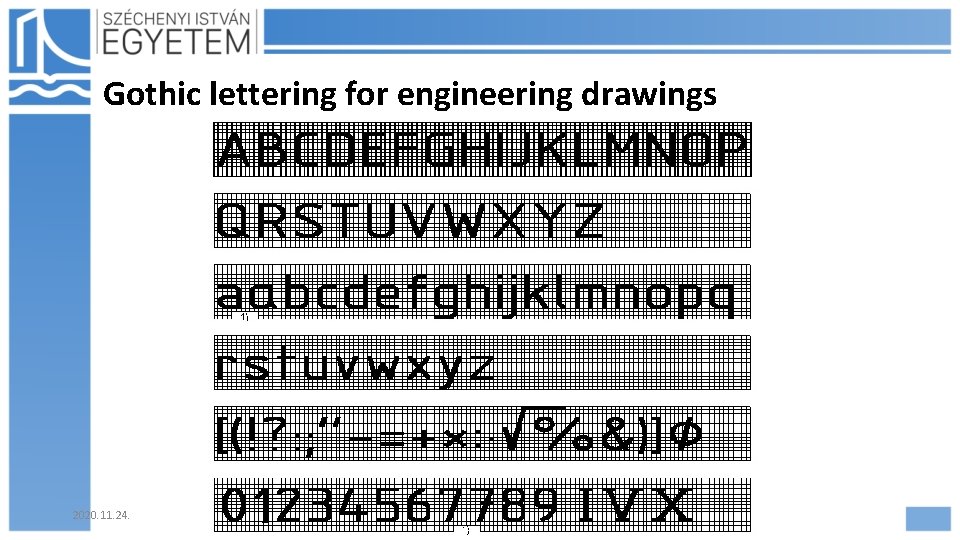
Gothic lettering for engineering drawings 2020. 11. 24. Hajdu Flóra

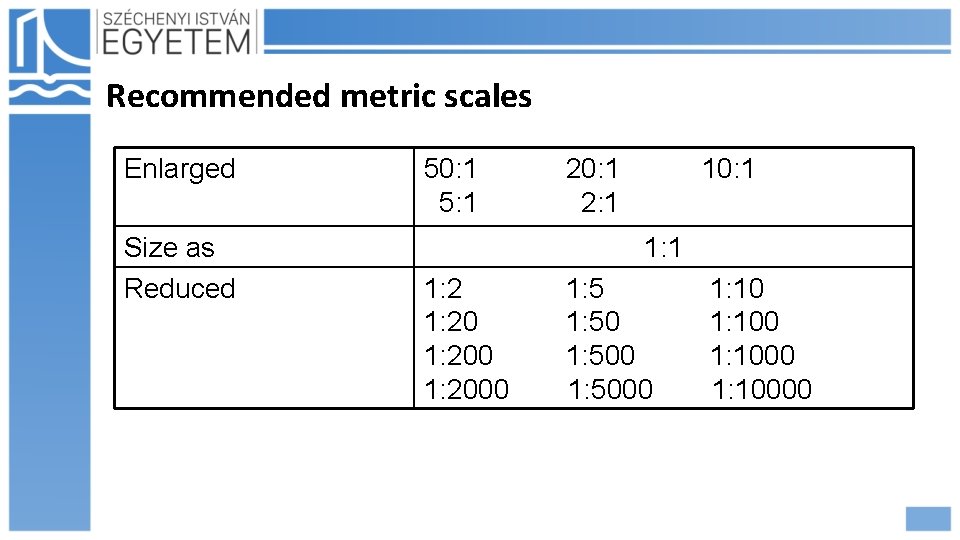
Scale • Scale may refer to the measuring instument or the size to which a dawing is to be made • It is important to draw accurately to scale! • The scale to which the drawing is made must be given in the title block • Scale 1: 1 – full scale: object it drawn at its actual size • Reduced scale: 1: 2 • Enlarged scale: 5: 1 2020. 11. 24. Hajdu Flóra

Recommended metric scales Enlarged Size as Reduced 50: 1 5: 1 20: 1 2: 1 10: 1 1: 200 1: 2000 1: 5000 1: 10000

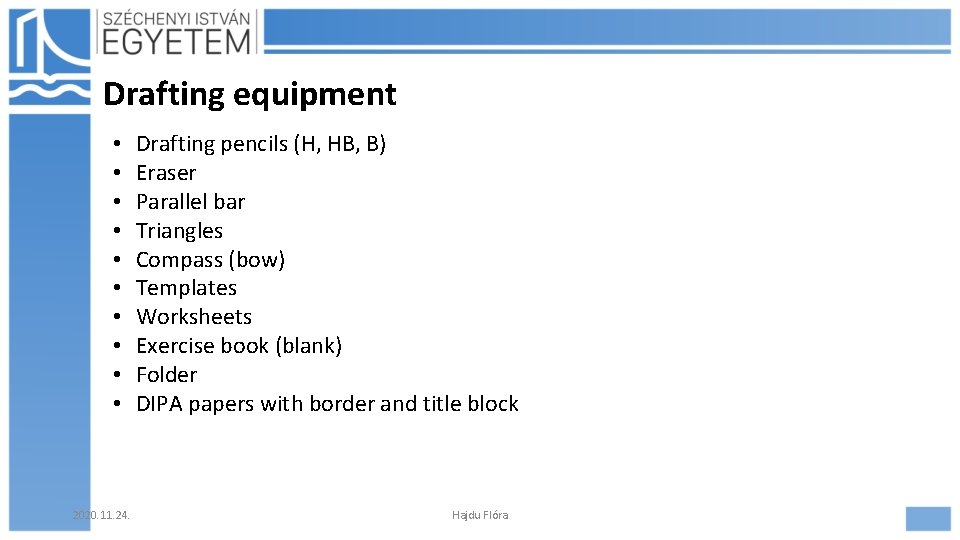
Drafting equipment • • • 2020. 11. 24. Drafting pencils (H, HB, B) Eraser Parallel bar Triangles Compass (bow) Templates Worksheets Exercise book (blank) Folder DIPA papers with border and title block Hajdu Flóra

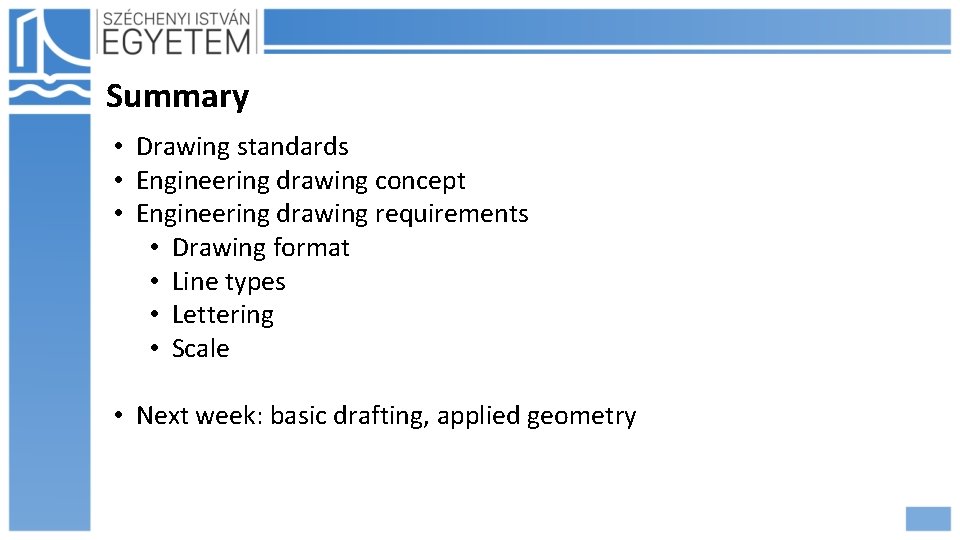
Summary • Drawing standards • Engineering drawing concept • Engineering drawing requirements • Drawing format • Line types • Lettering • Scale • Next week: basic drafting, applied geometry

Thank You for Your attention!