ASL 201 AFVsGUNS IN ADVANCED SQUAD LEADER Session












- Slides: 83

ASL 201: AFVs/GUNS IN ADVANCED SQUAD LEADER Session 1: To Hit / To Kill – AFV/Guns with Russ Gifford

ASL 201: AFV Combat Goals for This Session This session, we will learn • how ‘To Hit’ and how ‘To Kill’ AFVs!

ASL 201: AFV Combat Goals for This Session This session, we will learn: • Motion status • Armored Facing • HIP • LAWs • Crew Survival

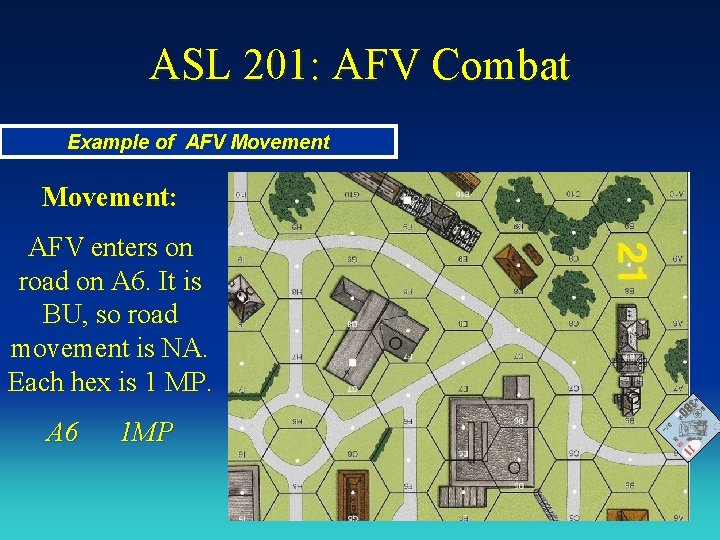
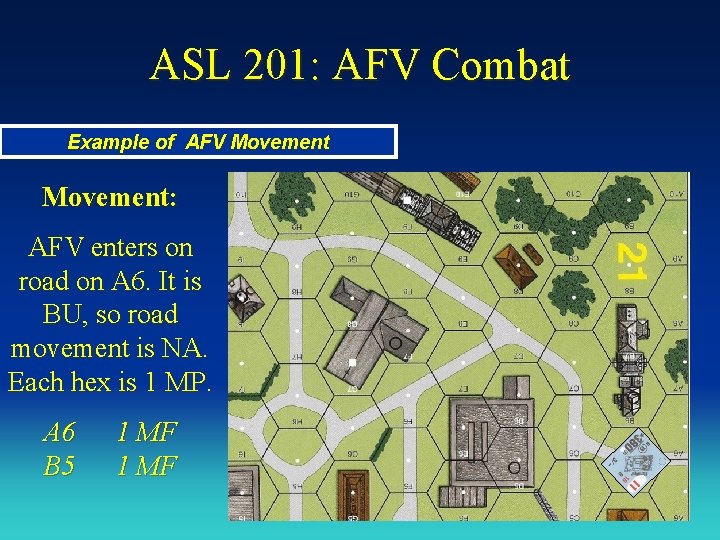
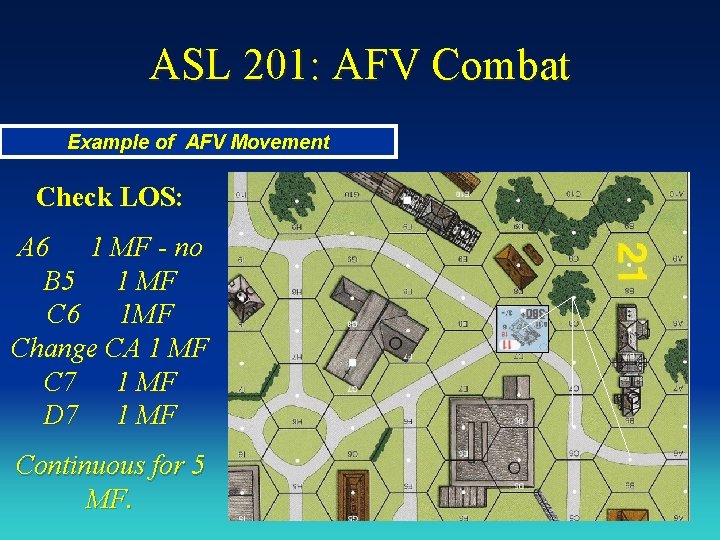
ASL 201: AFV Combat Example of AFV Movement: AFV enters on road on A 6. It is BU, so road movement is NA. Each hex is 1 MP. A 6 1 MP

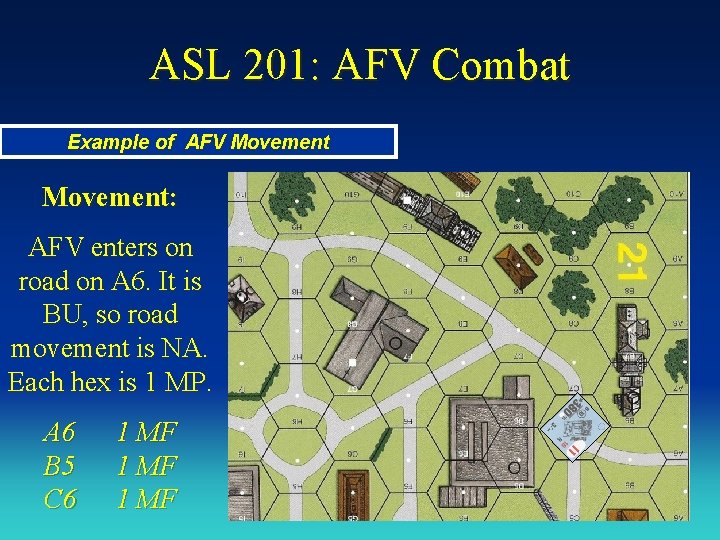
ASL 201: AFV Combat Example of AFV Movement: AFV enters on road on A 6. It is BU, so road movement is NA. Each hex is 1 MP. A 6 B 5 1 MF

ASL 201: AFV Combat Example of AFV Movement: AFV enters on road on A 6. It is BU, so road movement is NA. Each hex is 1 MP. A 6 B 5 C 6 1 MF

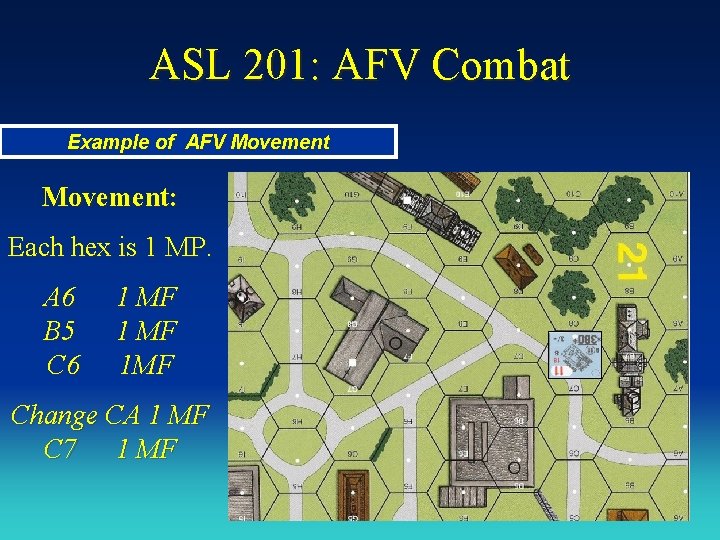
ASL 201: AFV Combat Example of AFV Movement: Each hex is 1 MP. A 6 B 5 C 6 1 MF 1 MF Change CA 1 MF

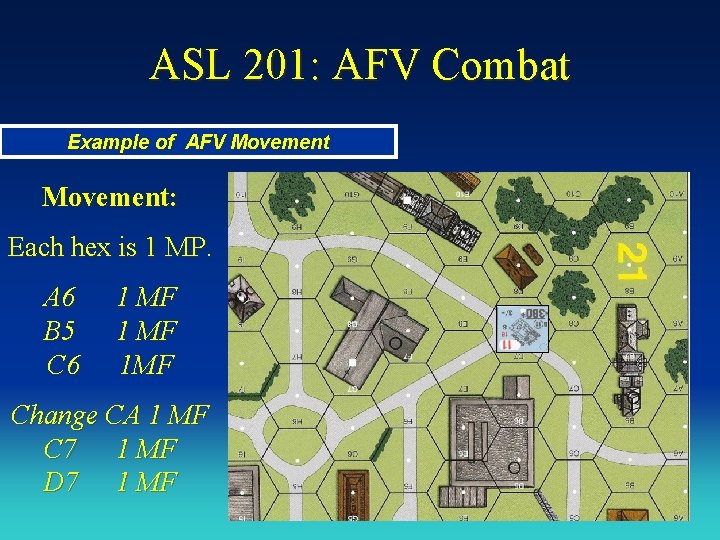
ASL 201: AFV Combat Example of AFV Movement: Each hex is 1 MP. A 6 B 5 C 6 1 MF 1 MF Change CA 1 MF C 7 1 MF

ASL 201: AFV Combat Example of AFV Movement: Each hex is 1 MP. A 6 B 5 C 6 1 MF 1 MF Change CA 1 MF C 7 1 MF D 7 1 MF

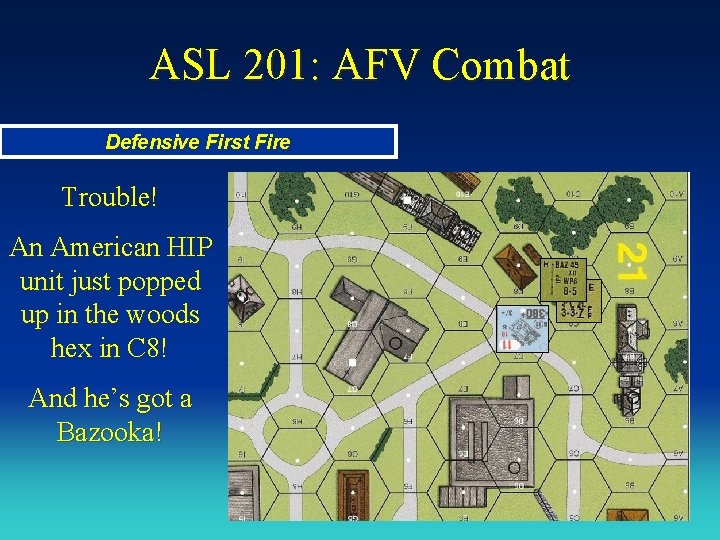
ASL 201: AFV Combat Example of AFV Movement Trouble! An American HIP unit just popped up in the woods hex in C 8!

ASL 201: AFV Combat Defensive First Fire Trouble! An American HIP unit just popped up in the woods hex in C 8! And he’s got a Bazooka!

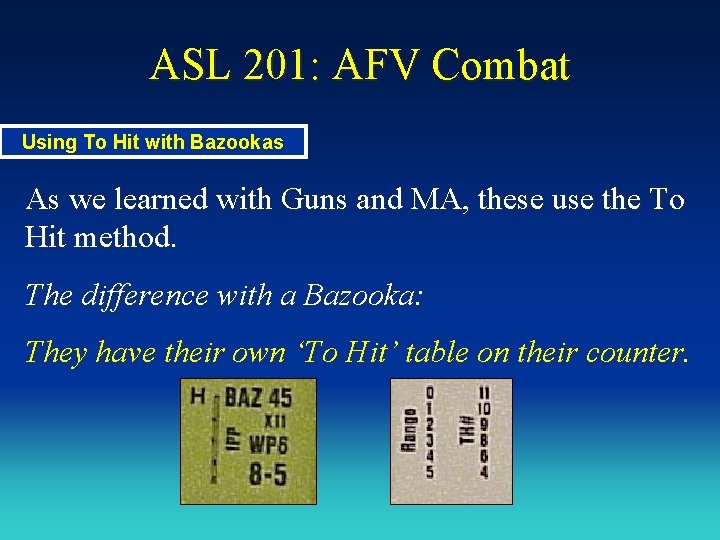
ASL 201: AFV Combat Using To Hit with Bazookas As we learned with Guns and MA, these use the To Hit method. The difference with a Bazooka: They have their own ‘To Hit’ table on their counter.

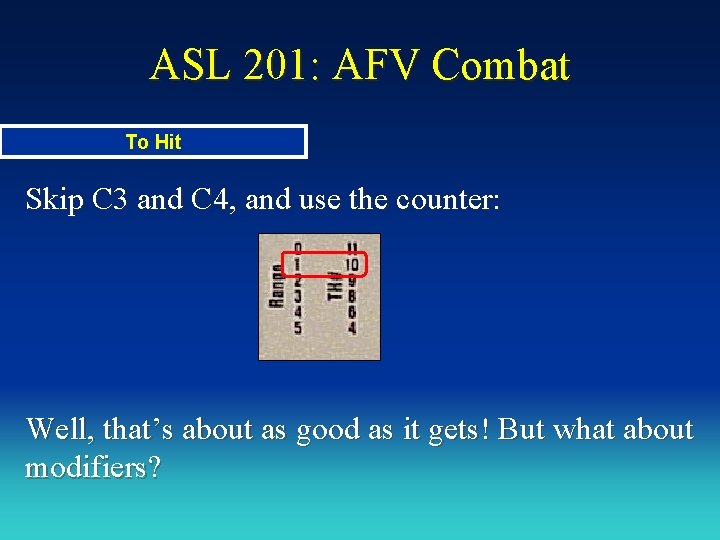
ASL 201: AFV Combat To Hit Skip C 3 and C 4, and use the counter: Well, that’s about as good as it gets! But what about modifiers?

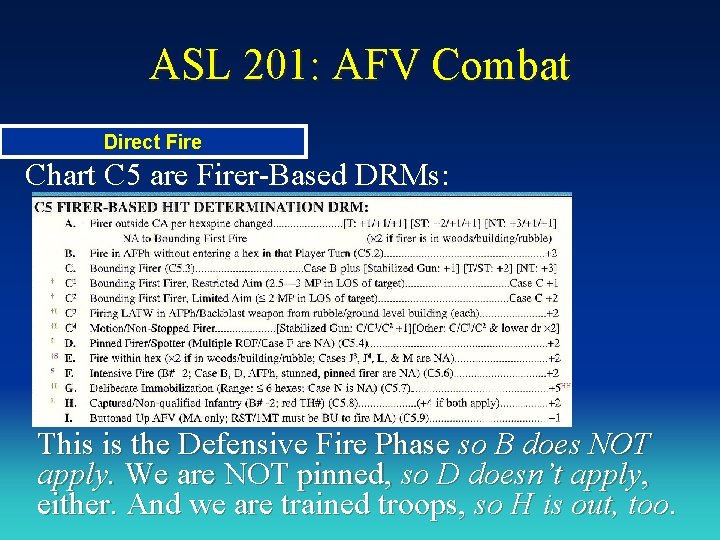
ASL 201: AFV Combat Direct Fire Chart C 5 are Firer-Based DRMs: This is the Defensive Fire Phase so B does NOT apply. We are NOT pinned, so D doesn’t apply, either. And we are trained troops, so H is out, too.

ASL 201: AFV Combat C 5 Modifications Thus far: We have: 10 original To Hit DR +0 DRM for Firer Based DRMs What about Target Based DRMs? That’s chart C 6!

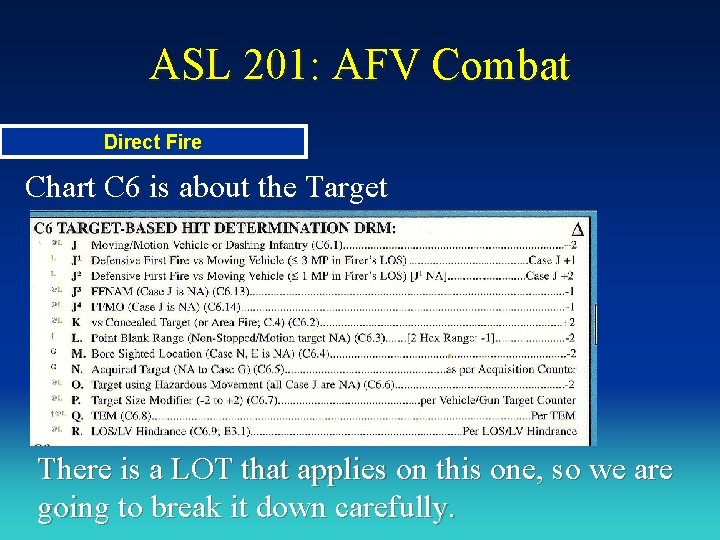
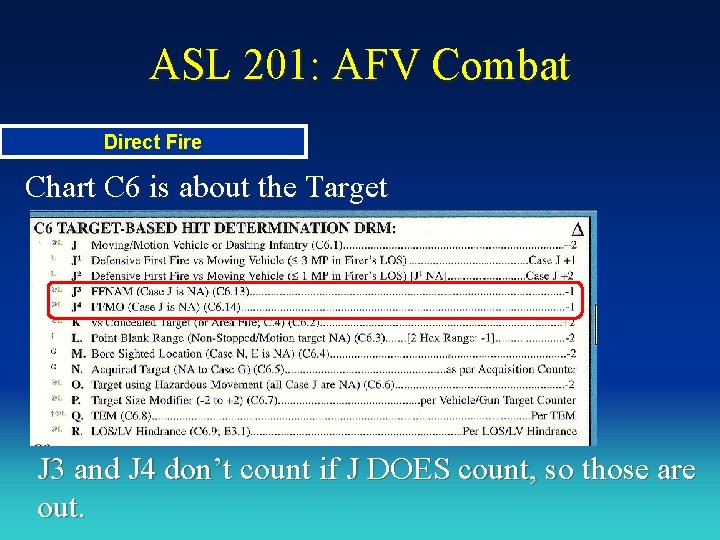
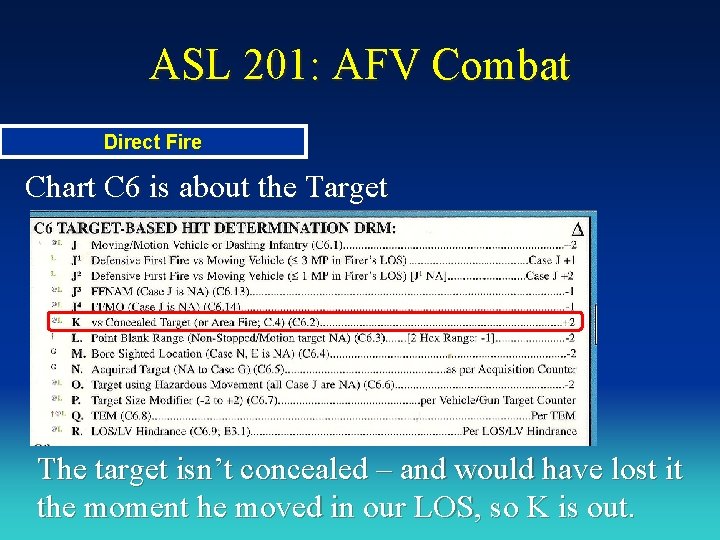
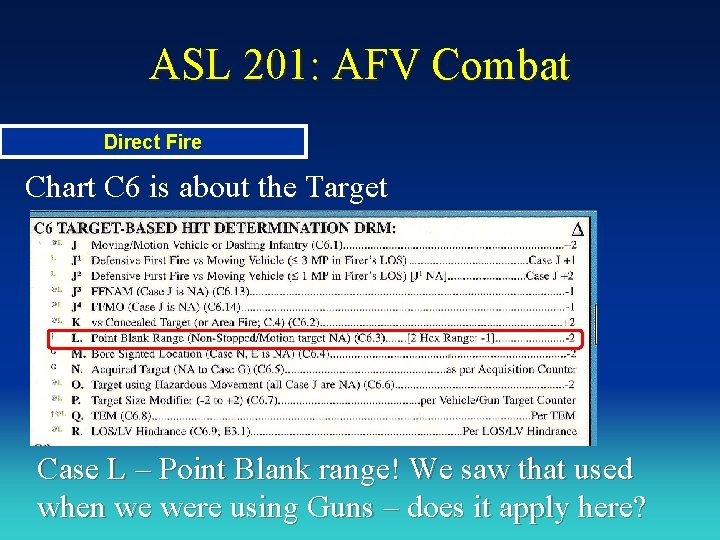
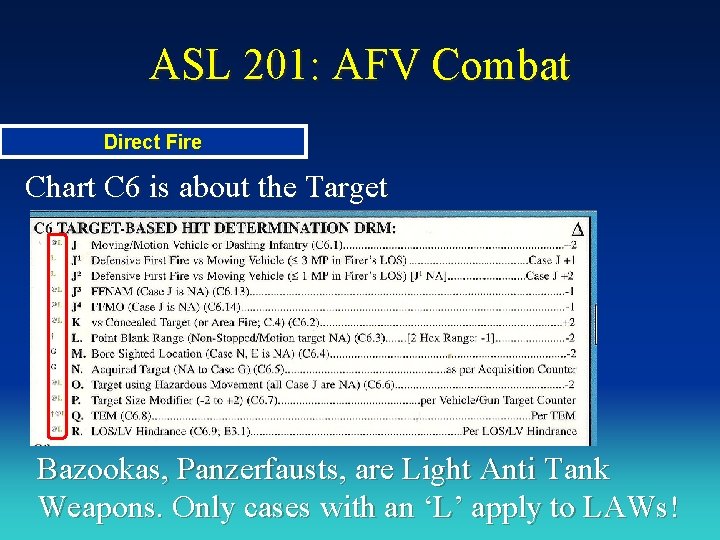
ASL 201: AFV Combat Direct Fire Chart C 6 is about the Target There is a LOT that applies on this one, so we are going to break it down carefully.

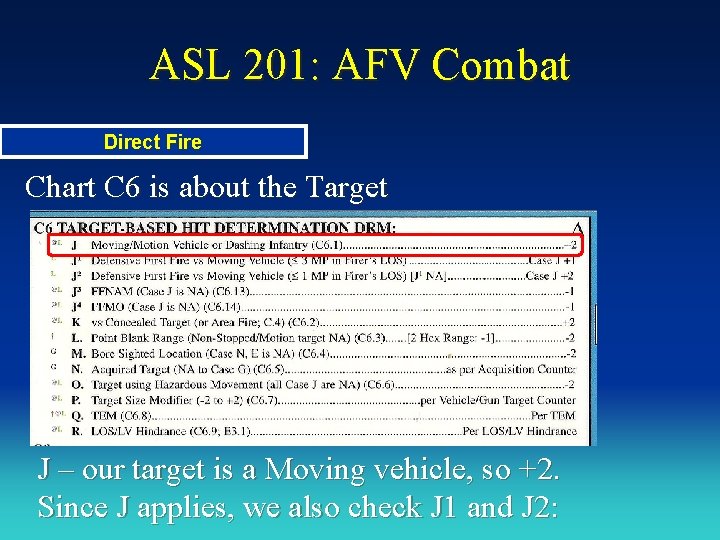
ASL 201: AFV Combat Direct Fire Chart C 6 is about the Target J – our target is a Moving vehicle, so +2. Since J applies, we also check J 1 and J 2:

ASL 201: AFV Combat Direct Fire Chart C 6 is about the Target Essentially, the longer we’ve had to ‘track’ the target, the better our aim. Only one of these apply.

ASL 201: AFV Combat C 6 Modifications So how long have we seen the target?

ASL 201: AFV Combat Example of AFV Movement Check LOS: A 6 1 MF - no B 5 1 MF C 6 1 MF Change CA 1 MF C 7 1 MF D 7 1 MF Continuous for 5 MF.

ASL 201: AFV Combat Direct Fire Chart C 6 is about the Target So we have see them long enough that J 1 nor J 2 apply! J still have J, however.

ASL 201: AFV Combat Direct Fire Chart C 6 is about the Target J 3 and J 4 don’t count if J DOES count, so those are out.

ASL 201: AFV Combat Direct Fire Chart C 6 is about the Target The target isn’t concealed – and would have lost it the moment he moved in our LOS, so K is out.

ASL 201: AFV Combat Direct Fire Chart C 6 is about the Target Case L – Point Blank range! We saw that used when we were using Guns – does it apply here?

ASL 201: AFV Combat Direct Fire Chart C 6 is about the Target Does it apply here? – have to check the notes!

ASL 201: AFV Combat Direct Fire Chart C 6 is about the Target Bazookas, Panzerfausts, are Light Anti Tank Weapons. Only cases with an ‘L’ apply to LAWs!

ASL 201: AFV Combat Direct Fire Chart C 6 is about the Target Everything so far had an ‘L’ out front – but Cases L, M, and N do NOT! So we can’t use these!

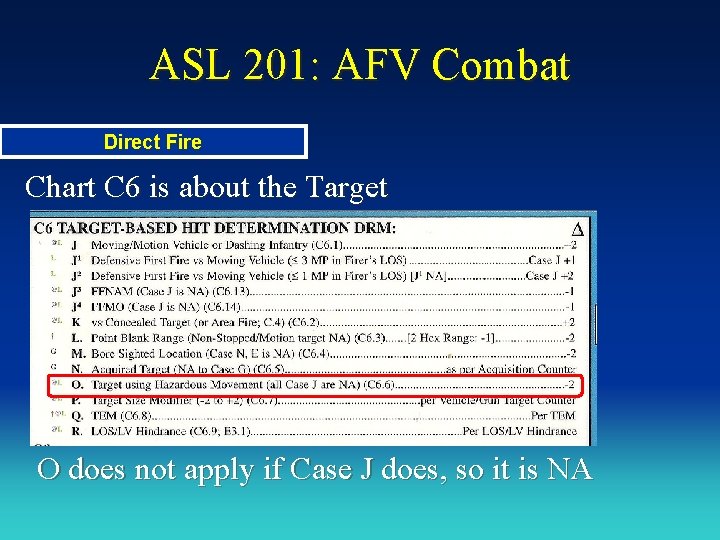
ASL 201: AFV Combat Direct Fire Chart C 6 is about the Target O does not apply if Case J does, so it is NA

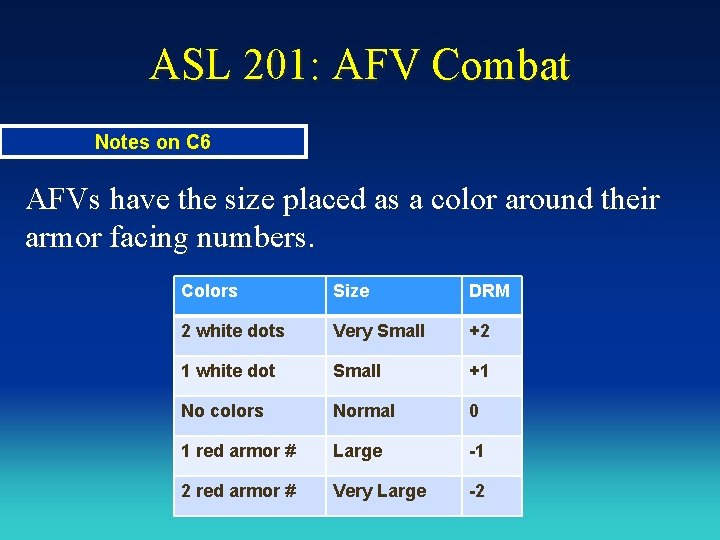
ASL 201: AFV Combat Direct Fire Chart C 6 is about the Target Case P is very important! AFVs and Guns have sizes – big ones are easier to hit!

ASL 201: AFV Combat Notes on C 6 AFVs have the size placed as a color around their armor facing numbers. Colors Size DRM 2 white dots Very Small +2 1 white dot Small +1 No colors Normal 0 1 red armor # Large -1 2 red armor # Very Large -2

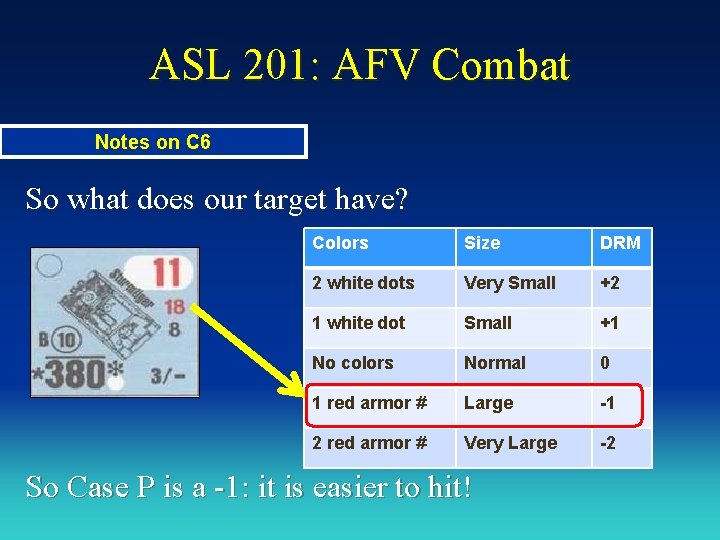
ASL 201: AFV Combat Notes on C 6 So what does our target have? Colors Size DRM 2 white dots Very Small +2 1 white dot Small +1 No colors Normal 0 1 red armor # Large -1 2 red armor # Very Large -2 So Case P is a -1: it is easier to hit!

ASL 201: AFV Combat Direct Fire Chart C 6 is about the Target Anything else? Doesn’t look like it – It is in Open Ground, and no Hindrances apply!

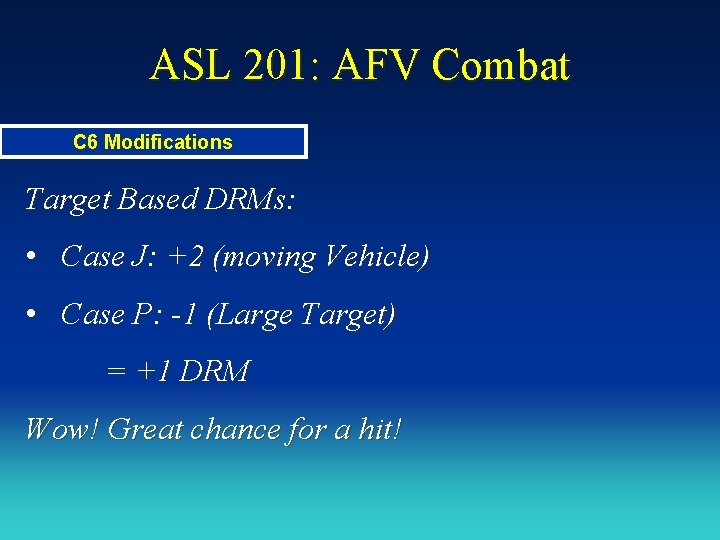
ASL 201: AFV Combat C 6 Modifications Target Based DRMs: • Case J: +2 (moving Vehicle) • Case P: -1 (Large Target) = +1 DRM Wow! Great chance for a hit!

ASL 201: AFV Combat Other To Hit Notes Other things that we need to keep in mind: • Firer CX? • Target over stacking limit? Those would also apply DRMs – so a list with many others items to check are in the ‘Other’ notes beneath the C 5 and C 6 charts.

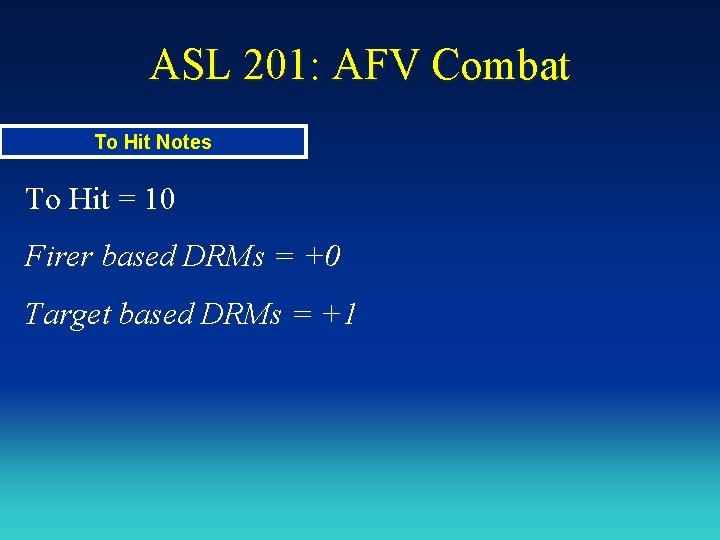
ASL 201: AFV Combat To Hit Notes To Hit = 10 Firer based DRMs = +0 Target based DRMs = +1

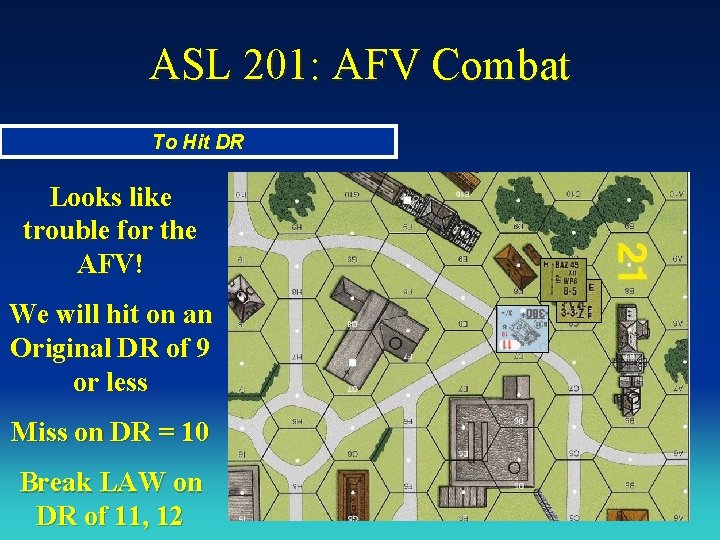
ASL 201: AFV Combat To Hit DR Looks like trouble for the AFV! We will hit on an Original DR of 9 or less Miss on DR = 10 Break LAW on DR of 11, 12

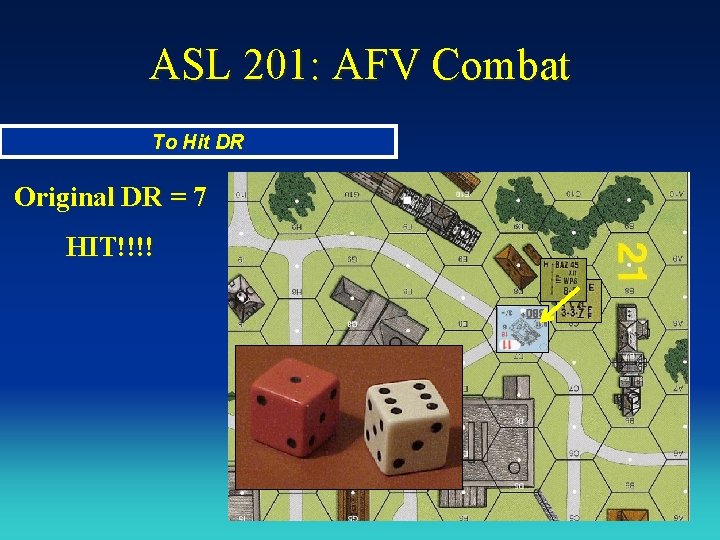
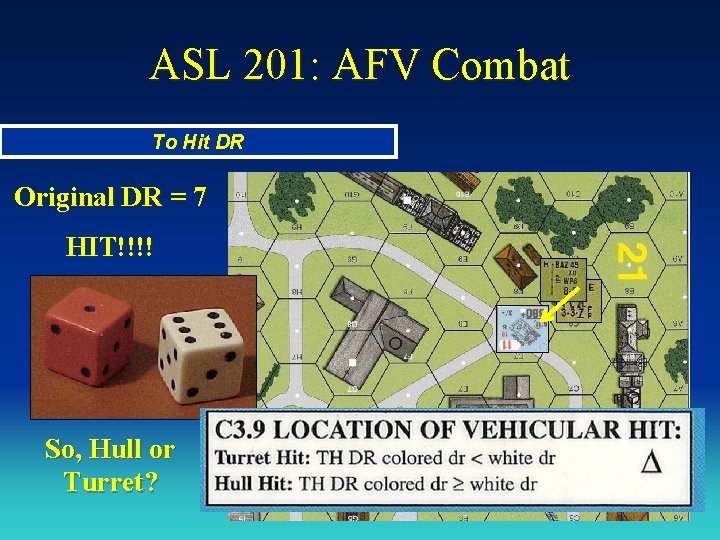
ASL 201: AFV Combat To Hit DR Original DR = 7 HIT!!!!

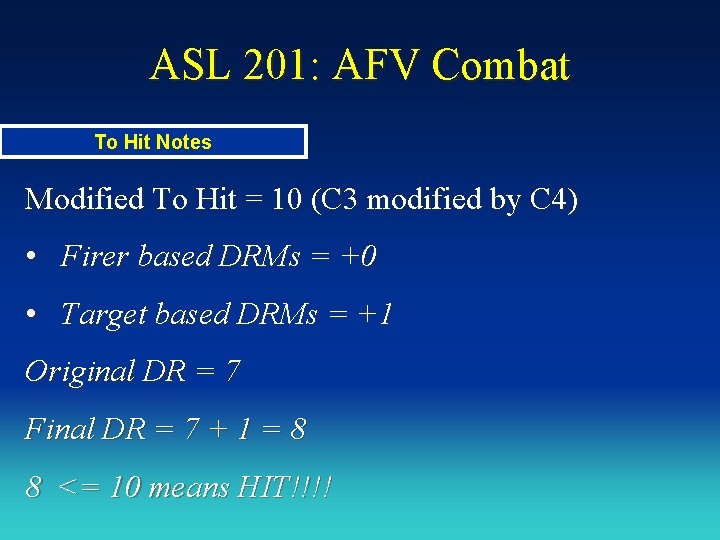
ASL 201: AFV Combat To Hit Notes Modified To Hit = 10 (C 3 modified by C 4) • Firer based DRMs = +0 • Target based DRMs = +1 Original DR = 7 Final DR = 7 + 1 = 8 8 <= 10 means HIT!!!!

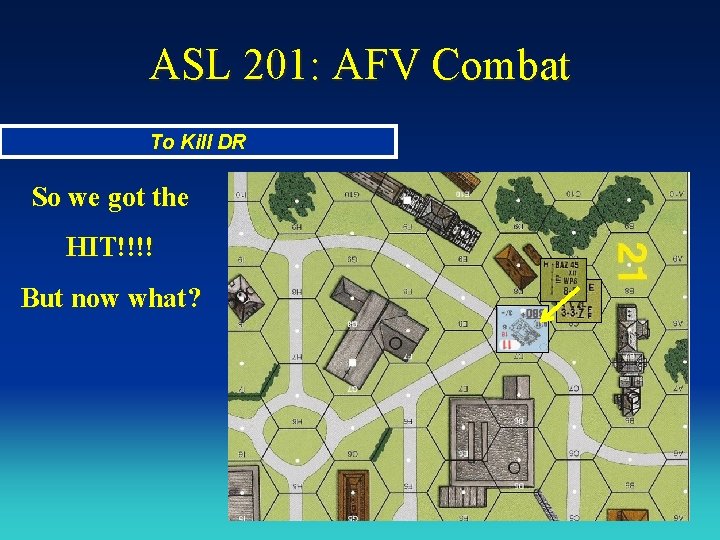
ASL 201: AFV Combat To Kill DR So we got the HIT!!!! But now what?

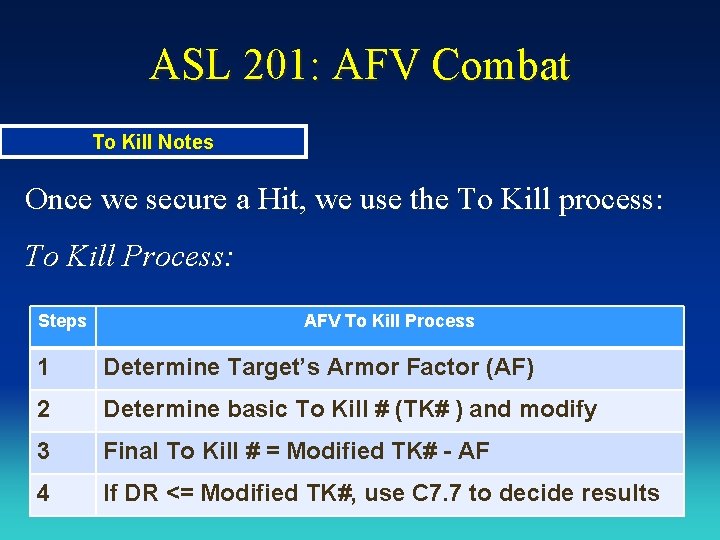
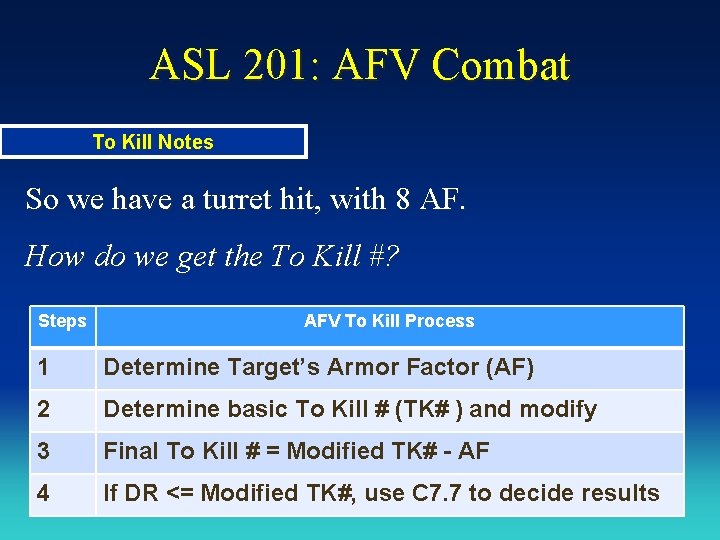
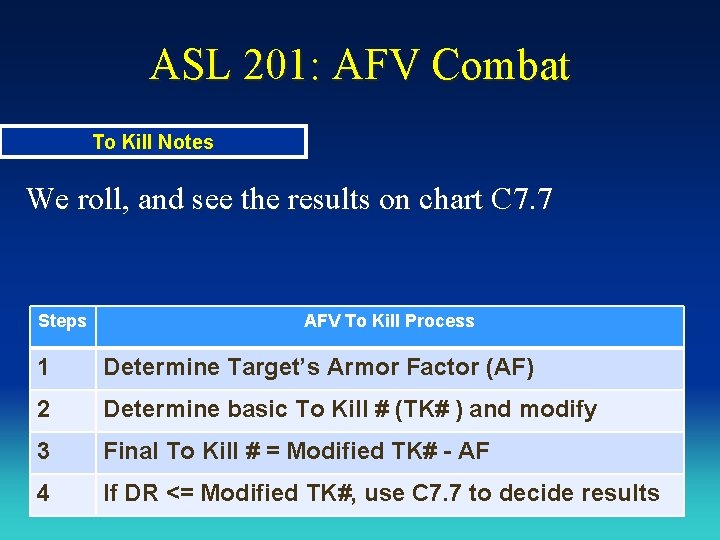
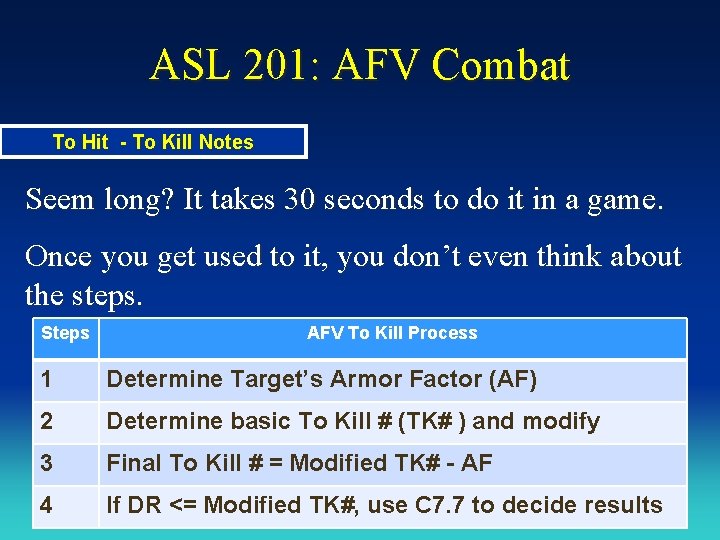
ASL 201: AFV Combat To Kill Notes Once we secure a Hit, we use the To Kill process: To Kill Process: Steps AFV To Kill Process 1 Determine Target’s Armor Factor (AF) 2 Determine basic To Kill # (TK# ) and modify 3 Final To Kill # = Modified TK# - AF 4 If DR <= Modified TK#, use C 7. 7 to decide results

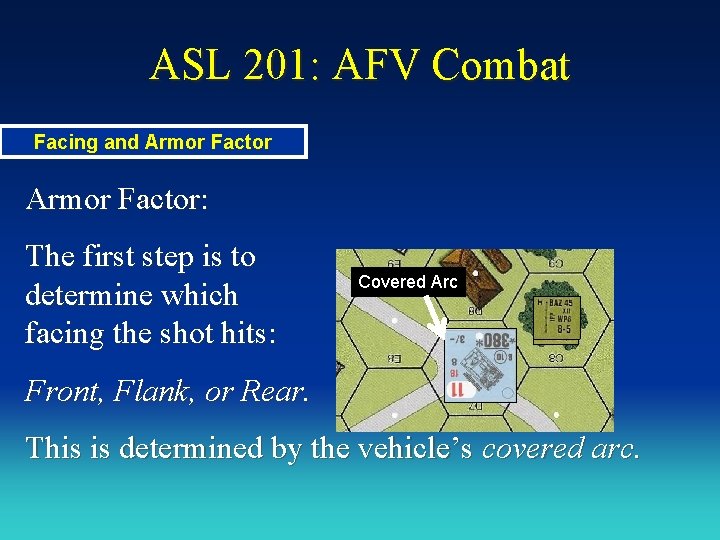
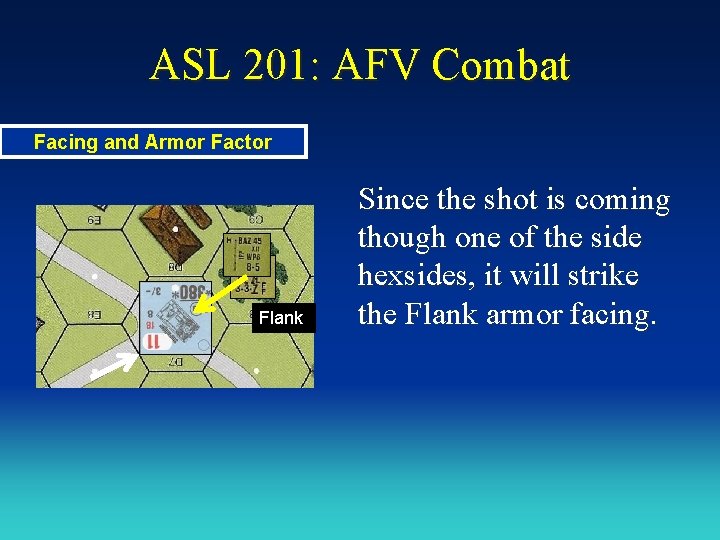
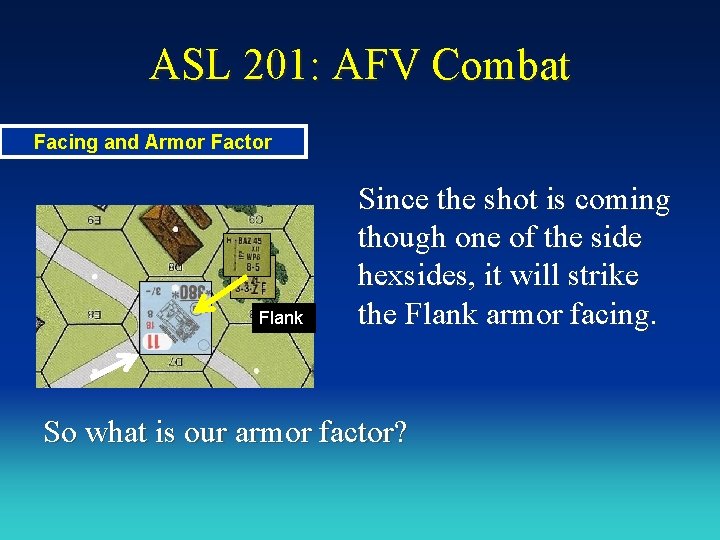
ASL 201: AFV Combat Facing and Armor Factor: The first step is to determine which facing the shot hits: Covered Arc Front, Flank, or Rear. This is determined by the vehicle’s covered arc.

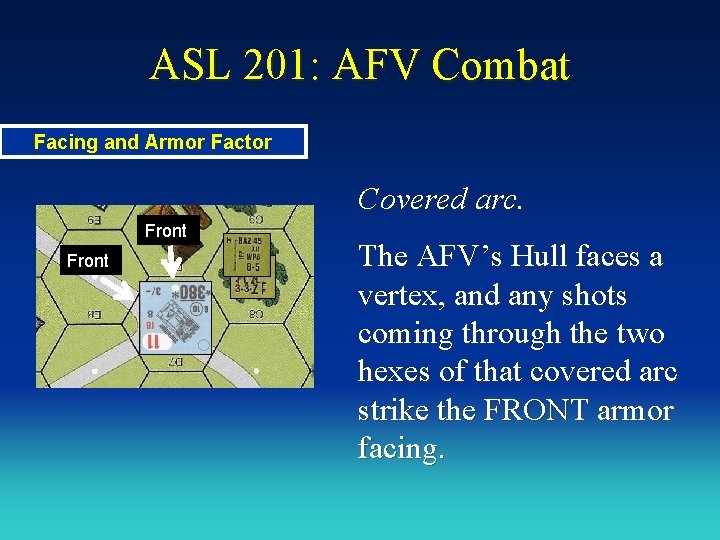
ASL 201: AFV Combat Facing and Armor Factor Covered arc. Front The AFV’s Hull faces a vertex, and any shots coming through the two hexes of that covered arc strike the FRONT armor facing.

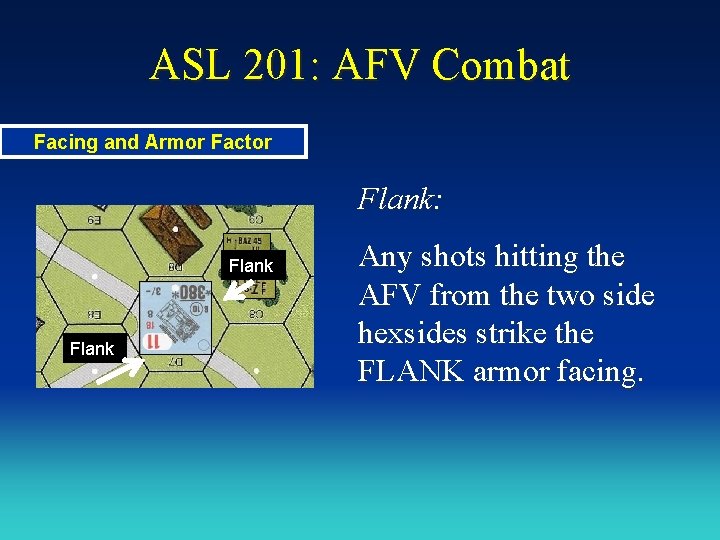
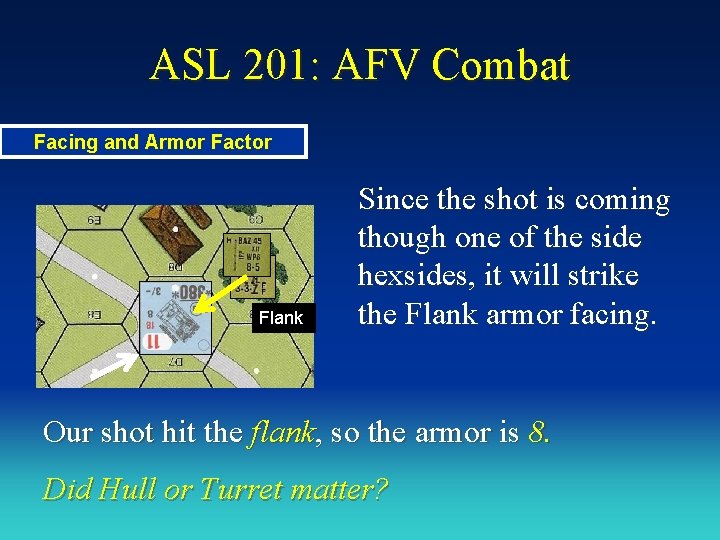
ASL 201: AFV Combat Facing and Armor Factor Flank: Flank Any shots hitting the AFV from the two side hexsides strike the FLANK armor facing.

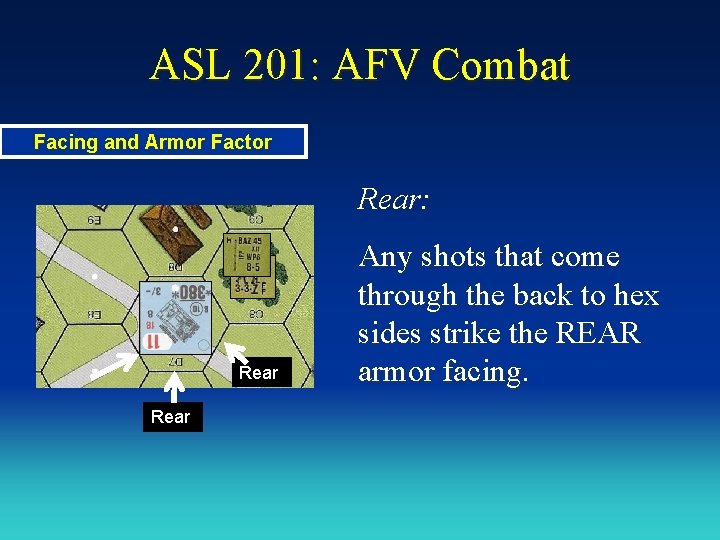
ASL 201: AFV Combat Facing and Armor Factor Rear: Rear Any shots that come through the back to hex sides strike the REAR armor facing.

ASL 201: AFV Combat Facing and Armor Factor Flank Since the shot is coming though one of the side hexsides, it will strike the Flank armor facing.

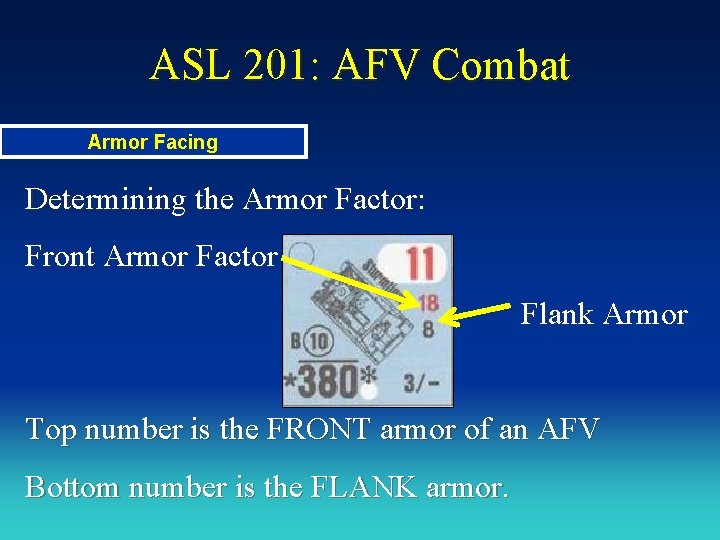
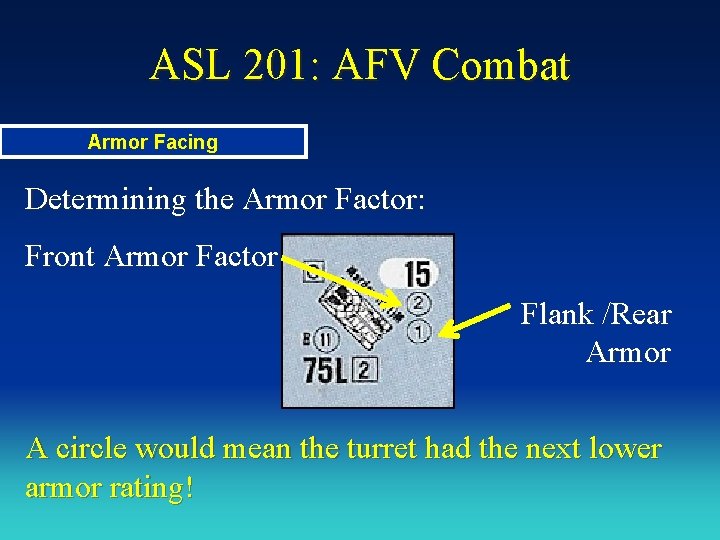
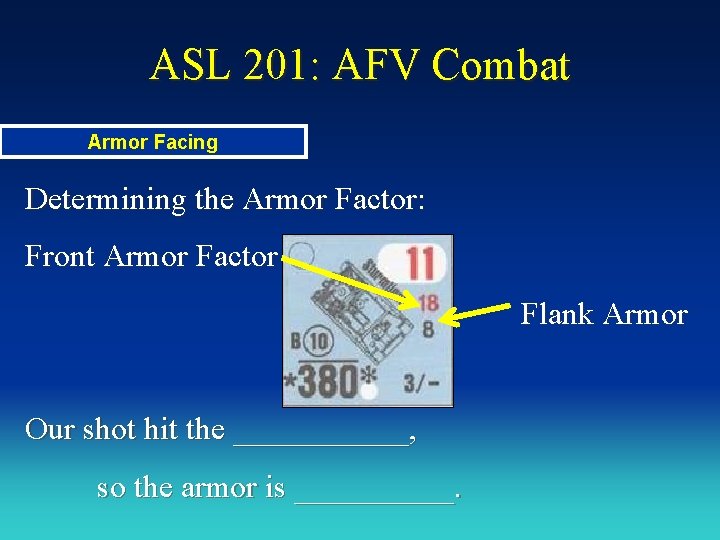
ASL 201: AFV Combat Armor Facing Determining the Armor Factor: Front Armor Factor Flank Armor Top number is the FRONT armor of an AFV Bottom number is the FLANK armor.

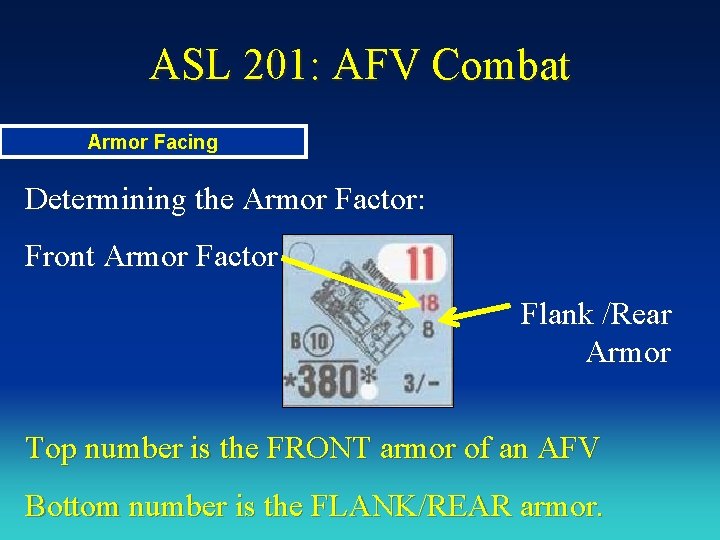
ASL 201: AFV Combat Armor Facing Determining the Armor Factor: Front Armor Factor Flank /Rear Armor Top number is the FRONT armor of an AFV Bottom number is the FLANK/REAR armor.

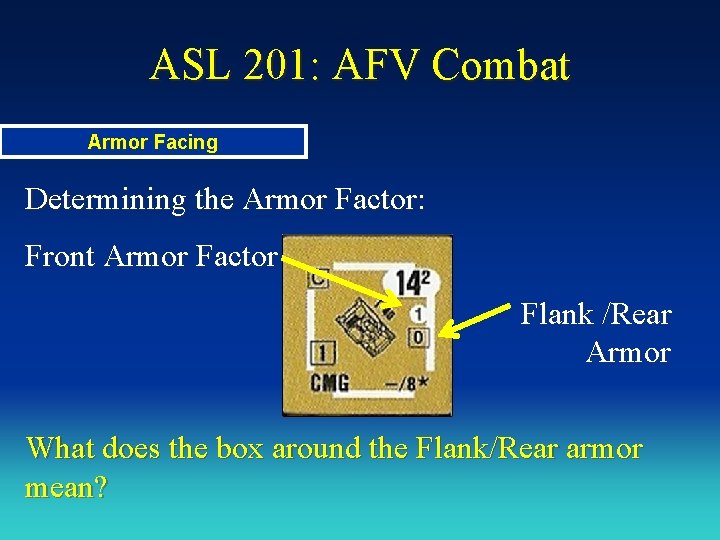
ASL 201: AFV Combat Armor Facing Determining the Armor Factor: Front Armor Factor Flank /Rear Armor What does the box around the Flank/Rear armor mean?

ASL 201: AFV Combat Armor Facing Determining the Armor Factor: Front Armor Factor Flank /Rear Armor A box indicates the upper structure on that facing (the turret) has the NEXT better AF.

ASL 201: AFV Combat Armor Facing Determining the Armor Factor: Front Armor Factor Flank /Rear Armor A circle would mean the turret had the next lower armor rating!

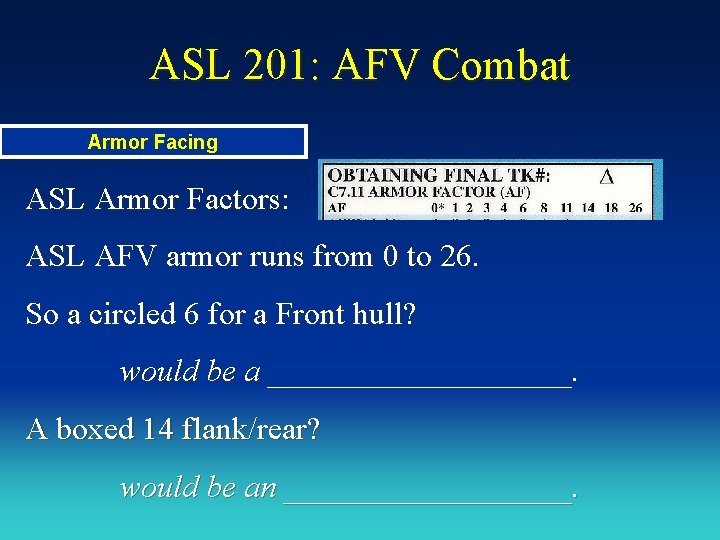
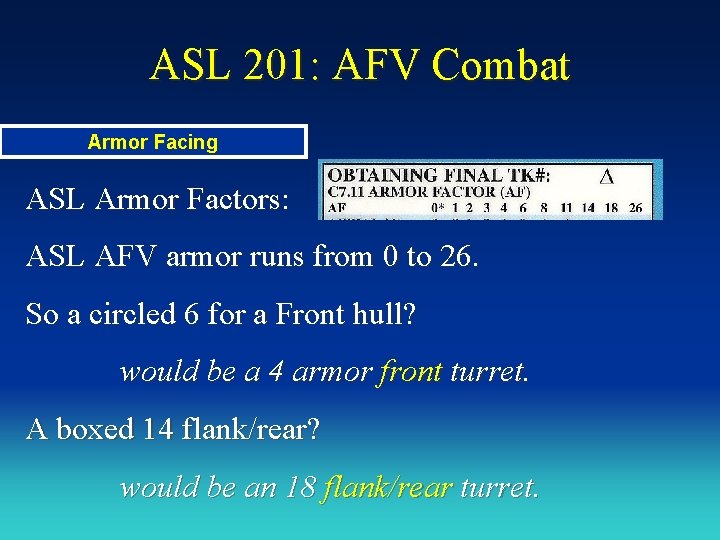
ASL 201: AFV Combat Armor Facing ASL Armor Factors: ASL AFV armor runs from 0 to 26. So a circled 6 for a Front hull? would be a __________. A boxed 14 flank/rear? would be an _________.

ASL 201: AFV Combat Armor Facing ASL Armor Factors: ASL AFV armor runs from 0 to 26. So a circled 6 for a Front hull? would be a 4 armor front turret. A boxed 14 flank/rear? would be an 18 flank/rear turret.

ASL 201: AFV Combat Facing and Armor Factor Flank Since the shot is coming though one of the side hexsides, it will strike the Flank armor facing. So what is our armor factor?

ASL 201: AFV Combat Armor Facing Determining the Armor Factor: Front Armor Factor Flank Armor Our shot hit the ______, so the armor is _____.

ASL 201: AFV Combat Facing and Armor Factor Flank Since the shot is coming though one of the side hexsides, it will strike the Flank armor facing. Our shot hit the flank, so the armor is 8. Did Hull or Turret matter?

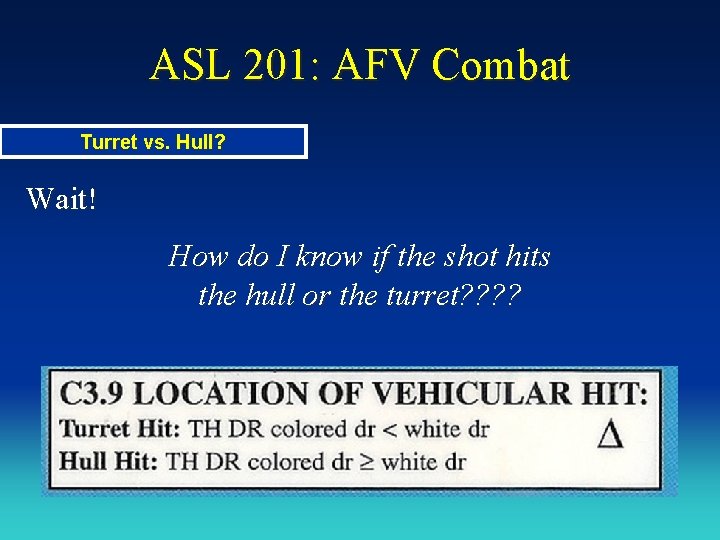
ASL 201: AFV Combat Turret vs. Hull? Wait! How do I know if the shot hits the hull or the turret? ?

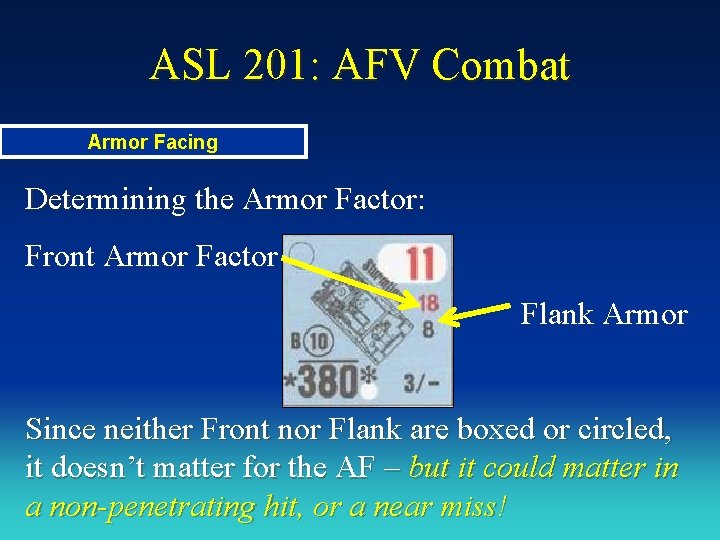
ASL 201: AFV Combat Armor Facing Determining the Armor Factor: Front Armor Factor Flank Armor Since neither Front nor Flank are boxed or circled, it doesn’t matter for the AF – but it could matter in a non-penetrating hit, or a near miss!

ASL 201: AFV Combat To Hit DR Original DR = 7 HIT!!!! So, Hull or Turret?

ASL 201: AFV Combat To Kill Notes So we have a turret hit, with 8 AF. How do we get the To Kill #? Steps AFV To Kill Process 1 Determine Target’s Armor Factor (AF) 2 Determine basic To Kill # (TK# ) and modify 3 Final To Kill # = Modified TK# - AF 4 If DR <= Modified TK#, use C 7. 7 to decide results

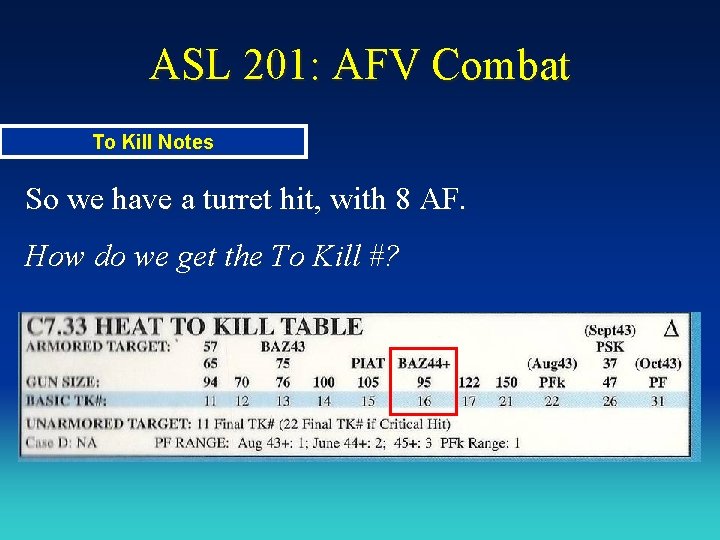
ASL 201: AFV Combat To Kill Notes So we have a turret hit, with 8 AF. How do we get the To Kill #?

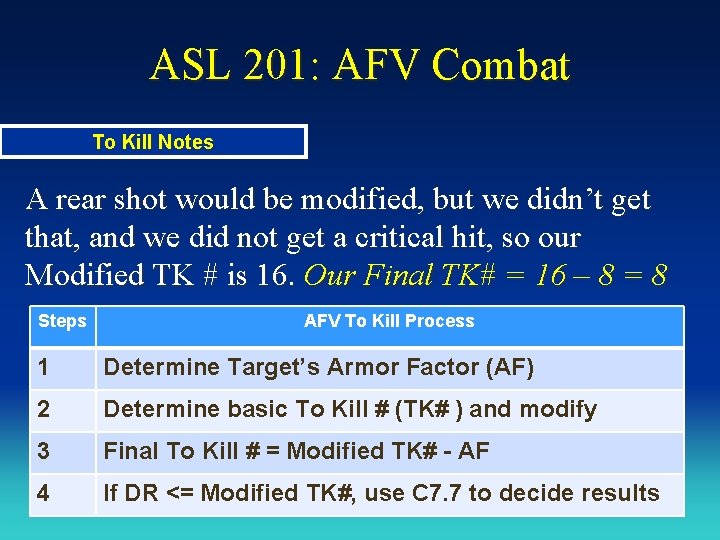
ASL 201: AFV Combat To Kill Notes A rear shot would be modified, but we didn’t get that, and we did not get a critical hit, so our Modified TK # is 16. Our Final TK# = 16 – 8 = 8 Steps AFV To Kill Process 1 Determine Target’s Armor Factor (AF) 2 Determine basic To Kill # (TK# ) and modify 3 Final To Kill # = Modified TK# - AF 4 If DR <= Modified TK#, use C 7. 7 to decide results

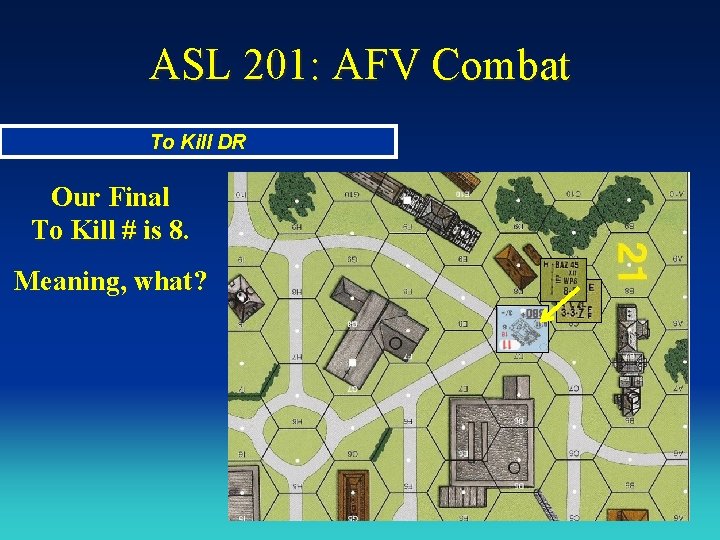
ASL 201: AFV Combat To Kill DR Our Final To Kill # is 8. Meaning, what?

ASL 201: AFV Combat To Kill Notes We roll, and see the results on chart C 7. 7 Steps AFV To Kill Process 1 Determine Target’s Armor Factor (AF) 2 Determine basic To Kill # (TK# ) and modify 3 Final To Kill # = Modified TK# - AF 4 If DR <= Modified TK#, use C 7. 7 to decide results

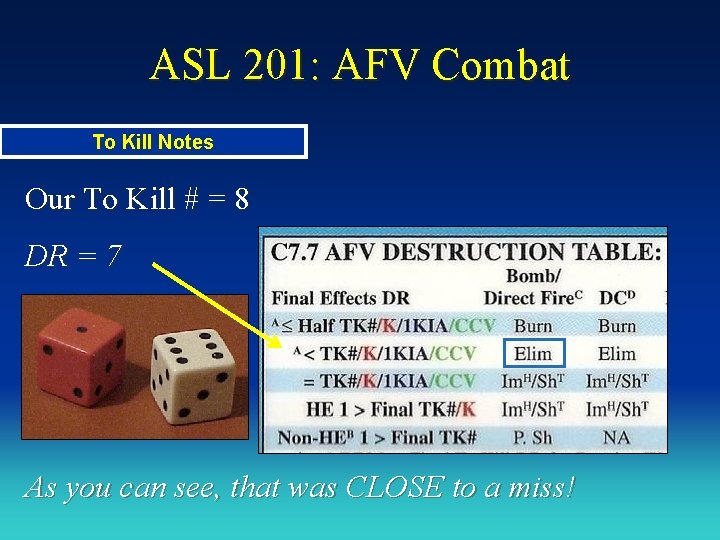
ASL 201: AFV Combat To Kill Notes Our To Kill # = 8 DR =

ASL 201: AFV Combat To Kill Notes Our To Kill # = 8 DR = 7 As you can see, that was CLOSE to a miss!

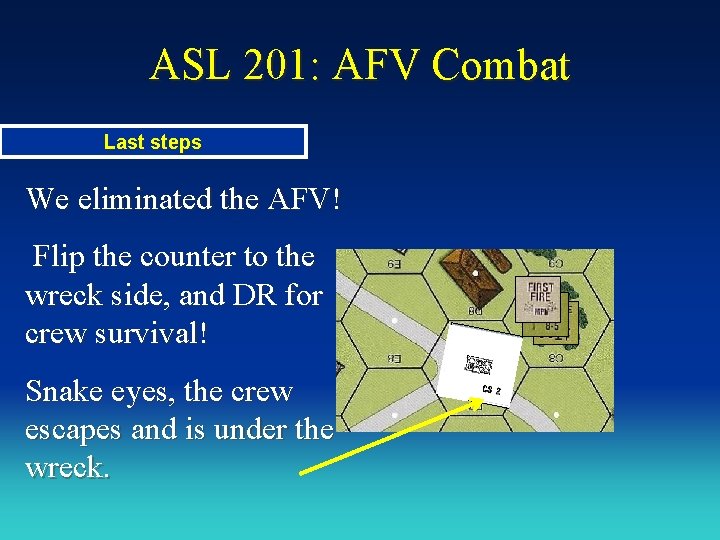
ASL 201: AFV Combat Last steps We eliminated the AFV! Flip the counter to the wreck side, and DR for crew survival! Snake eyes, the crew escapes and is under the wreck.

ASL 201: AFV Combat To Hit - To Kill Notes Seem long? It takes 30 seconds to do it in a game. Once you get used to it, you don’t even think about the steps. Steps AFV To Kill Process 1 Determine Target’s Armor Factor (AF) 2 Determine basic To Kill # (TK# ) and modify 3 Final To Kill # = Modified TK# - AF 4 If DR <= Modified TK#, use C 7. 7 to decide results

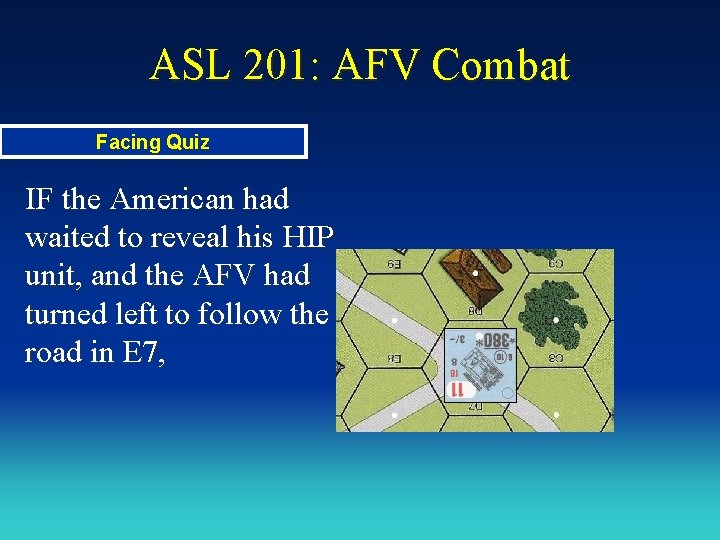
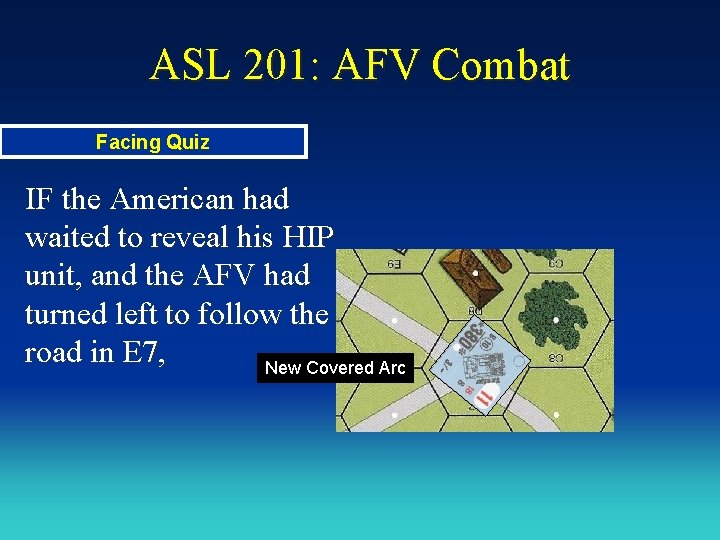
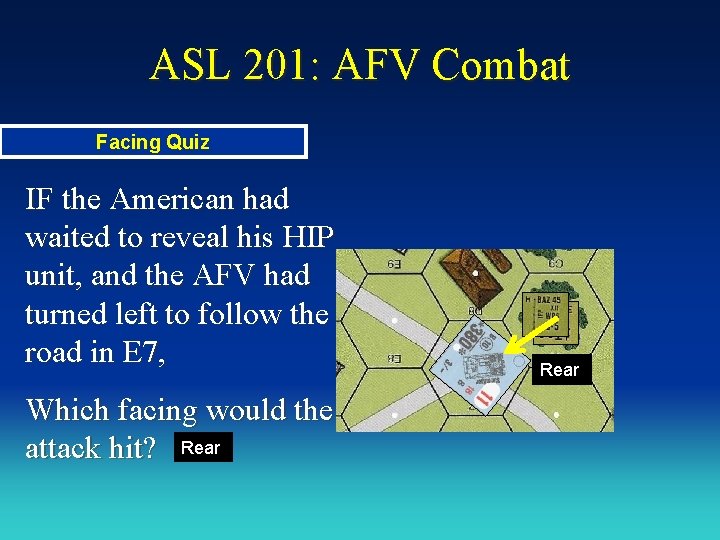
ASL 201: AFV Combat Facing Quiz IF the American had waited to reveal his HIP unit, and the AFV had turned left to follow the road in E 7,

ASL 201: AFV Combat Facing Quiz IF the American had waited to reveal his HIP unit, and the AFV had turned left to follow the road in E 7, New Covered Arc

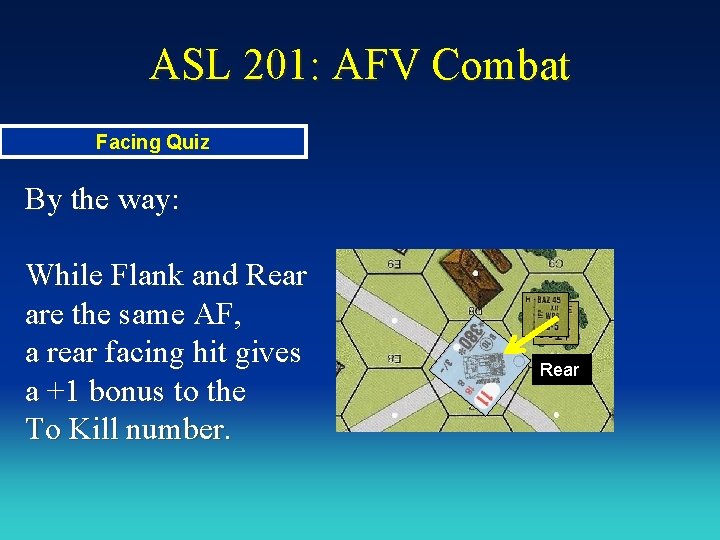
ASL 201: AFV Combat Facing Quiz IF the American had waited to reveal his HIP unit, and the AFV had turned left to follow the road in E 7, Which facing would the attack hit? Rear

ASL 201: AFV Combat Facing Quiz By the way: While Flank and Rear are the same AF, a rear facing hit gives a +1 bonus to the To Kill number. Rear

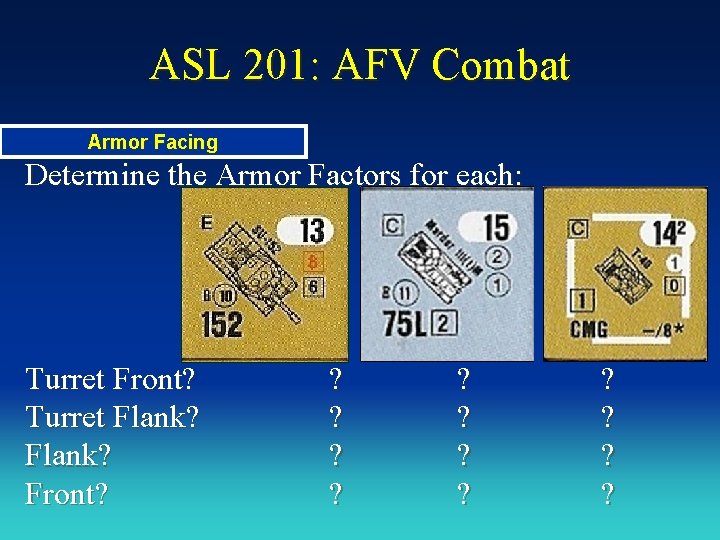
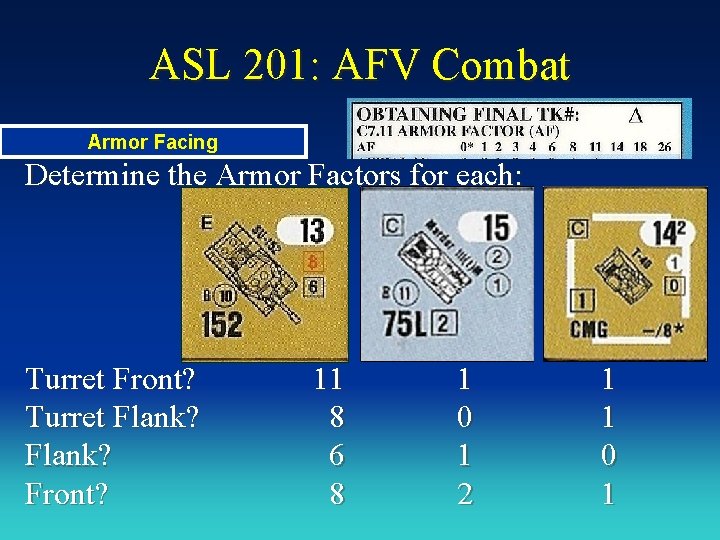
ASL 201: AFV Combat Armor Facing Determine the Armor Factors for each: Turret Front? Turret Flank? Front? ? ? ? ?

ASL 201: AFV Combat Armor Facing Determine the Armor Factors for each: Turret Front? Turret Flank? Front? 11 8 6 8 1 0 1 2 1 1 0 1

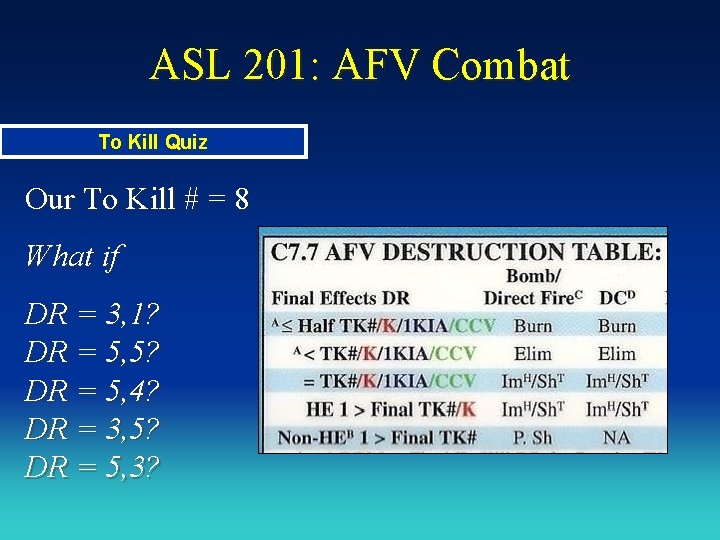
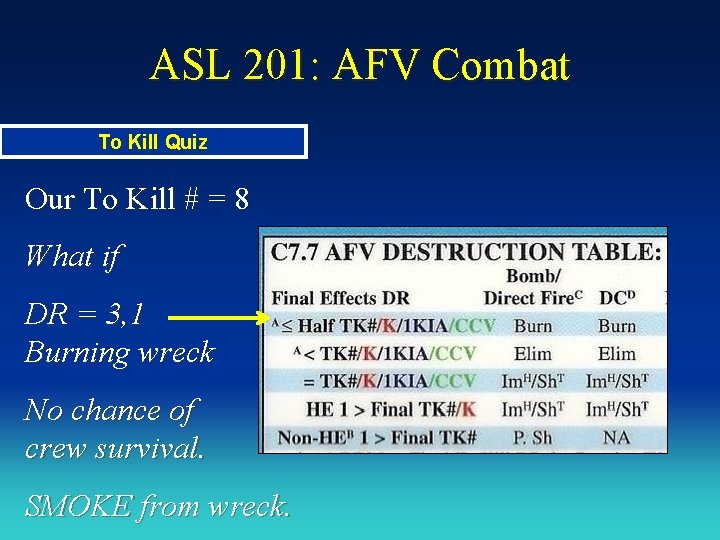
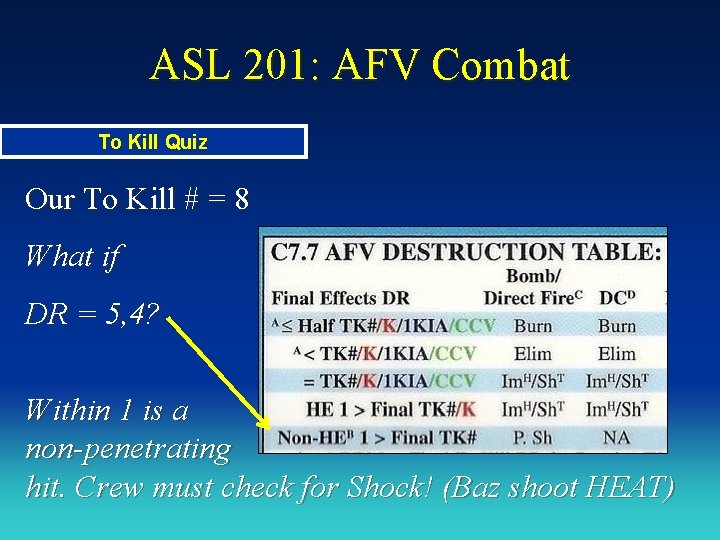
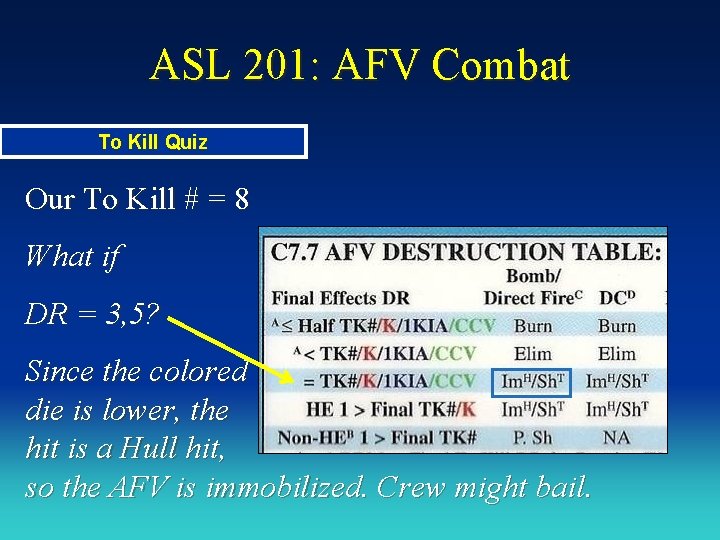
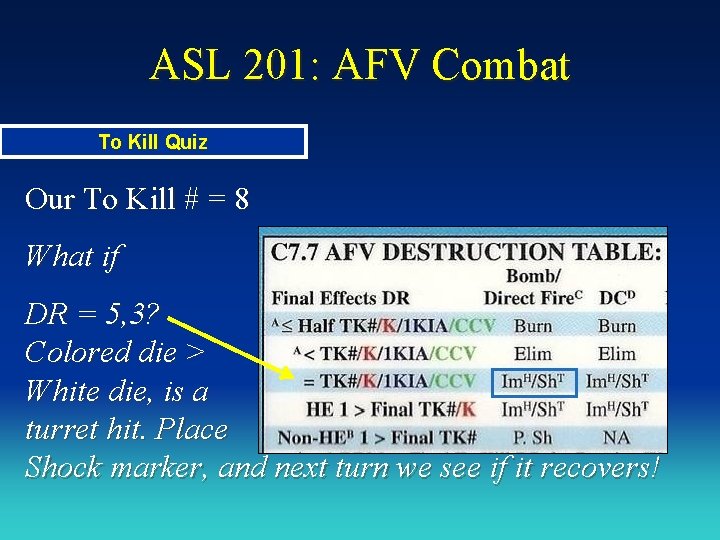
ASL 201: AFV Combat To Kill Quiz Our To Kill # = 8 What if DR = 3, 1? DR = 5, 5? DR = 5, 4? DR = 3, 5? DR = 5, 3?

ASL 201: AFV Combat To Kill Quiz Our To Kill # = 8 What if DR = 3, 1 Burning wreck No chance of crew survival. SMOKE from wreck.

ASL 201: AFV Combat To Kill Quiz Our To Kill # = 8 What if DR = 5, 6 Miss – but the bazooka is out of ammo (remove from game. )

ASL 201: AFV Combat To Kill Quiz Our To Kill # = 8 What if DR = 5, 4? Within 1 is a non-penetrating hit. Crew must check for Shock! (Baz shoot HEAT)

ASL 201: AFV Combat To Kill Quiz Our To Kill # = 8 What if DR = 3, 5? Since the colored die is lower, the hit is a Hull hit, so the AFV is immobilized. Crew might bail.

ASL 201: AFV Combat To Kill Quiz Our To Kill # = 8 What if DR = 5, 3? Colored die > White die, is a turret hit. Place Shock marker, and next turn we see if it recovers!

ASL 201: AFV Combat For Further Information For further information: Read Section C 2. 0 to C 7. 0 (all) , in the rule book for ADVANCED SQUAD LEADER.

ASL 201: AFV Combat Coming Next Session In the next module, we’ll get you fired up as we take target practice with Tanks and Guns of Tanks! See you at Session 2

ASL 201 was created by: • Russell Gifford Learning the Great Battles of the American Civil War (CD Rom learning series, 2005) Iowa Soldiers in the American Civil War (Multimedia lecture series, 2010) Spectacular Voyage: Lewis and Clark in Iowa, Nebraska and South Dakota (2002)

Additional Information Advanced Squad Leader, ASL, and all artwork © MMP, 2011 This Presentation is © 2011 by Russell Gifford May be used with permission Write to rgifford@russgifford. net