Arduino Uno controlling LED strips Are all LED


- Slides: 16

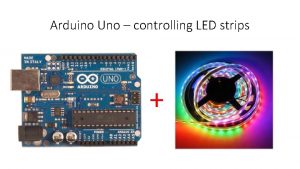
Arduino Uno – controlling LED strips +

Are all LED strip lights the same? • An LED strip contains a large number of LEDs connected together on one strip of flexible plastic containing thin metal circuit tracks. • There are many different designs and types of strips. • Our strips have tiny WS 2812 b LEDs which can produce red, green and blue (RGB) light. These colours can mix to make many other colours. • WS 2812 b strips are called “addressable” as it is possible to turn on and change the colour of each LED independently of all the others. Many coloured patterns and effects can be created. Let’s find out more!

Arduino ‘Libraries’ – A ‘library’ is a type of code that makes it easier to use some devices like LED strips. This sketch uses two libraries. Libraries are included at the beginning of the sketch code.

Collect libraries – we need to collect libraries that are used to control the LED strips. 1. You must be connected to the internet 2. Sketch Include Library Manage Libraries

Type in ‘neo’ in the search bar and install the latest version (1. 1. 1) of Adafruit Neopixel

Go back to manage libraries Go to sketch > include library > manage libraries

Type in fast. LED in the search bar and install the latest version (3. 1. 3)

Time to fire up some WS 2812 b LED strips! Take time to look at the WS 2182 b LED. It is a very advanced LED which contains its own tiny control circuit technology !

The WS 2812 b LED strips have 3 wires which can be connected to a breadboard using a short wire connector, or by pushing the pins of your coloured ‘jumper wires’ into the connector. GND DATA +5 V GND = Ground or 0 V. DATA = a wire which sends control signals to each LED from the Arduino. It carries Serial Data In/Out. +5 V = power source, can be labelled as Vcc

Power supply module: 1. connect the power supply module to the breadboard (check the pins are not bent!) 2. put the yellow rail jumpers on the 5 V side 1. 2.

Power supply connection: connect your DC power supply (5 V to 12 V DC) to the black DC input jack: Using an AC adaptor or charger Using a 9 V DC battery OR

Your circuit should look like this… Don’t turn on the power switch yet!

Check that your circuit connections look like the diagram:

Connect your Arduino Uno to your computer Open the Arduino software (IDE) Select Cylon from the Custom Libraries examples File Examples (from Custom Libraries) Fast. LED Cylon

Set up the code for the LED strip: 1. Change NUM_LEDS to 30 2. Change DATA_PIN to 6 3. upload the code, then switch on the power button on the power module Now, 1. Can you change the code to make the lights go Blue one way and come back Red? 2. What other colours can you do? 3. Can you change the speed of the Cylon pattern?

Now try some more light patterns! 1. Try First. Light from the Fast. LED examples 2. Try strandtest from the Adafruit Neopixel library
 Control led strip with arduino
 Mikael ferm
 Arduino uno l led
 Uno è il sole che splende di giorno
 Arduino uno logo
 Bascom-avr
 Language
 Arduino uno mouse
 Arduino uno wikipedia
 아두이노 로고
 아두이노 로고
 Arduino uno
 Rangkaian skematik arduino uno
 Multiwiiconf download
 Arduino uno c#
 Arduino uno anatomy
 Arduino uno bill of materials
