AnNajah National University Electrical Engineering Department Graduation Project


, so we Implement it in")
:")


 control circuit(TL 494 IC): *The above diagram inside the")


: *The important thing that you should take into account")


- Slides: 39
An-Najah National University Electrical Engineering Department Graduation Project Power supply with regulated adjustable output Supervisor : Prof. Dr. Marwa Students: Qamar Hazeem(10716189) Fareeda odeh(10718807)
Introduction: A regulated power supply is one that controls the output voltage or current to a specific value. A power supply converting AC line voltage to DC power must perform the following functions at high efficiency and at low cost: 1. Rectification: Convert the incoming AC line voltage to DC voltage. 2. Voltage transformation: Supply the correct DC voltage level(s). 3. Filtering: Smooth the ripple of the rectified voltage. 4. Regulation: Control the output voltage level to a constant value. 5. Isolation: Separate electrically the output from the input voltage source. 6. Protection: Prevent damaging voltage surges from reaching the output; provide back-up power or shut down during a brown-out.
In our project we built two type of power supply : Linear power supply Ø 1 -Linear power supply Switched-mode power supply Ø 2 -Switched-mode power supply
Linear power supply linear power supply with the following block diagram:
We choose the following circuit to build it , but we have a problem in availability the component (high power transistor the We choose the following circuit to build it , but we have a problem in availability Q 5, Q 6) component (high power transistor Q 5, Q 6)
So we choose another circuit that make voltage , current regulator with limit ( 0 -30 Vdc, . 002 -3 A).
General Description about the linear power supply circuit : This is a high power supply a continuously variable Thisquality is a high quality powerwith supply with a tabilized output adjustable at any value output between 0 and 30 VDC. continuously variable tabilized adjustable at The circuitany alsovalue incorporates electronic output current between 0 an and 30 VDC. The circuit also limiter incorporates electronic that effectively controlsanthe output current from alimiter few that effectively the output current of from a few milliamperes (2 m. A) controls to the maximum three amperes milliamperes (2 m. A) to the maximum output of three that the circuit can deliver. amperes that the circuit can deliver.
Technical Specifications: Input Voltage: . …. . . 24 VAC Input Voltage: Input Current: . …. . . 3 A. …. . . (max) 24 VAC Output Voltage: …. . 0 -30 adjustable Input. Current: . …V. . . 3 A (max) Output. … Voltage: . …. . 0 -30 V Output Current: . . 2 m. A-3 A adjustable Output Current: . …. . 2 m. A-3 A adjustable Output Voltage Ripple: . … 0. 01 % maximum Features: - Reduced dimensions, easy construction, simple operation. - Output voltage easily adjustable. - Reduced dimensions, easy construction, simple operation. - Output current limiting with visual indication. Output voltage easilydevice adjustable. - Complete-protection of the supplied against over loads and malfunction. Features: - Output current limiting with visual indication. - Complete protection of the supplied device against over loads and malfunction.
How the circuit Works: How the circuit Works Transformer: A transformer a device transfers electrical energy A transformer is a device is that transfersthat electrical energy from one circuitfrom to another conductors onethrough circuitinductively to anothercoupled through inductively coupled conductors In our project: is a step-down mains transformer with a There is. There a step-down mains transformer with a secondary winding rated at 24 V/3 at A 24 V/3 A rated secondary
Rectifier: A rectifier is an electrical device that converts current A rectifier is an electrical device thatalternating converts alternating (AC), which periodically reverses direction, to direct current (DC), current (AC), which periodically reverses direction, to direct which flows in only one direction. The process is known as current (DC), which flows in only one direction. The process is rectification. known as rectification. In our project: The ACThe voltage the transformers secondary winding is rectified by the is ACofvoltage of the transformers secondary winding bridge formed by the rectified by four the diodes bridge. D 1 -D 4. formed by the four diodes D 1 -D 4.
Rippel smoothing circuit : The DC taken voltage taken across outputis of the bridge The DC voltage across the output of the bridge smoothed by theisfilter by the filter C 1 formed the reservoir capacitor C 1 formedsmoothed by the reservoir capacitor and theby resistor R 1. the resistor R 1. and
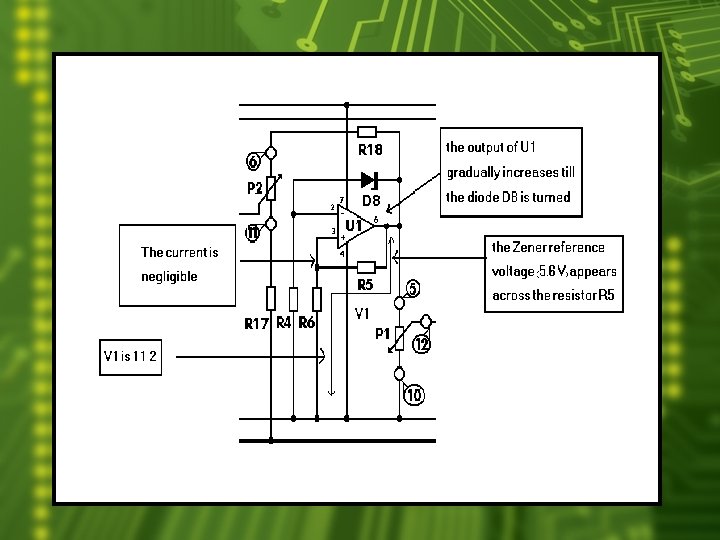
Voltage regulator:
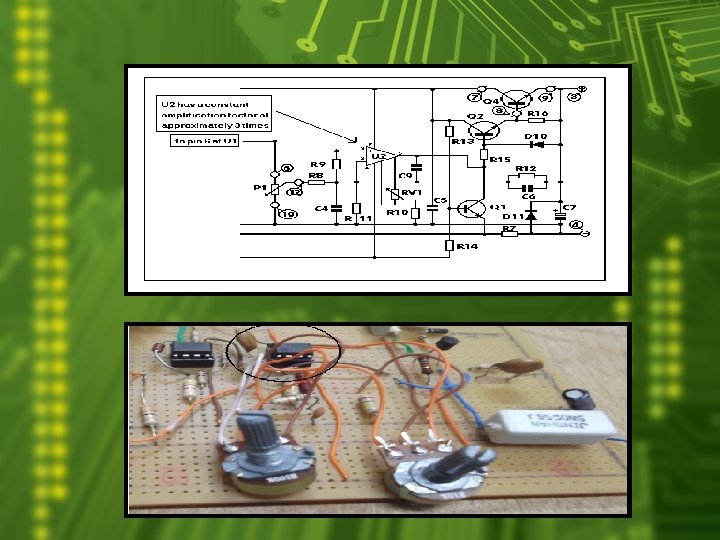
The integrated circuit U 2 has a constant amplification factor of approximately 3 times, according to the formula A=(R 11+R 12)/R 11, and raises the 11. 2 V reference voltage to approximately 33 V
The following reading gotreading from the circuit: The following got from the circuit: VIN 12 v 15 V 20. 4 V 12 12 15 15 20. 4 VLoad 6. 2 8. 4 13. 6 6. 6 8. 9 14 14 Vdrop 5. 8 6. 6 6. 8 5. 4 6. 1 5. 6 ILoad 77. 9 m. A 97. 6 m. A 137. 2 m. A 72 m. A 77 m. A 88 m. A
current regulator: The output of U 3 is low and coupled to the non inverting input of U 2 by D 9 , U 2 is responsible for the voltage control and as U 3 is coupled to its input the latter can effectively override its function, and the voltage decrease at the output of U 2 , so decreasing the voltage at the base of Q 2 , this is causing decrease the current sinking from emitter to the load, so the voltage drop across R 7 decreasing because the current decreasing
The following component make current regulator:
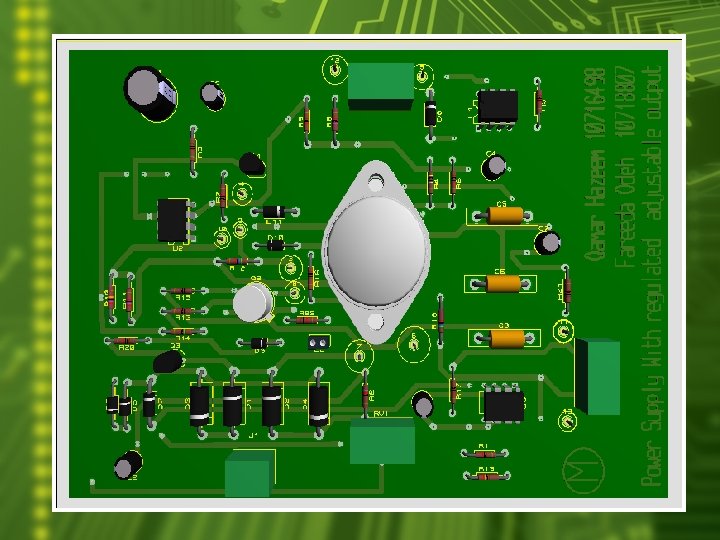
After we built this circuit as printed board (PCB), so we Implement it in PROTEUS PROGRAM.
(PCB – Connections):
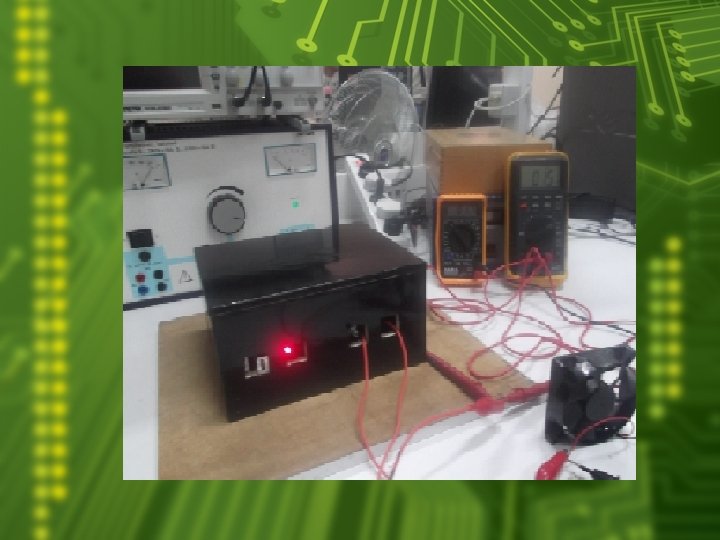
The following picture represent printed board circute:
Switched mode power supply an SMPS transfers power from a source, like mains power, to a load, SMPS transfers power fromconverting a source, voltage like mains power, to such as a personal computer , while and current a load, such as a personal computer, while converting characteristics. voltage and current characteristics. An SMPS is usually
1 -The primary side: SMPS will divide in two part : 1 -The primary side: 2 - The secondary side:
In my gradution project We built the following circuit for switch mode power supply : Figure-24
These circuit can be divided into three staage: Control circuit High power circuit Dc stage First stage: We built the control circuit to give us Pulse width modulation (PWM) by using IC component which is called (TL 494 IC).
1 -Pulse width modulation (PWM) control circuit(TL 494 IC): *The above diagram inside the regulator IC. In the top left hand corner there is an oscillator whose frequency is determined by the resistor and capacitor combination connected to pins 5 and 6. *Pin 8 and Pin 11 will give pulses with shift reach to nanosecond which is make you in safe side that two driver transistor do not work at the same time. *Pulling Pin 4 high put chip into sleep mode –No PWM output –over load shutdown, this happened when current over 20 amper.
2 - Drivers switch & coil isolation: Now , *We use two diver transistor as shown in above circuit. *The direction of current in coil will give alternating voltage. *The transformer (T 2) will make the isolation. *E &F will take the pulses from PWM control circuit IC
In our project: Note: We manipulate on our circuit to give us correct pulses by connecting (pin 3) with (pin 4)
The result from these circuit as pulses on oscilloscope:
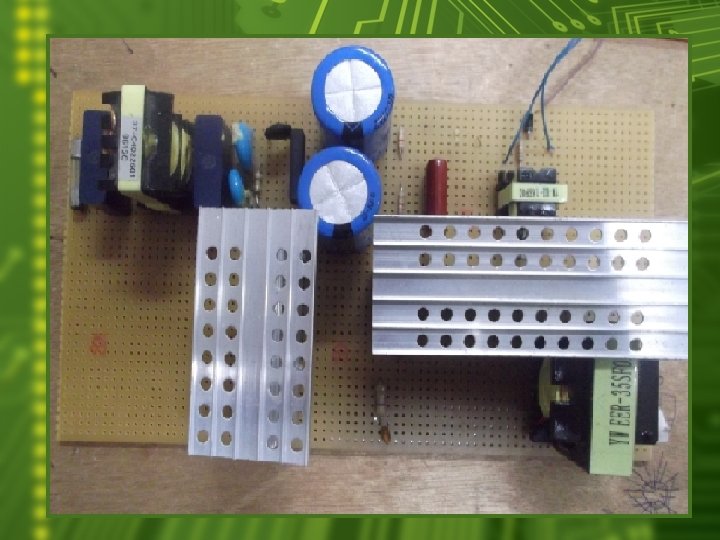
The complete control circuit in the following picture : Figure-32
Second stage: We built the high power circiut: 1 -AC Harmonic Filter *A harmonic filter is used to eliminate the harmonic distortion caused by appliances. In our project: *Input 220 V, 60 Hz to the AC filter as shown in the previous diagram consist L, C. *The reason for using this filter that our project is a SMPS for personal computers, Which is a non linear load, so we need a harmonic filter.
2 -Bridge rectifier : in SMPS the bridge should have the high limit of voltage and current than the linear which is reach to 300 V , 15 A because the 220 V AC from the gride will connect directly to the bridge without using step down transformer.
3 -Rippel smoothing circuit: In our project , we will use the capacitor with value 470 micro F/200 V as shown in the Figure, and connected in way to give( +Vdc, -Vdc) and at the middle gives common.
4 -Power switch (BJT transistor): *The important thing that you should take into account , two transistor must not work at the same time, if this happened it will distortion system.
In our project: We connect the following circuit: Figure-37
THANK YOU