AMSTERDAM TECHNOLOGY NDT Scan Solutions Introduction spot and
- Slides: 28

AMSTERDAM TECHNOLOGY NDT Scan Solutions Introduction spot- and projection weld inspection with the Mini Scanner A high level inspection method with a handy instrument

AMSTERDAM TECHNOLOGY Raised in 2006 by: • v. Amsterdam SES Software, Engineering and Systems for ultrasonic and Eddy Current inspection machines • Technolothgy BV Engineering of special machines and instruments for Non Destructive Technology

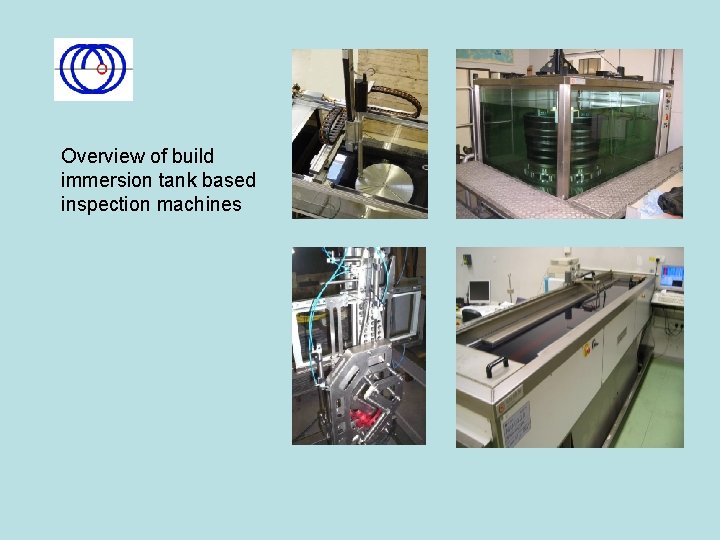
Overview of build immersion tank based inspection machines

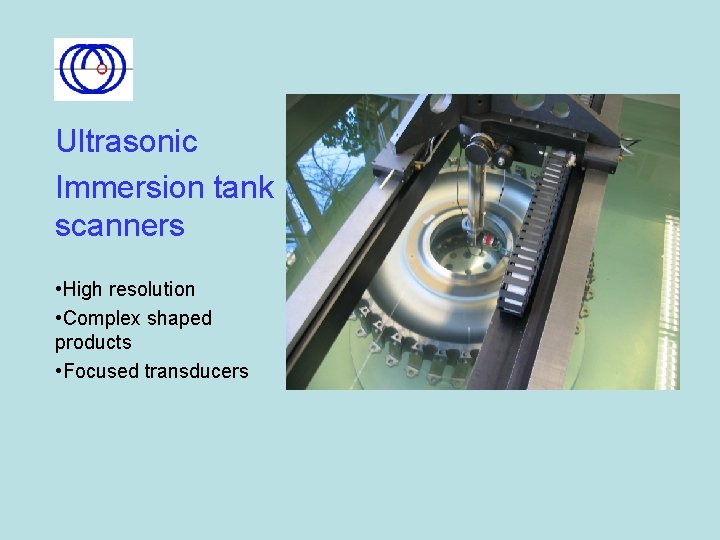
Ultrasonic Immersion tank scanners • High resolution • Complex shaped products • Focused transducers

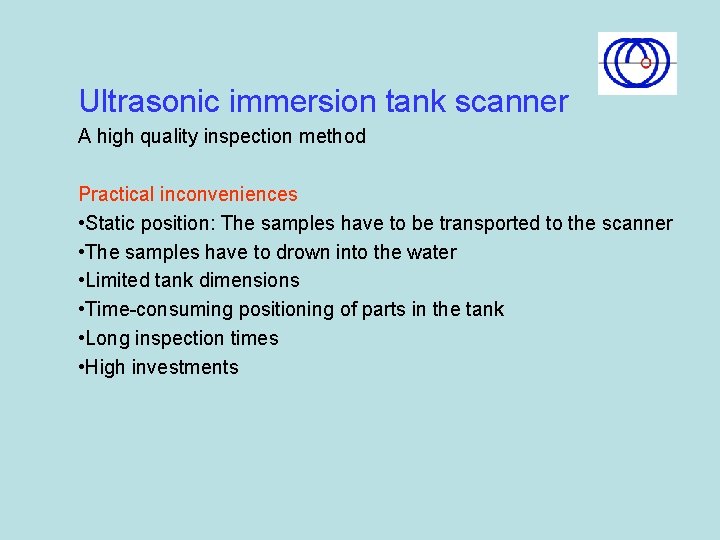
Ultrasonic immersion tank scanner A high quality inspection method Practical inconveniences • Static position: The samples have to be transported to the scanner • The samples have to drown into the water • Limited tank dimensions • Time-consuming positioning of parts in the tank • Long inspection times • High investments

Project with Daimler. Chrysler Project description: Design a portable ultrasonic scanner for spot weld inspection on location. Specifications: • Short inspection time • No immersion of the inspected parts • High resolution C-scan presentation • For plate thickness from 0, 5 mm • Handheld instrument

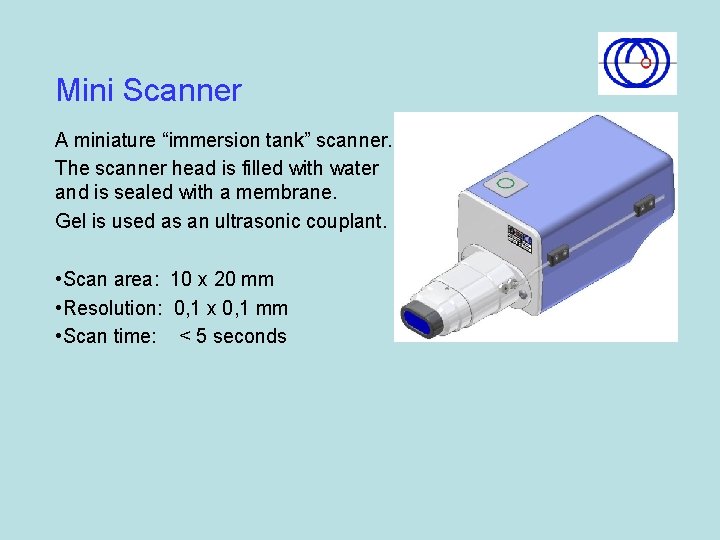
Mini Scanner A miniature “immersion tank” scanner. The scanner head is filled with water and is sealed with a membrane. Gel is used as an ultrasonic couplant. • Scan area: 10 x 20 mm • Resolution: 0, 1 x 0, 1 mm • Scan time: < 5 seconds

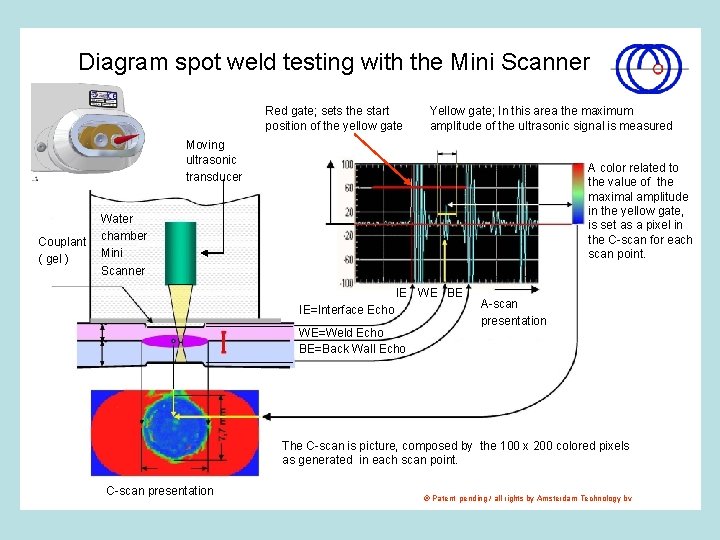
Diagram spot weld testing with the Mini Scanner Red gate; sets the start position of the yellow gate Yellow gate; In this area the maximum amplitude of the ultrasonic signal is measured Moving ultrasonic transducer Couplant ( gel ) A color related to the value of the maximal amplitude in the yellow gate, is set as a pixel in the C-scan for each scan point. Water chamber Mini Scanner IE WE BE IE=Interface Echo WE=Weld Echo BE=Back Wall Echo A-scan presentation The C-scan is picture, composed by the 100 x 200 colored pixels as generated in each scan point. C-scan presentation ® Patent pending / all rights by Amsterdam Technology bv

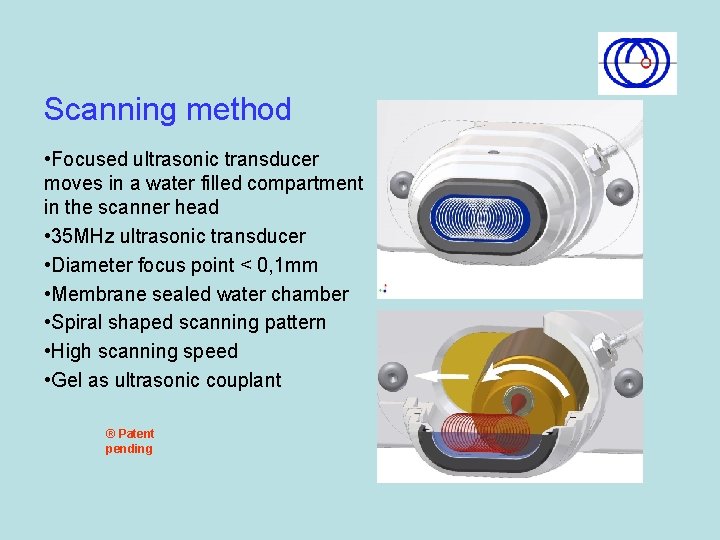
Scanning method • Focused ultrasonic transducer moves in a water filled compartment in the scanner head • 35 MHz ultrasonic transducer • Diameter focus point < 0, 1 mm • Membrane sealed water chamber • Spiral shaped scanning pattern • High scanning speed • Gel as ultrasonic couplant ® Patent pending

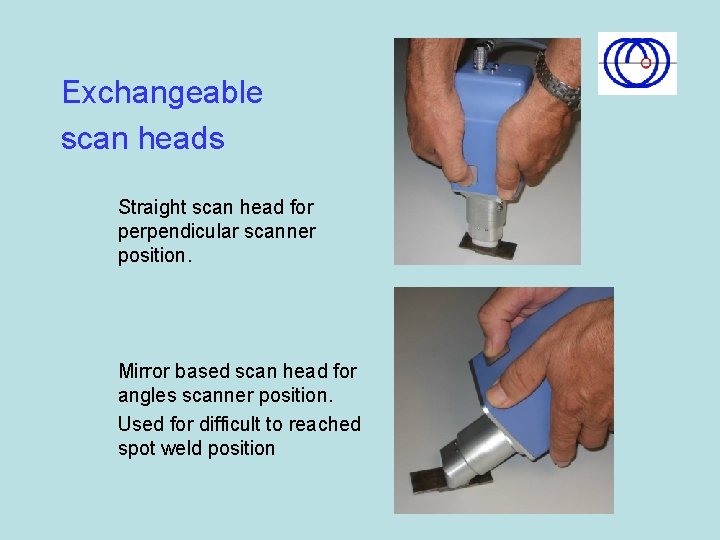
Exchangeable scan heads Straight scan head for perpendicular scanner position. Mirror based scan head for angles scanner position. Used for difficult to reached spot weld position

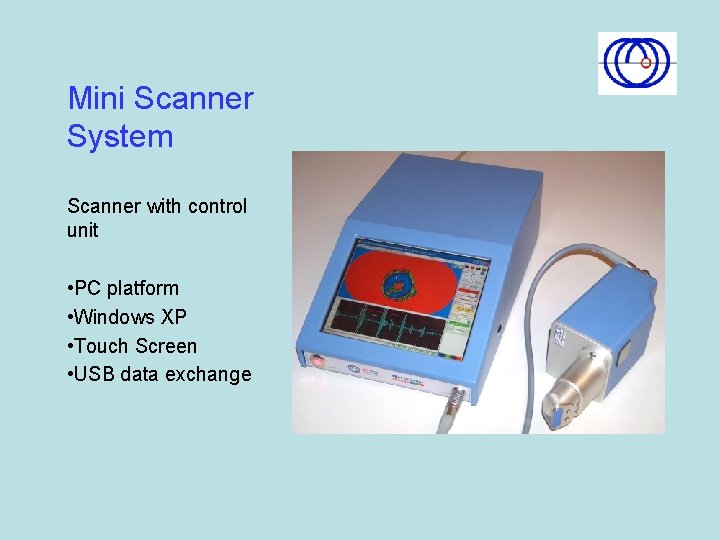
Mini Scanner System Scanner with control unit • PC platform • Windows XP • Touch Screen • USB data exchange

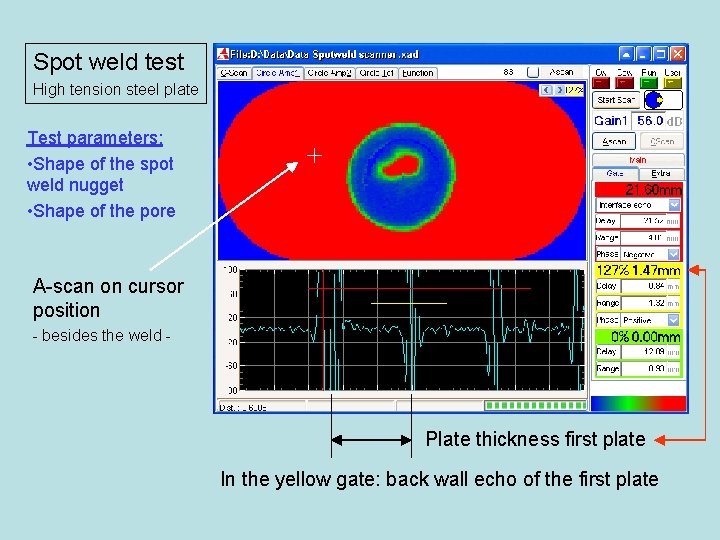
Spot weld test High tension steel plate Test parameters: • Shape of the spot weld nugget • Shape of the pore A-scan on cursor position - besides the weld - Plate thickness first plate In the yellow gate: back wall echo of the first plate

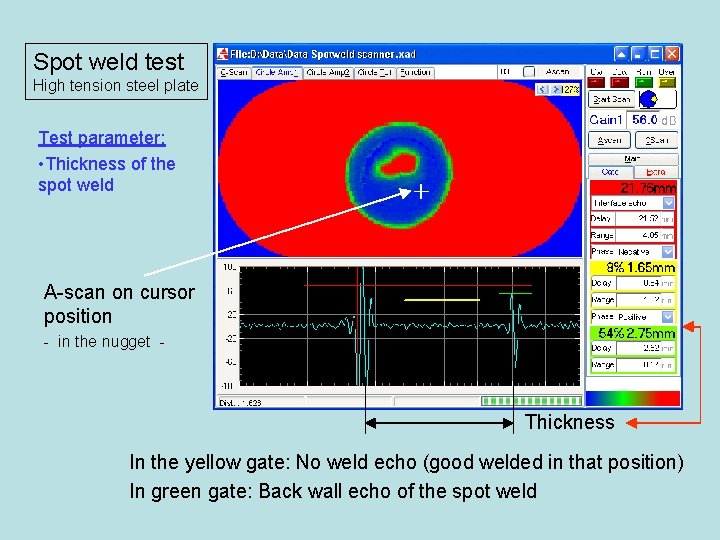
Spot weld test High tension steel plate Test parameter: • Thickness of the spot weld A-scan on cursor position - in the nugget - Thickness In the yellow gate: No weld echo (good welded in that position) In green gate: Back wall echo of the spot weld

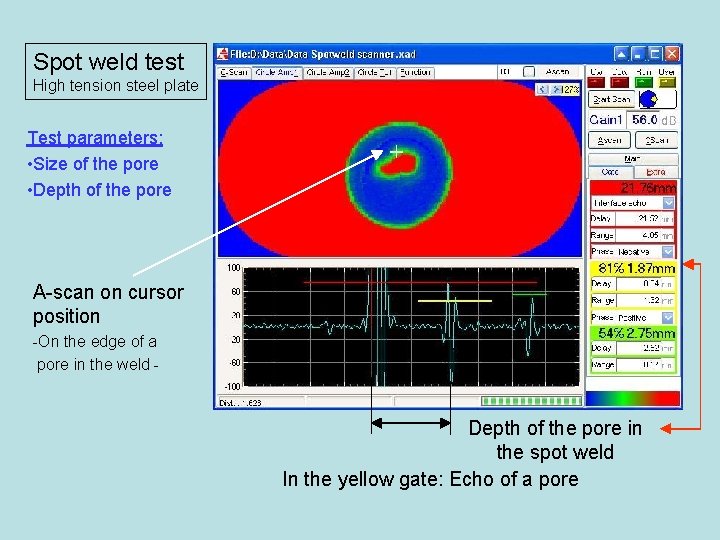
Spot weld test High tension steel plate Test parameters: • Size of the pore • Depth of the pore A-scan on cursor position -On the edge of a pore in the weld - Depth of the pore in the spot weld In the yellow gate: Echo of a pore

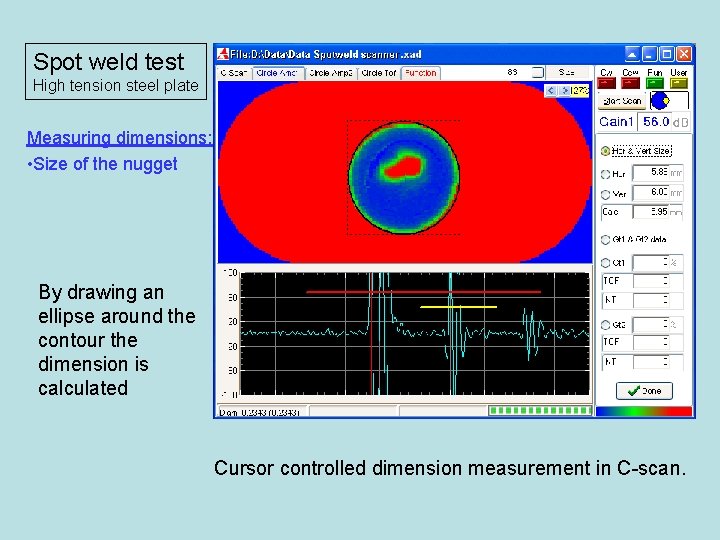
Spot weld test High tension steel plate Measuring dimensions: • Size of the nugget By drawing an ellipse around the contour the dimension is calculated Cursor controlled dimension measurement in C-scan.

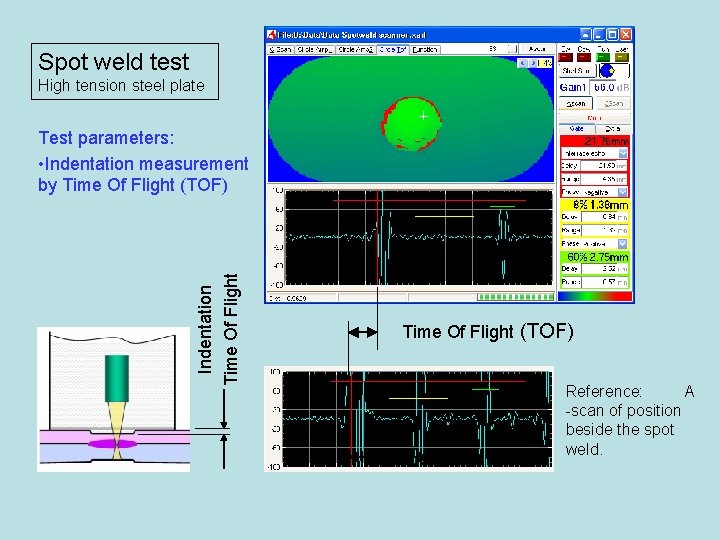
Spot weld test High tension steel plate Indentation Time Of Flight Test parameters: • Indentation measurement by Time Of Flight (TOF) Reference: A -scan of position beside the spot weld.

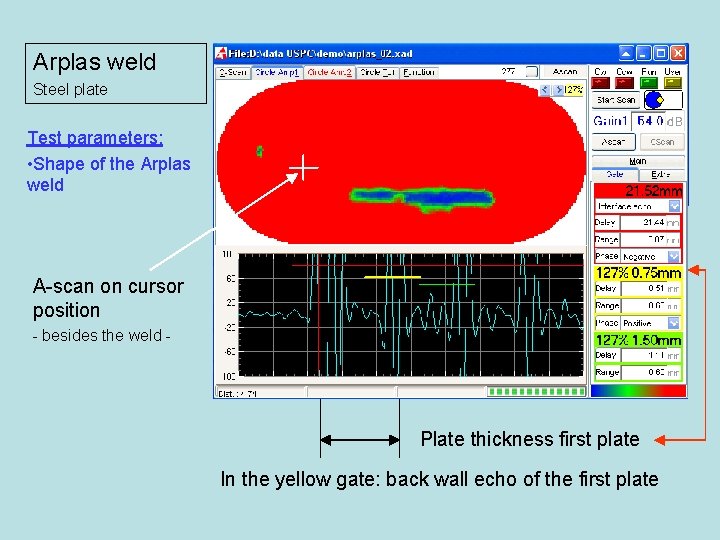
Arplas weld Steel plate Test parameters: • Shape of the Arplas weld A-scan on cursor position - besides the weld - Plate thickness first plate In the yellow gate: back wall echo of the first plate

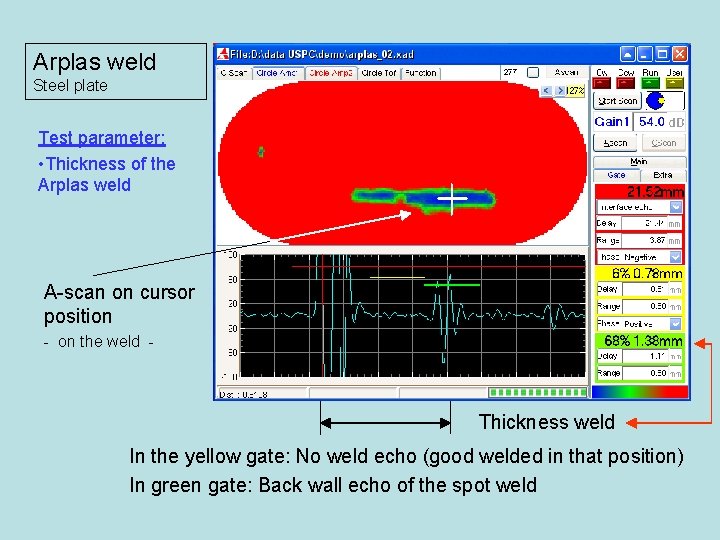
Arplas weld Steel plate Test parameter: • Thickness of the Arplas weld A-scan on cursor position - on the weld - Thickness weld In the yellow gate: No weld echo (good welded in that position) In green gate: Back wall echo of the spot weld

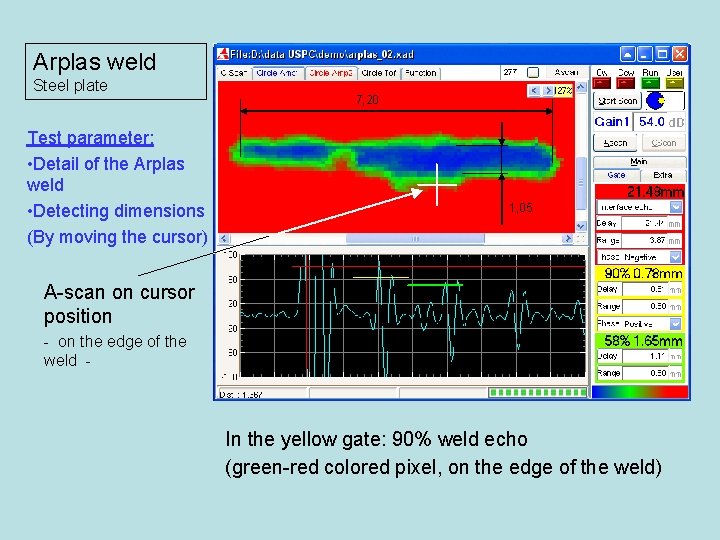
Arplas weld Steel plate Test parameter: • Detail of the Arplas weld • Detecting dimensions (By moving the cursor) 7, 20 1, 05 A-scan on cursor position - on the edge of the weld - In the yellow gate: 90% weld echo (green-red colored pixel, on the edge of the weld)

Software • Storage of A-scans (ultrasonic signal) for each scanning point • After event data evaluation possible by gate repositioning • Ultrasonic settings storable as pre-set for typical applications • Numerical wall thickness indication • Direct C-scan presentation • Two C-scan presentations with independent gate settings • No picture processing for C-scan presentation

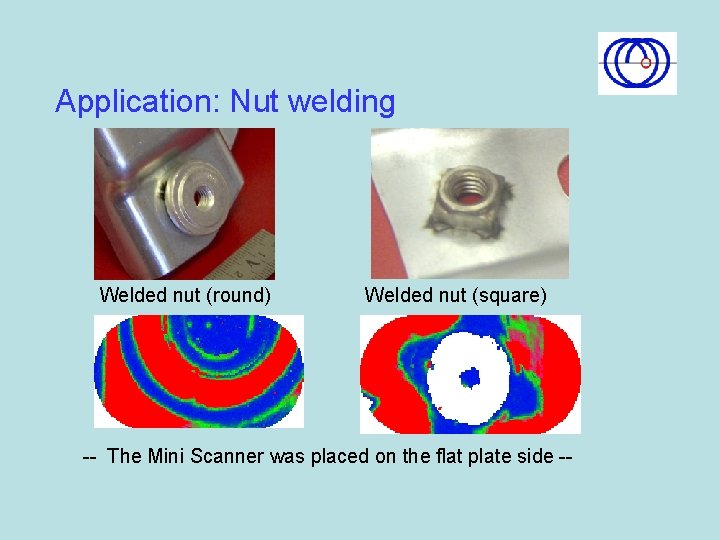
Application: Nut welding Welded nut (round) Welded nut (square) -- The Mini Scanner was placed on the flat plate side --

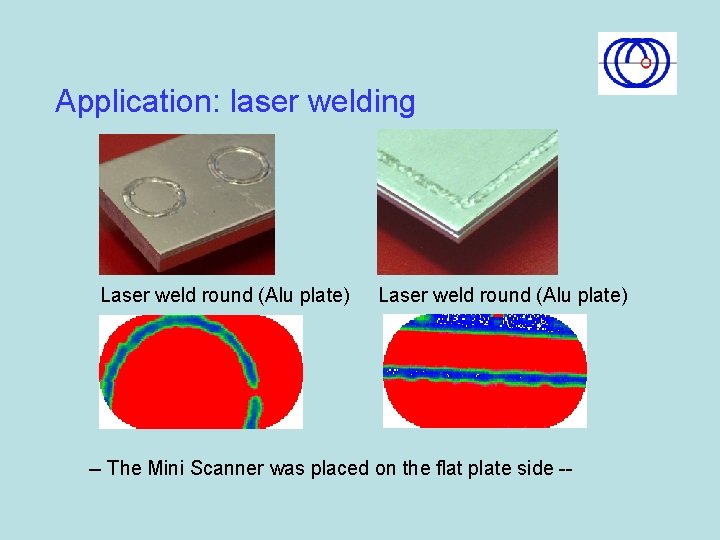
Application: laser welding Laser weld round (Alu plate) -- The Mini Scanner was placed on the flat plate side --

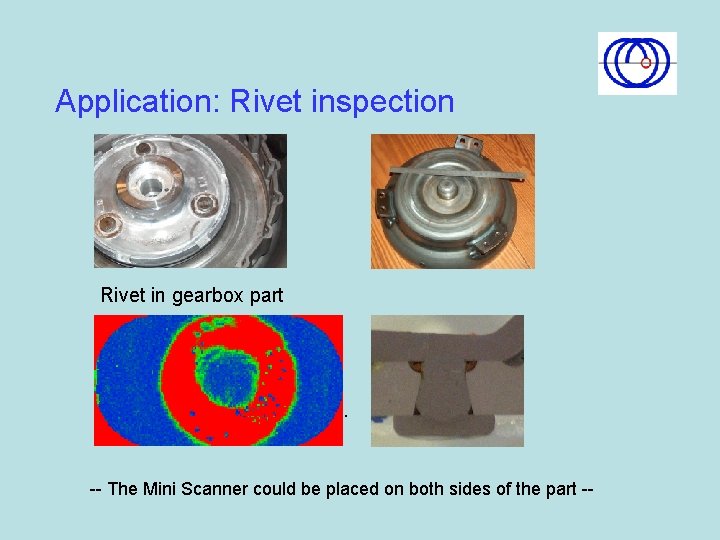
Application: Rivet inspection Rivet in gearbox part . -- The Mini Scanner could be placed on both sides of the part --

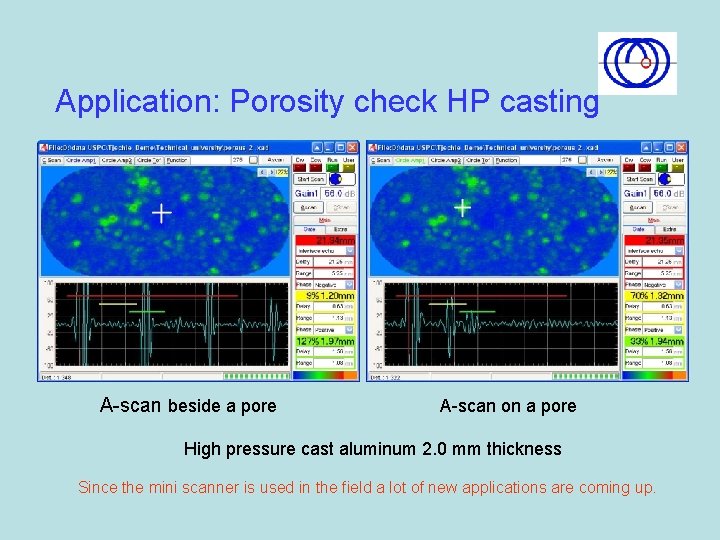
Application: Porosity check HP casting A-scan beside a pore A-scan on a pore High pressure cast aluminum 2. 0 mm thickness Since the mini scanner is used in the field a lot of new applications are coming up.

Inspection with the Mini Scanner Applications • Multiple plate weld inspection • Plate thickness 0, 5 -8 mm with standard transducers. • Weld between plates and massive parts Conditions: • Scan head has to be placed on a flat surface • Accessibility scanner to the product • Use of gel allowable

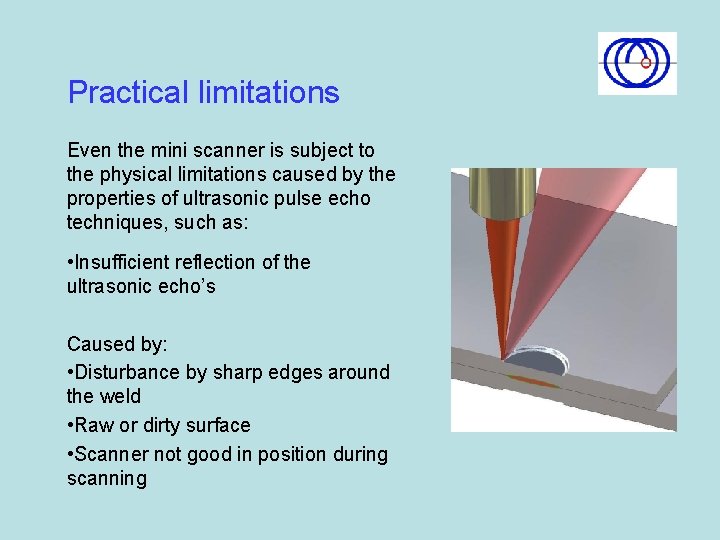
Practical limitations Even the mini scanner is subject to the physical limitations caused by the properties of ultrasonic pulse echo techniques, such as: • Insufficient reflection of the ultrasonic echo’s Caused by: • Disturbance by sharp edges around the weld • Raw or dirty surface • Scanner not good in position during scanning

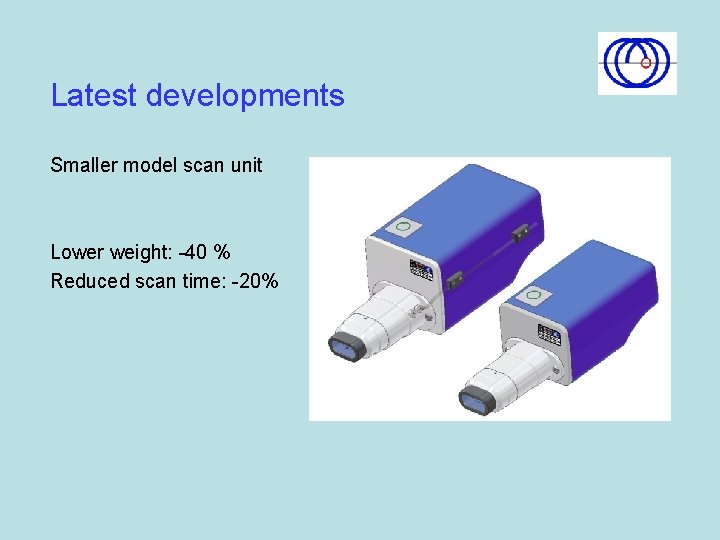
Latest developments Smaller model scan unit Lower weight: -40 % Reduced scan time: -20%

Concluding • Handy ultrasonic C-scan device for detailed weld inspection • Multiple ultrasonic signal evaluation modes • Storage of all ultrasonic data • Improved welding process control possible by inspection on location