Amazing Animals A project to make amazing animals


- Slides: 11

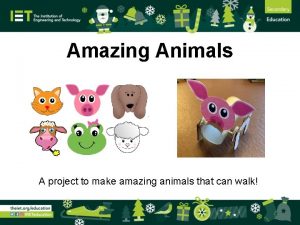
Amazing Animals A project to make amazing animals that can walk!

Step 1 – Choose your animal • • Choose a face Cut it out carefully with scissors • Or you could design your own animal face!

Step 2 – Attach the face • • • Gently squeeze the card tube Make one cut near the end, carefully with scissors Insert your animal face into the cut

Step 3 – Animal legs template • Carefully cut the cams and legs with scissors

Step 4 – Animal legs • • • Glue template to cardboard Carefully cut out with scissors Put an eraser or sticky tack behind the hole, then push a sharp pencil in to make a small hole

Step 5 – Leg holes • • Mark 2 points on each side of the card tube Use the holes from the legs as a template - push a pencil through each hole in the legs to mark the points Try to get the holes on each side in line with each other Put an eraser or sticky tack behind the hole, then push a sharp pencil in to make a small hole. Repeat this for all 4 holes.

Step 6 – Leg holes • • Carefully push a skewer or stick through the holes to make sure they line up Keep your fingers out of the way of the skewer!

Step 7 – Leg Cams • • • Glue cam templates to cardboard Carefully cut out with scissors Glue 2 cams together

Step 8 – Leg Cams • • • Put an eraser or sticky tack behind the hole, then push a sharp pencil in to make a small hole Repeat this to make two holes in each cam Connect the cams to the legs using split pins (through the hole nearest the edge) Split pin goes here Skewer goes here Linkage

Step 9 – Leg 1 • • • Cut the skewers to 7 cm Get an adult to help Use glue to attach the skewers to the cams LET THE GLUE DRY! Push through the holes in the card tube

Step 10 – Leg 2 • • • Use glue to attach the legs on the other side of the body to the skewers LET THE GLUE DRY! To see the legs work, roll the front skewer between 2 fingers
 Amazing animals project
 Amazing animals project
 Https//a-z-animals.com/animals
 Producers consumers and decomposers
 G h patel college of engineering and technology
 Carnivore
 Animals can make their own food
 Animals can make their own food
 Hand shadow puppets
 Animal whose ears we cannot see
 Make the lie big make it simple
 Steve angrisano go make a difference


