ALIGNMENT TESTS for the Two Beam Test Module

ALIGNMENT TESTS for the Two Beam Test Module On behalf of CLIC pre-alignment team Mathieu Duquenne Marek Gutt-Mostowy Juha Kemppinen Vivien Rude Mateusz Sosin With the support of SU mechanical & electronics workshops 29/04/2015
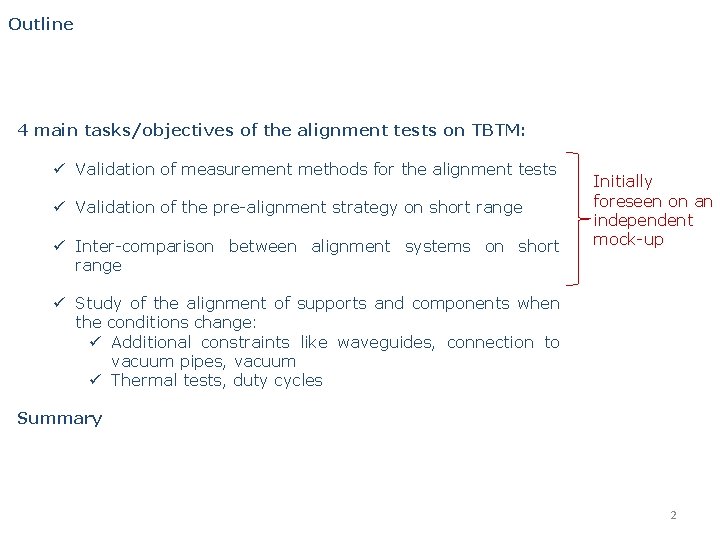
Outline 4 main tasks/objectives of the alignment tests on TBTM: ü Validation of measurement methods for the alignment tests ü Validation of the pre-alignment strategy on short range ü Inter-comparison between alignment systems on short range Initially foreseen on an independent mock-up ü Study of the alignment of supports and components when the conditions change: ü Additional constraints like waveguides, connection to vacuum pipes, vacuum ü Thermal tests, duty cycles Summary 2
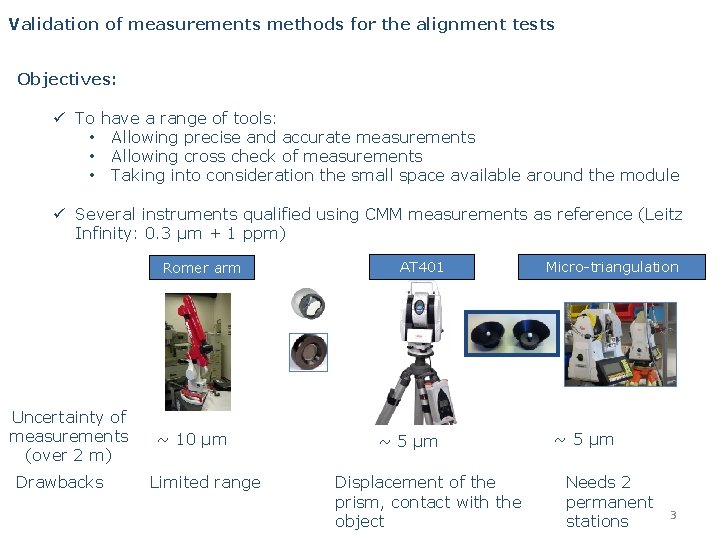
Validation of measurements methods for the alignment tests Objectives: ü To • • • have a range of tools: Allowing precise and accurate measurements Allowing cross check of measurements Taking into consideration the small space available around the module ü Several instruments qualified using CMM measurements as reference (Leitz Infinity: 0. 3 μm + 1 ppm) Romer arm Uncertainty of measurements (over 2 m) Drawbacks ~ 10 µm Limited range AT 401 ~ 5 µm Displacement of the prism, contact with the object Micro-triangulation ~ 5 µm Needs 2 permanent stations 3
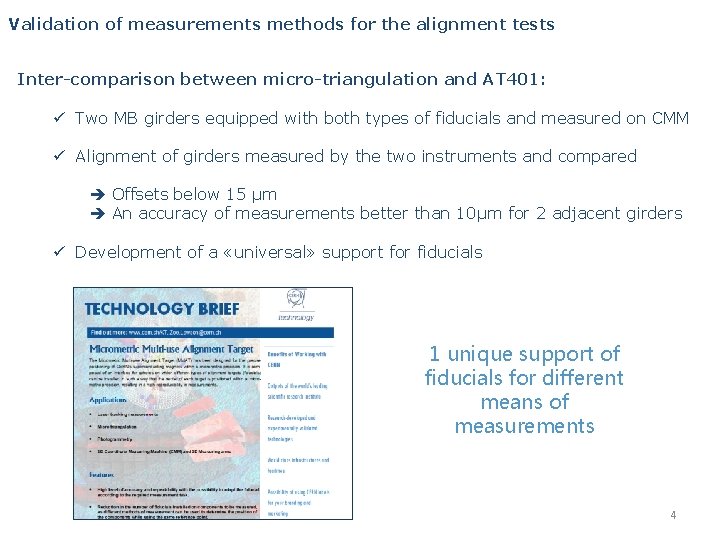
Validation of measurements methods for the alignment tests Inter-comparison between micro-triangulation and AT 401: ü Two MB girders equipped with both types of fiducials and measured on CMM ü Alignment of girders measured by the two instruments and compared Offsets below 15 µm An accuracy of measurements better than 10μm for 2 adjacent girders ü Development of a «universal» support for fiducials 1 unique support of fiducials for different means of measurements 4
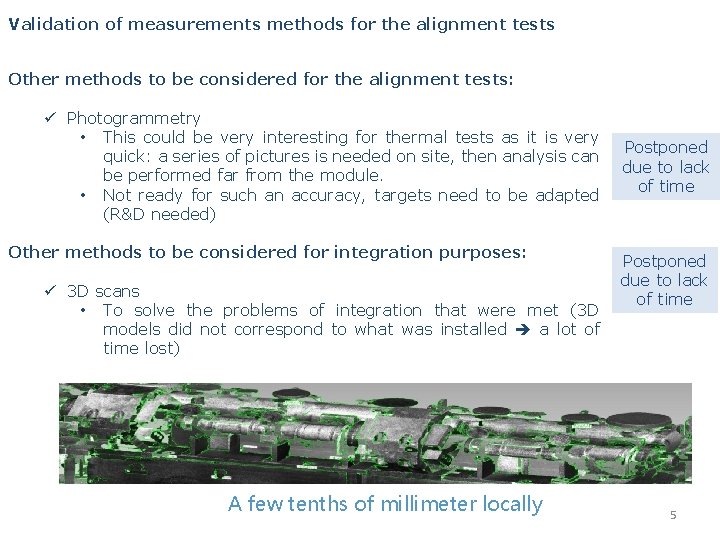
Validation of measurements methods for the alignment tests Other methods to be considered for the alignment tests: ü Photogrammetry • This could be very interesting for thermal tests as it is very quick: a series of pictures is needed on site, then analysis can be performed far from the module. • Not ready for such an accuracy, targets need to be adapted (R&D needed) Other methods to be considered for integration purposes: ü 3 D scans • To solve the problems of integration that were met (3 D models did not correspond to what was installed a lot of time lost) A few tenths of millimeter locally Postponed due to lack of time 5

Validation of the pre-alignment strategy on short range Strategy of pre-alignment: Alignment of components on girder Fiducialisation 6 Pre-alignment in tunnel

Validation of the pre-alignment strategy on short range Budget of alignment errors ü Requirements: The zero of each component will be included in a cylinder with a radius of a few microns: 14 µm (RF structures & MB quad BPM) 17 µm (MB quad) 20 µm (DB quad) ü Budget of error: Steps AS MB quad Achieved Zero of components to fiducials 5 µm 10 µm ? ? Fiducials to sensor interface on support 5 µm Yes Sensor measurement w. r. t straight reference 5 µm Yes Stability knowledge of the straight reference 10 µm Yes, on short range Total error budget 14 µm 17 µm The combination of the 3 first steps is the object of PACMAN 7
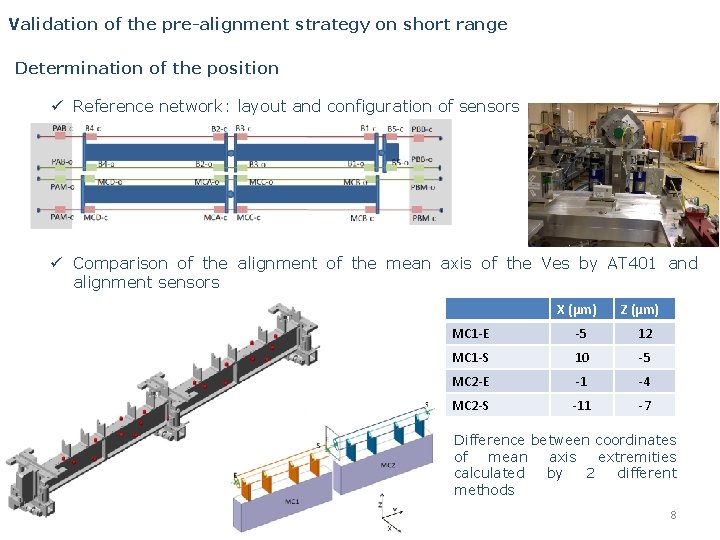
Validation of the pre-alignment strategy on short range Determination of the position ü Reference network: layout and configuration of sensors ü Comparison of the alignment of the mean axis of the Ves by AT 401 and alignment sensors X (µm) Z (µm) MC 1 -E -5 12 MC 1 -S 10 -5 MC 2 -E -1 -4 MC 2 -S -11 -7 Difference between coordinates of mean axis extremities calculated by 2 different methods 8
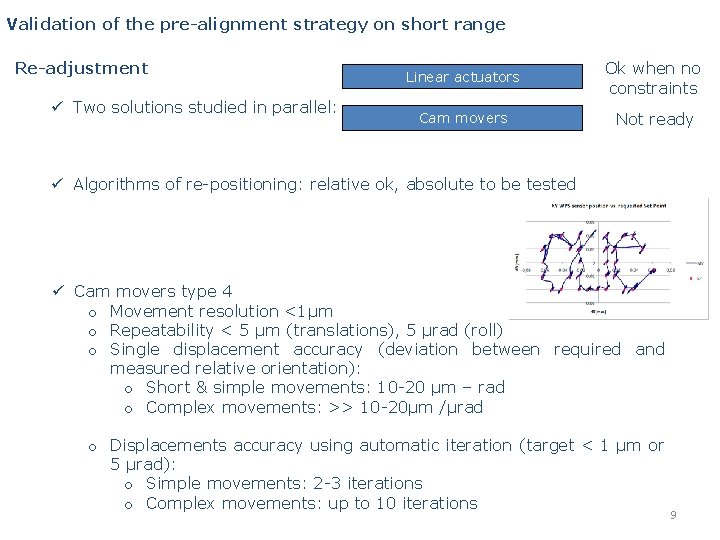
Validation of the pre-alignment strategy on short range Re-adjustment ü Two solutions studied in parallel: Linear actuators Ok when no constraints Cam movers Not ready ü Algorithms of re-positioning: relative ok, absolute to be tested ü Cam movers type 4 o Movement resolution <1μm o Repeatability < 5 μm (translations), 5 μrad (roll) o Single displacement accuracy (deviation between required and measured relative orientation): o Short & simple movements: 10 -20 μm – rad o Complex movements: >> 10 -20μm /μrad o Displacements accuracy using automatic iteration (target < 1 μm or 5 μrad): o Simple movements: 2 -3 iterations o Complex movements: up to 10 iterations 9
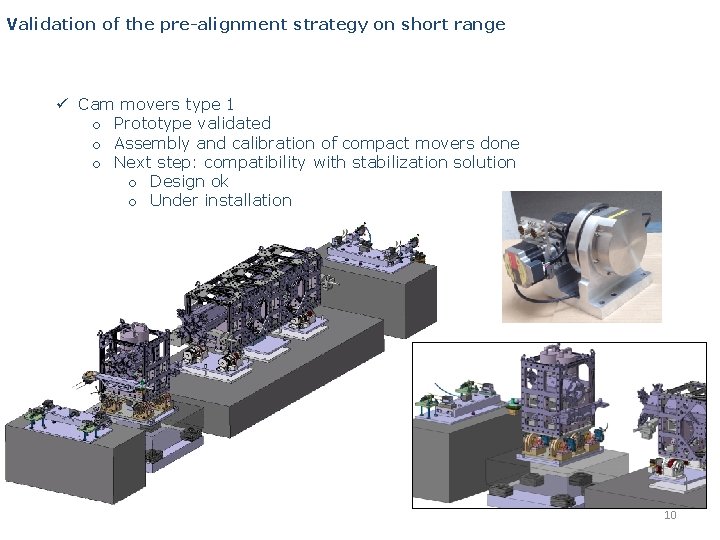
Validation of the pre-alignment strategy on short range ü Cam movers type 1 o Prototype validated o Assembly and calibration of compact movers done o Next step: compatibility with stabilization solution o Design ok o Under installation 10
Validation of the pre-alignment strategy on short range Case of the supports: ü Girder: • Straightness of the V-shaped supports: § Boostec: radius of the cylinder containing the center of the V-shaped support : 6μm and 4μm § Micro-Contrôle: radius of the cylinder containing the center of the Vshaped support: 7. 5 μm and 5. 5 μm ü Girder + cradle: • Total length above 2 m • Measurements out of the range of the CMM: accuracy ~ 15 µm, some faults detected. • Different types of fiducials implied different types of measuring devices sometimes outside the range of measurement. • Position of the cradle wr. t. girder not stable along time ü Articulation point: • Function ok • Stability along time ? ? • Shocks, loads, constraints • T° 11
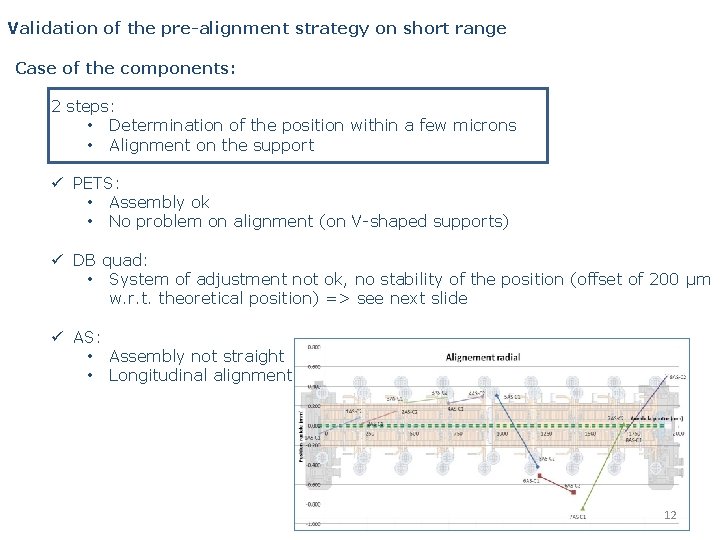
Validation of the pre-alignment strategy on short range Case of the components: 2 steps: • Determination of the position within a few microns • Alignment on the support ü PETS: • Assembly ok • No problem on alignment (on V-shaped supports) ü DB quad: • System of adjustment not ok, no stability of the position (offset of 200 μm w. r. t. theoretical position) => see next slide ü AS: • Assembly not straight • Longitudinal alignment to be improved 12
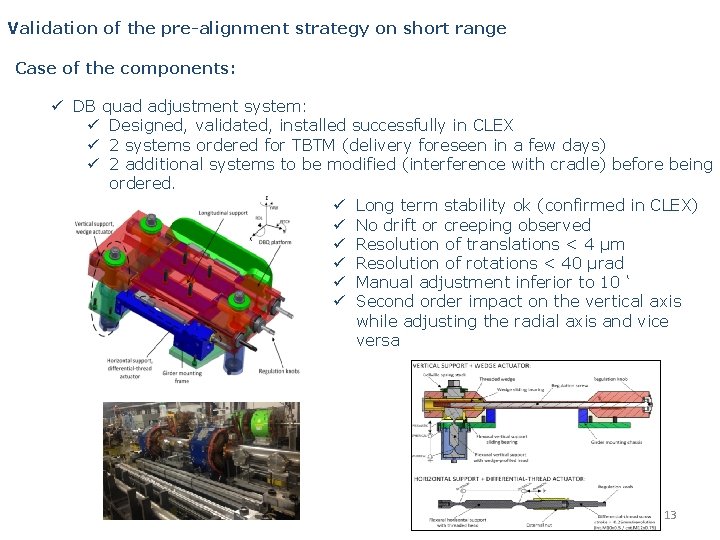
Validation of the pre-alignment strategy on short range Case of the components: ü DB quad adjustment system: ü Designed, validated, installed successfully in CLEX ü 2 systems ordered for TBTM (delivery foreseen in a few days) ü 2 additional systems to be modified (interference with cradle) before being ordered. ü Long term stability ok (confirmed in CLEX) ü No drift or creeping observed ü Resolution of translations < 4 µm ü Resolution of rotations < 40 µrad ü Manual adjustment inferior to 10 ‘ ü Second order impact on the vertical axis while adjusting the radial axis and vice versa 13
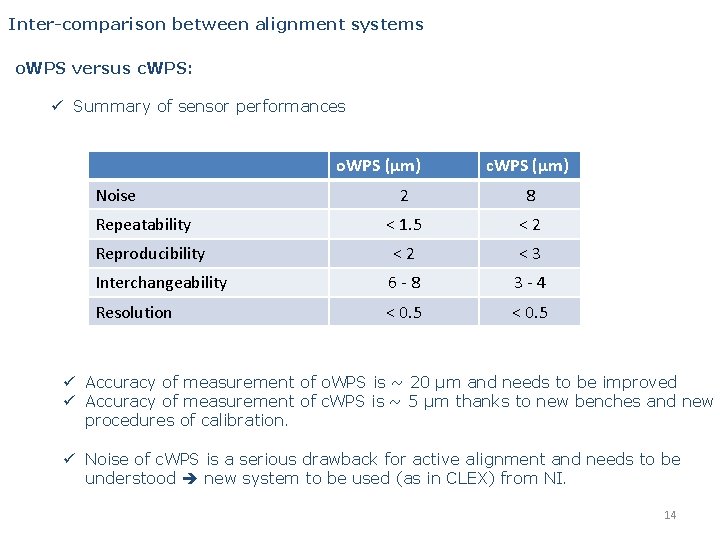
Inter-comparison between alignment systems o. WPS versus c. WPS: ü Summary of sensor performances o. WPS (μm) Noise c. WPS (μm) 2 8 < 1. 5 <2 Reproducibility <2 <3 Interchangeability 6 -8 3 -4 Resolution < 0. 5 Repeatability ü Accuracy of measurement of o. WPS is ~ 20 µm and needs to be improved ü Accuracy of measurement of c. WPS is ~ 5 µm thanks to new benches and new procedures of calibration. ü Noise of c. WPS is a serious drawback for active alignment and needs to be understood new system to be used (as in CLEX) from NI. 14
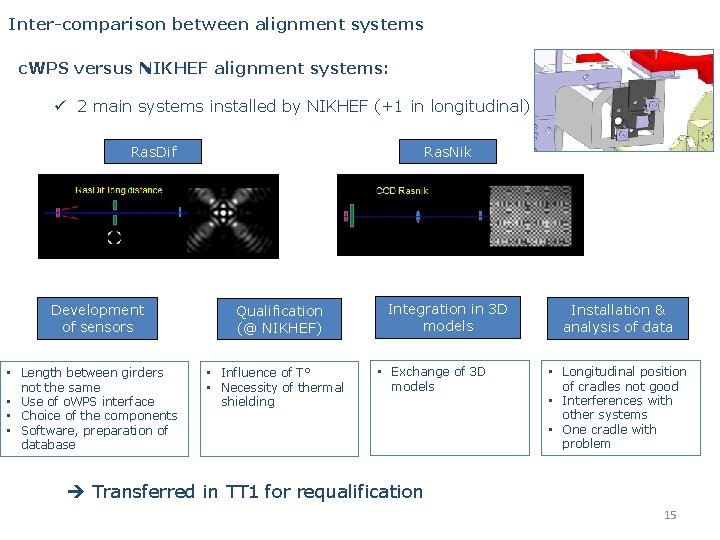
Inter-comparison between alignment systems c. WPS versus NIKHEF alignment systems: ü 2 main systems installed by NIKHEF (+1 in longitudinal) Ras. Nik Ras. Dif Development of sensors • Length between girders not the same • Use of o. WPS interface • Choice of the components • Software, preparation of database Qualification (@ NIKHEF) • Influence of T° • Necessity of thermal shielding Integration in 3 D models • Exchange of 3 D models Installation & analysis of data • Longitudinal position of cradles not good • Interferences with other systems • One cradle with problem Transferred in TT 1 for requalification 15
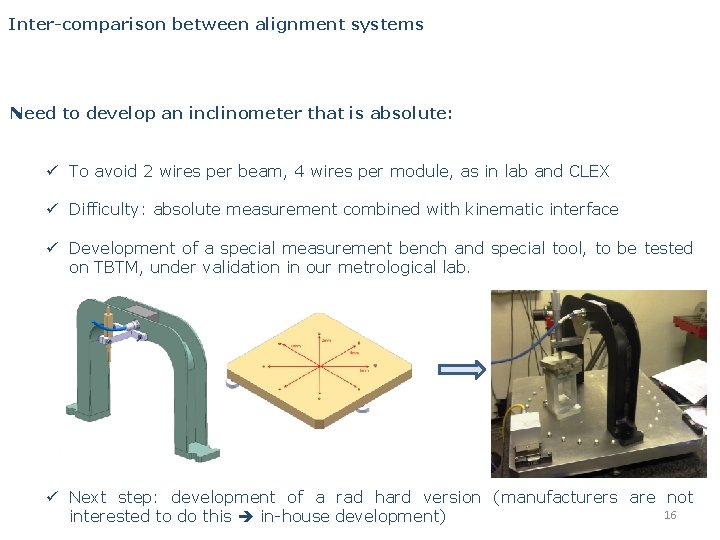
Inter-comparison between alignment systems Need to develop an inclinometer that is absolute: ü To avoid 2 wires per beam, 4 wires per module, as in lab and CLEX ü Difficulty: absolute measurement combined with kinematic interface ü Development of a special measurement bench and special tool, to be tested on TBTM, under validation in our metrological lab. ü Next step: development of a rad hard version (manufacturers are not 16 interested to do this in-house development)
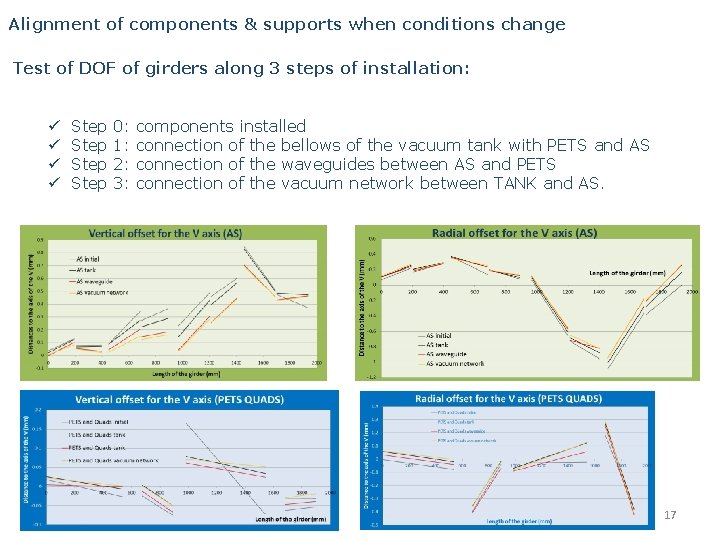
Alignment of components & supports when conditions change Test of DOF of girders along 3 steps of installation: ü ü Step 0: 1: 2: 3: components installed connection of the bellows of the vacuum tank with PETS and AS connection of the waveguides between AS and PETS connection of the vacuum network between TANK and AS. 17
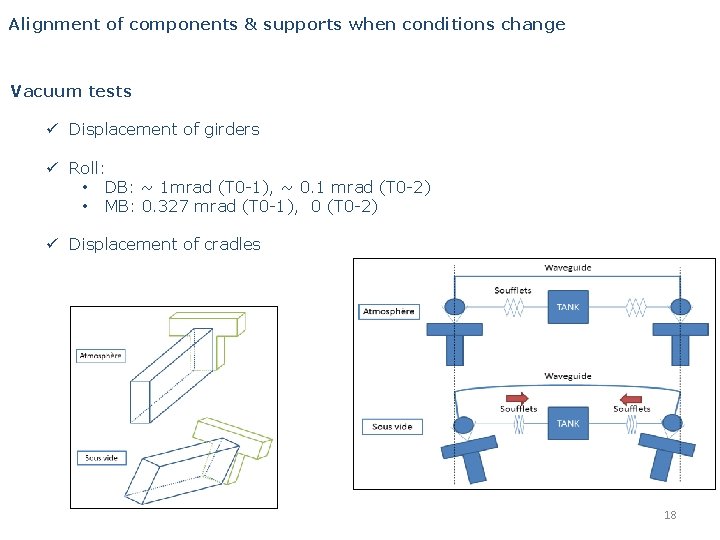
Alignment of components & supports when conditions change Vacuum tests ü Displacement of girders ü Roll: • DB: ~ 1 mrad (T 0 -1), ~ 0. 1 mrad (T 0 -2) • MB: 0. 327 mrad (T 0 -1), 0 (T 0 -2) ü Displacement of cradles 18
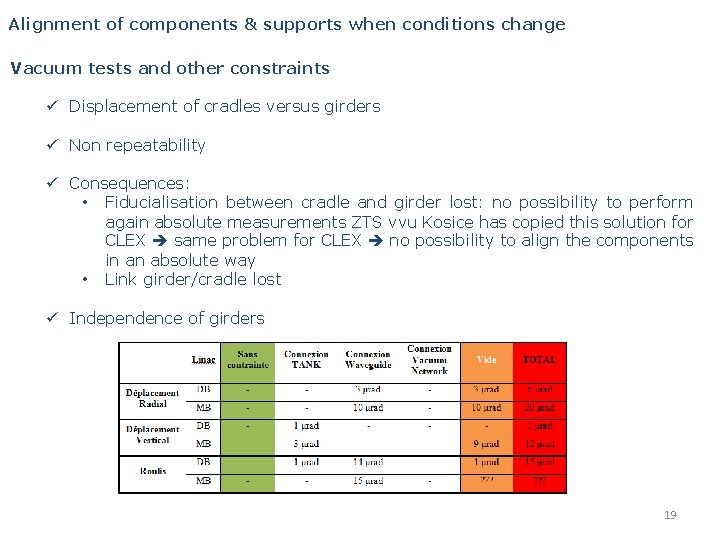
Alignment of components & supports when conditions change Vacuum tests and other constraints ü Displacement of cradles versus girders ü Non repeatability ü Consequences: • Fiducialisation between cradle and girder lost: no possibility to perform again absolute measurements ZTS vvu Kosice has copied this solution for CLEX same problem for CLEX no possibility to align the components in an absolute way • Link girder/cradle lost ü Independence of girders 19
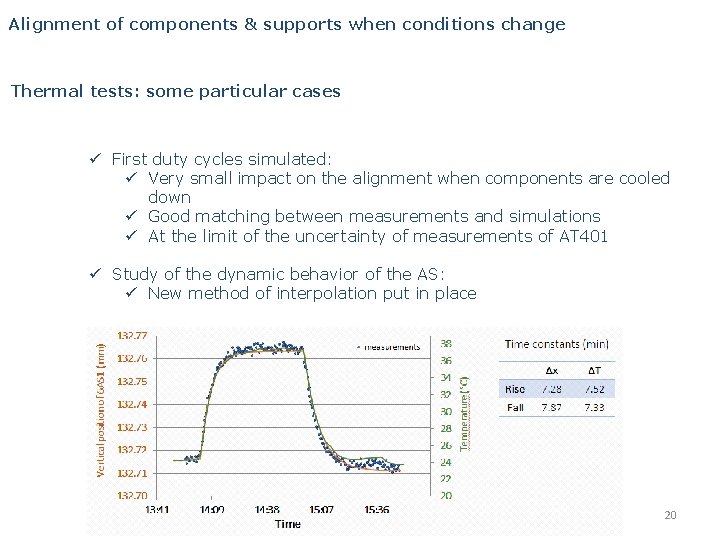
Alignment of components & supports when conditions change Thermal tests: some particular cases ü First duty cycles simulated: ü Very small impact on the alignment when components are cooled down ü Good matching between measurements and simulations ü At the limit of the uncertainty of measurements of AT 401 ü Study of the dynamic behavior of the AS: ü New method of interpolation put in place 20
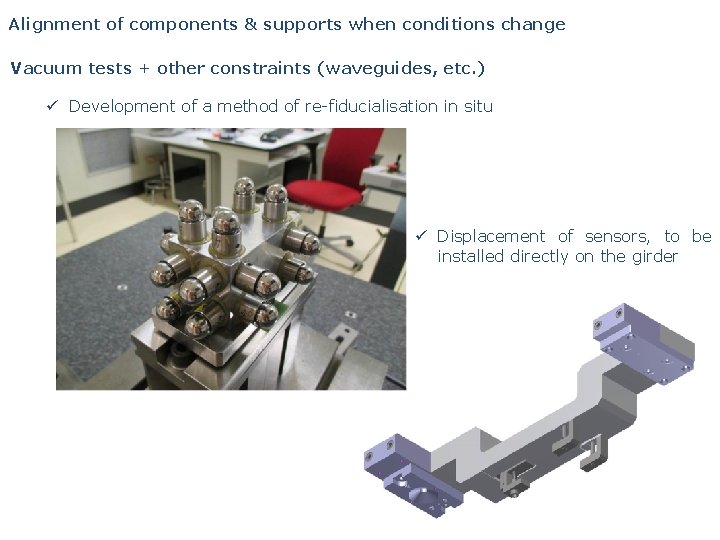
Alignment of components & supports when conditions change Vacuum tests + other constraints (waveguides, etc. ) ü Development of a method of re-fiducialisation in situ ü Displacement of sensors, to be installed directly on the girder 21
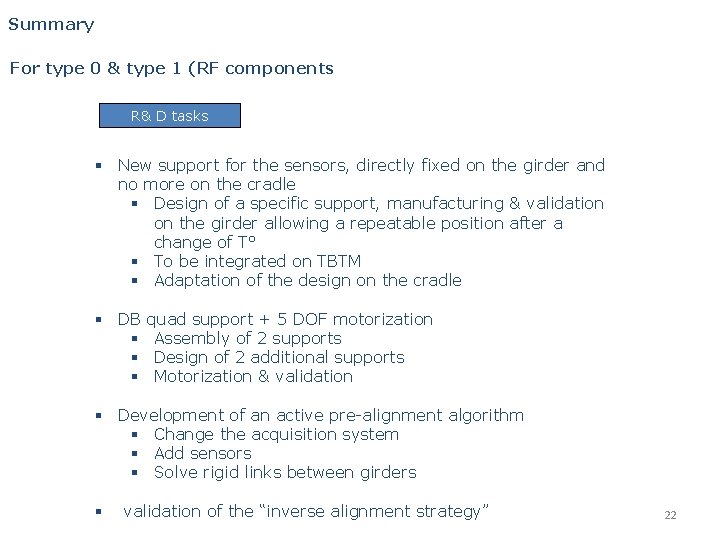
Summary For type 0 & type 1 (RF components R& D tasks § New support for the sensors, directly fixed on the girder and no more on the cradle § Design of a specific support, manufacturing & validation on the girder allowing a repeatable position after a change of T° § To be integrated on TBTM § Adaptation of the design on the cradle § DB § § § quad support + 5 DOF motorization Assembly of 2 supports Design of 2 additional supports Motorization & validation § Development of an active pre-alignment algorithm § Change the acquisition system § Add sensors § Solve rigid links between girders § validation of the “inverse alignment strategy” 22
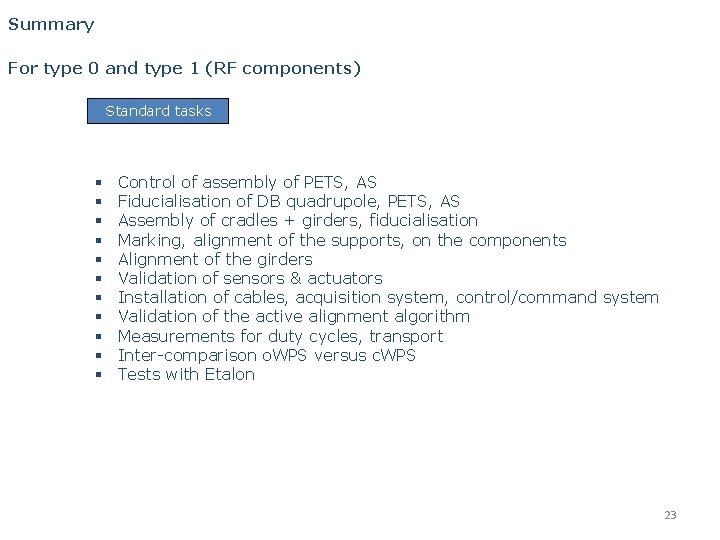
Summary For type 0 and type 1 (RF components) Standard tasks § § § Control of assembly of PETS, AS Fiducialisation of DB quadrupole, PETS, AS Assembly of cradles + girders, fiducialisation Marking, alignment of the supports, on the components Alignment of the girders Validation of sensors & actuators Installation of cables, acquisition system, control/command system Validation of the active alignment algorithm Measurements for duty cycles, transport Inter-comparison o. WPS versus c. WPS Tests with Etalon 23
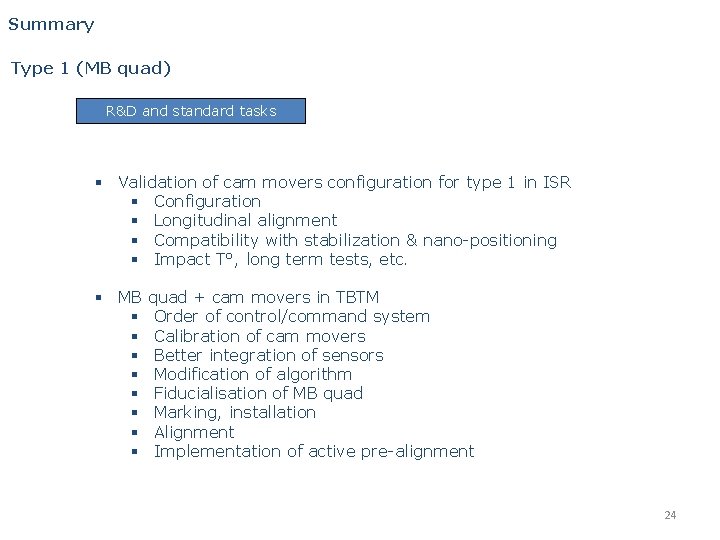
Summary Type 1 (MB quad) R&D and standard tasks § Validation of cam movers configuration for type 1 in ISR § Configuration § Longitudinal alignment § Compatibility with stabilization & nano-positioning § Impact T°, long term tests, etc. § MB § § § § quad + cam movers in TBTM Order of control/command system Calibration of cam movers Better integration of sensors Modification of algorithm Fiducialisation of MB quad Marking, installation Alignment Implementation of active pre-alignment 24
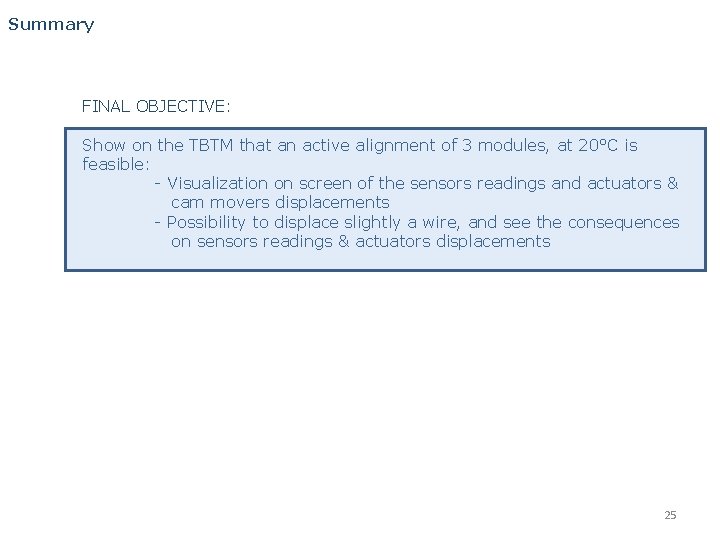
Summary FINAL OBJECTIVE: Show on the TBTM that an active alignment of 3 modules, at 20°C is feasible: - Visualization on screen of the sensors readings and actuators & cam movers displacements - Possibility to displace slightly a wire, and see the consequences on sensors readings & actuators displacements 25
- Slides: 25