Alignment Plan for the LCLS Undulator Catherine Le

- Slides: 20

Alignment Plan for the LCLS Undulator Catherine Le. Cocq, SLAC September 27, 2006 LCLS Overview Undulator Component Alignment Tolerances Support Undulator Hall Construction Plan Assembly of Girders Plan Tunnel Installation Sequence Alignment Possibilities after Installation 09 -27 -06 Alignment Plan for the LCLS Undulator IWAA 2006, 1 Catherine Le. Cocq, SLAC lecocq@slac. stanford. edu

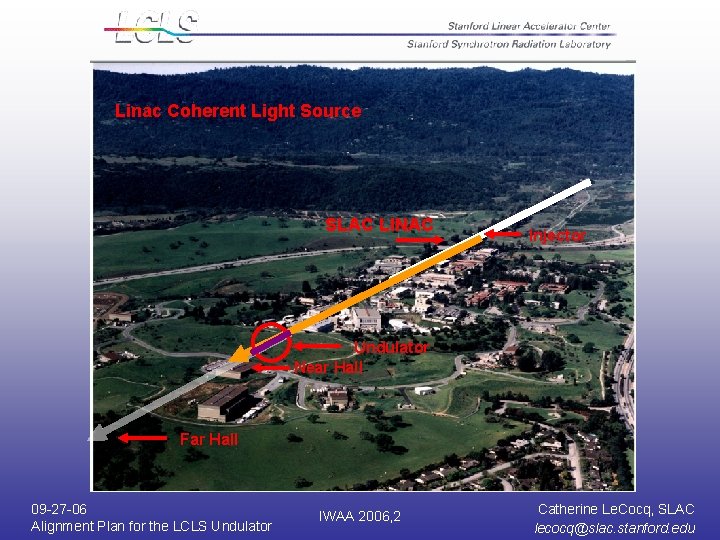
Linac Coherent Light Source SLAC LINAC Injector Undulator Near Hall Far Hall 09 -27 -06 Alignment Plan for the LCLS Undulator IWAA 2006, 2 Catherine Le. Cocq, SLAC lecocq@slac. stanford. edu

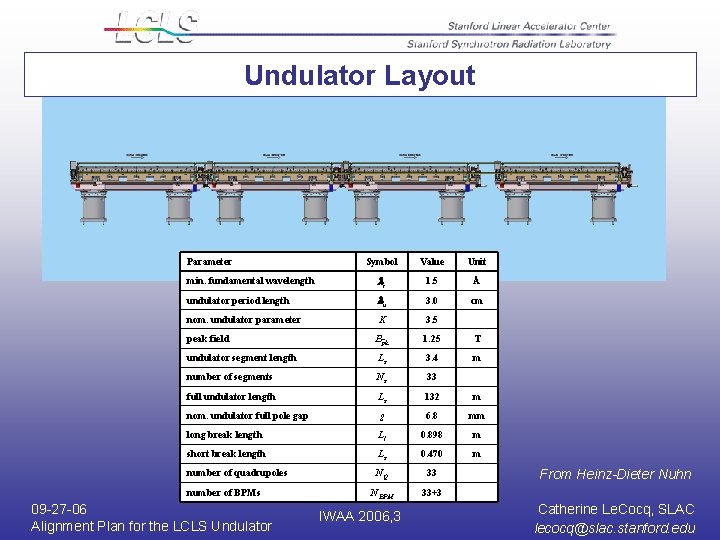
Undulator Layout Parameter Symbol Value Unit min. fundamental wavelength lr 1. 5 Å undulator period length lu 3. 0 cm nom. undulator parameter K 3. 5 peak field B pk 1. 25 T undulator segment length Ls 3. 4 m number of segments Ns 33 full undulator length Ls 132 m nom. undulator full pole gap g 6. 8 mm long break length Ll 0. 898 m short break length Ls 0. 470 m number of quadrupoles NQ 33 NBPM 33+3 number of BPMs 09 -27 -06 Alignment Plan for the LCLS Undulator IWAA 2006, 3 From Heinz-Dieter Nuhn Catherine Le. Cocq, SLAC lecocq@slac. stanford. edu

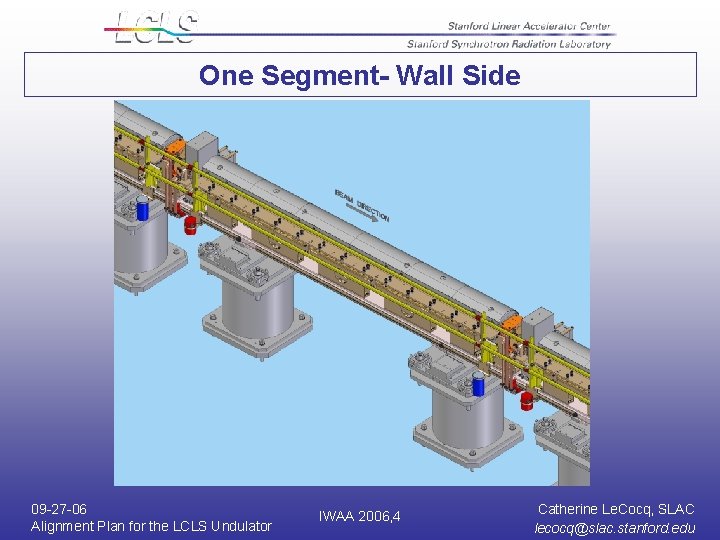
One Segment- Wall Side 09 -27 -06 Alignment Plan for the LCLS Undulator IWAA 2006, 4 Catherine Le. Cocq, SLAC lecocq@slac. stanford. edu

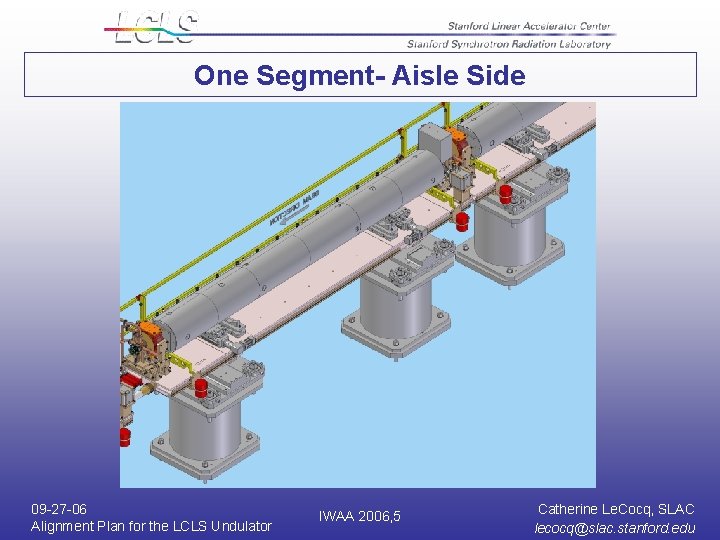
One Segment- Aisle Side 09 -27 -06 Alignment Plan for the LCLS Undulator IWAA 2006, 5 Catherine Le. Cocq, SLAC lecocq@slac. stanford. edu

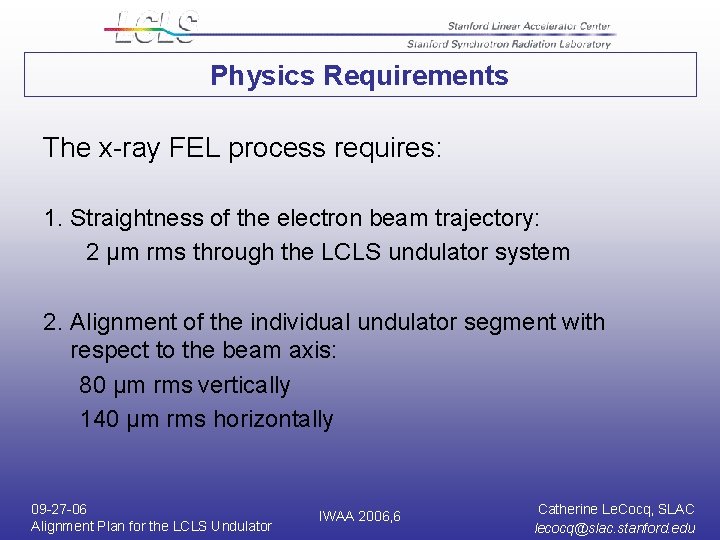
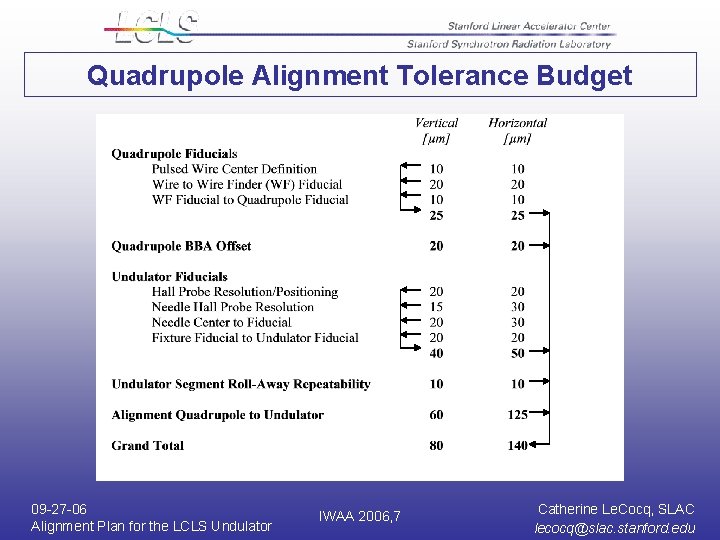
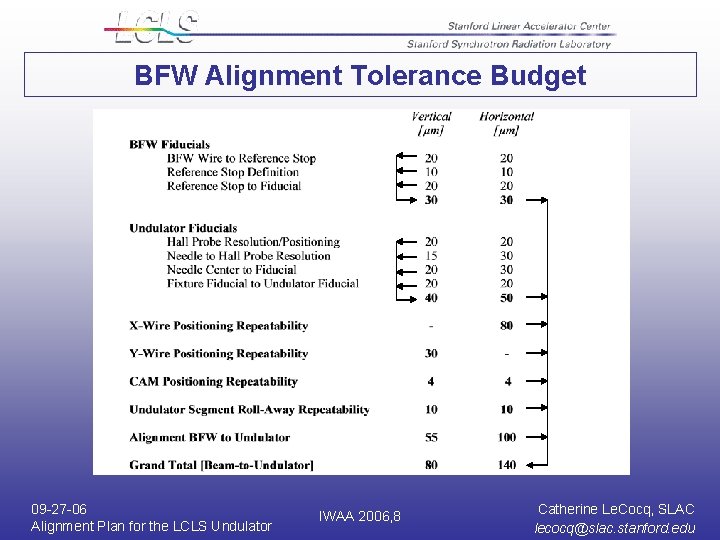
Physics Requirements The x-ray FEL process requires: 1. Straightness of the electron beam trajectory: 2 μm rms through the LCLS undulator system 2. Alignment of the individual undulator segment with respect to the beam axis: 80 μm rms vertically 140 μm rms horizontally 09 -27 -06 Alignment Plan for the LCLS Undulator IWAA 2006, 6 Catherine Le. Cocq, SLAC lecocq@slac. stanford. edu

Quadrupole Alignment Tolerance Budget 09 -27 -06 Alignment Plan for the LCLS Undulator IWAA 2006, 7 Catherine Le. Cocq, SLAC lecocq@slac. stanford. edu

BFW Alignment Tolerance Budget 09 -27 -06 Alignment Plan for the LCLS Undulator IWAA 2006, 8 Catherine Le. Cocq, SLAC lecocq@slac. stanford. edu

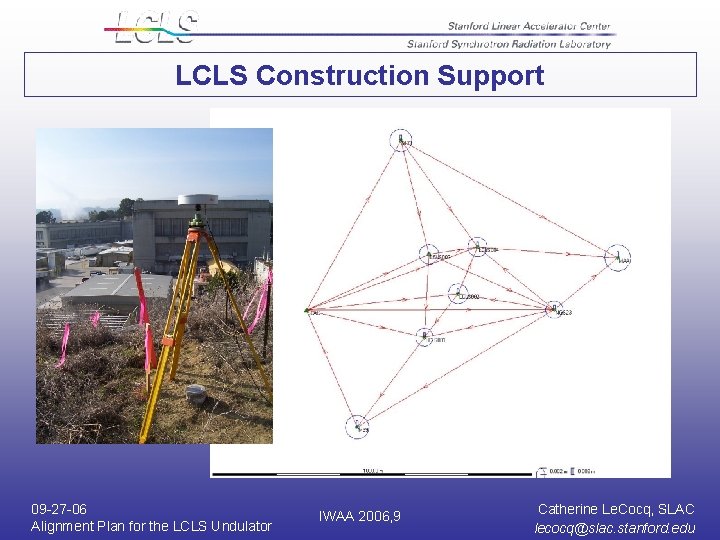
LCLS Construction Support 09 -27 -06 Alignment Plan for the LCLS Undulator IWAA 2006, 9 Catherine Le. Cocq, SLAC lecocq@slac. stanford. edu

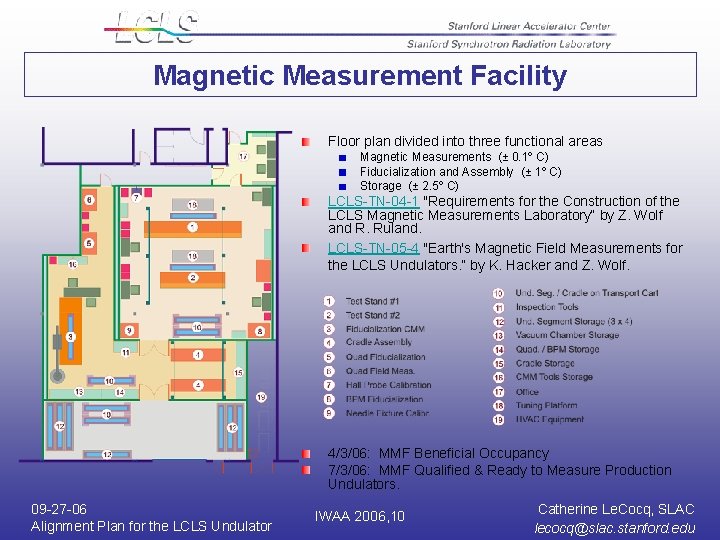
Magnetic Measurement Facility Floor plan divided into three functional areas Magnetic Measurements (± 0. 1º C) Fiducialization and Assembly (± 1º C) Storage (± 2. 5º C) LCLS-TN-04 -1 "Requirements for the Construction of the LCLS Magnetic Measurements Laboratory“ by Z. Wolf and R. Ruland. LCLS-TN-05 -4 "Earth's Magnetic Field Measurements for the LCLS Undulators. “ by K. Hacker and Z. Wolf. 4/3/06: MMF Beneficial Occupancy 7/3/06: MMF Qualified & Ready to Measure Production Undulators. 09 -27 -06 Alignment Plan for the LCLS Undulator IWAA 2006, 10 Catherine Le. Cocq, SLAC lecocq@slac. stanford. edu

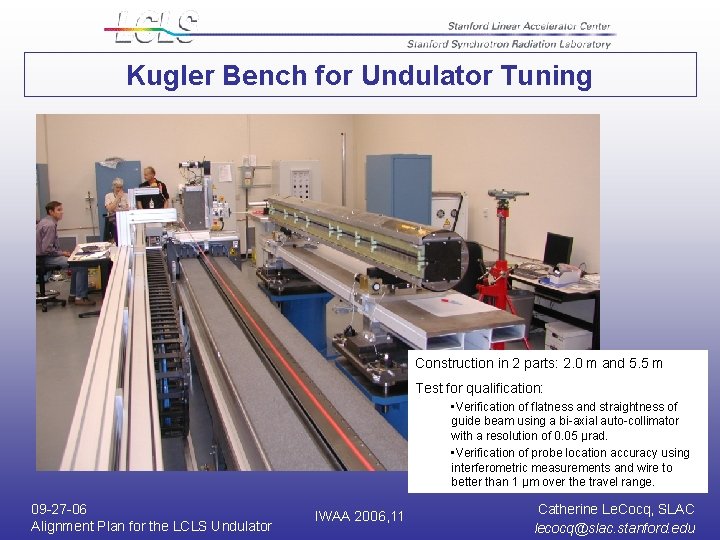
Kugler Bench for Undulator Tuning Construction in 2 parts: 2. 0 m and 5. 5 m Test for qualification: • Verification of flatness and straightness of guide beam using a bi-axial auto-collimator with a resolution of 0. 05 µrad. • Verification of probe location accuracy using interferometric measurements and wire to better than 1 µm over the travel range. 09 -27 -06 Alignment Plan for the LCLS Undulator IWAA 2006, 11 Catherine Le. Cocq, SLAC lecocq@slac. stanford. edu

Undulator Measurement Steps from Zack Wolf, Head of the Magnetic Measurement Group 1) 2) 3) 4) 5) 6) 7) 8) 9) 10) Place undulator Mechanically align undulator to bench Magnetically align Hall probe to undulator Perform any required large gap adjustments and re-align Straighten the X and Y trajectories Minimize phase errors Perform phase matching Determine K vs X, move probe to the X value which gives the specified K Add fiducialization magnets to undulator ends, locate center of fiducialization magnets Move undulator to CMM, finish fiducialization LCLS-TN-03 -07: “ANL and DESY Undulator Tuning Procedures“ by Z. Wolf. LCLS-TN-05 -10: “Test of Coordinate Transfer from Magnetic to Mechanical Reference for LCLS Undulator Fiducialization. “ by Y. Levashov and Z. Wolf. 09 -27 -06 Alignment Plan for the LCLS Undulator IWAA 2006, 12 Catherine Le. Cocq, SLAC lecocq@slac. stanford. edu

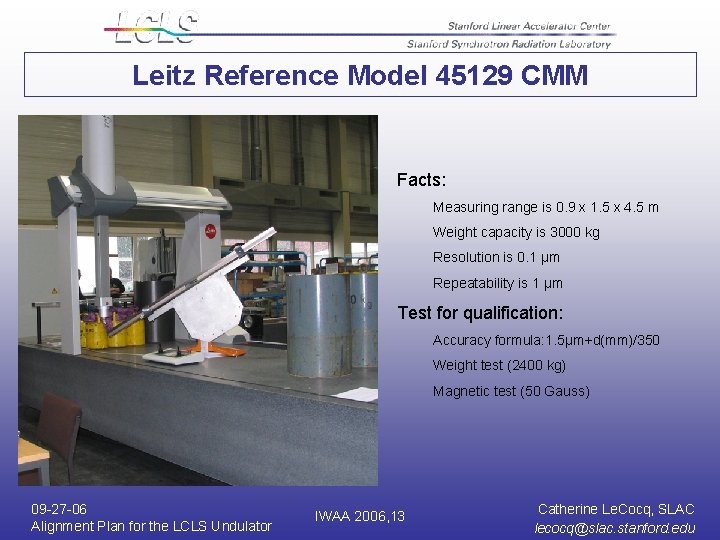
Leitz Reference Model 45129 CMM Facts: Measuring range is 0. 9 x 1. 5 x 4. 5 m Weight capacity is 3000 kg Resolution is 0. 1 μm Repeatability is 1 μm Test for qualification: Accuracy formula: 1. 5μm+d(mm)/350 Weight test (2400 kg) Magnetic test (50 Gauss) 09 -27 -06 Alignment Plan for the LCLS Undulator IWAA 2006, 13 Catherine Le. Cocq, SLAC lecocq@slac. stanford. edu

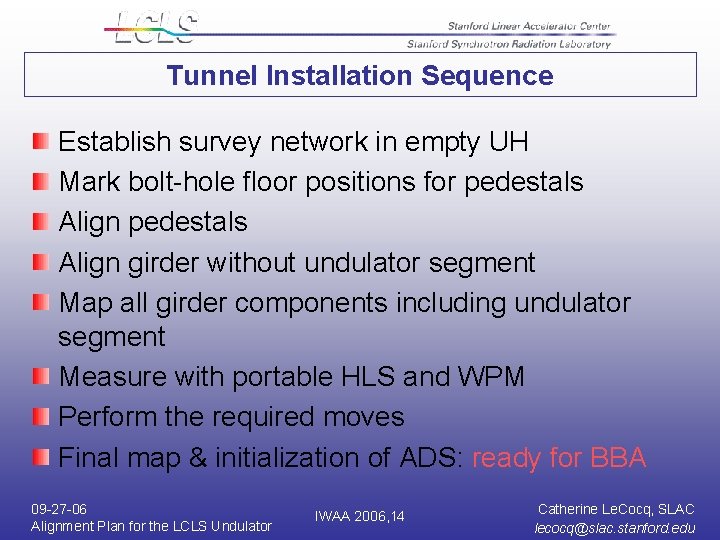
Tunnel Installation Sequence Establish survey network in empty UH Mark bolt-hole floor positions for pedestals Align girder without undulator segment Map all girder components including undulator segment Measure with portable HLS and WPM Perform the required moves Final map & initialization of ADS: ready for BBA 09 -27 -06 Alignment Plan for the LCLS Undulator IWAA 2006, 14 Catherine Le. Cocq, SLAC lecocq@slac. stanford. edu

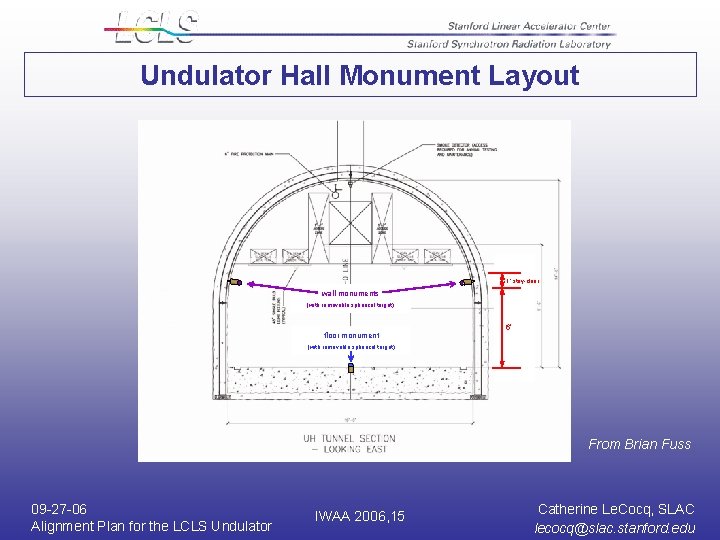
Undulator Hall Monument Layout 1‘ stay-clear wall monuments (with removable spherical target) floor monument 6’ (with removable spherical target) From Brian Fuss 09 -27 -06 Alignment Plan for the LCLS Undulator IWAA 2006, 15 Catherine Le. Cocq, SLAC lecocq@slac. stanford. edu

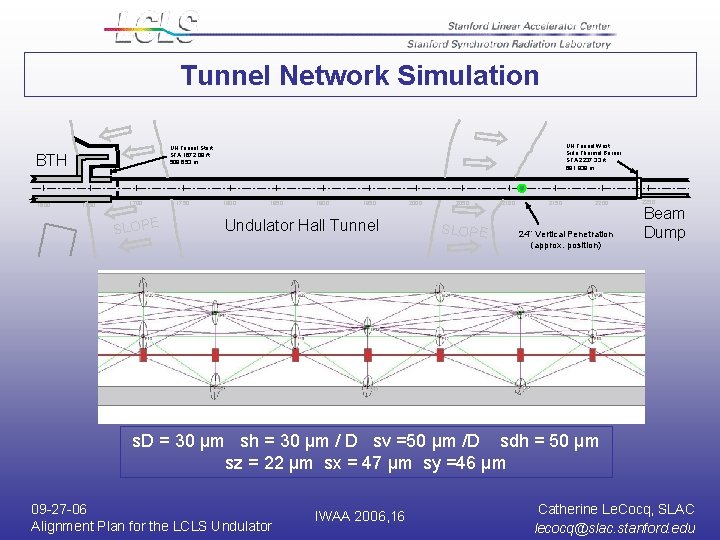
Tunnel Network Simulation BTH 1600 UH Tunnel West Side Thermal Barrier STA 2237. 33 ft 681. 939 m UH Tunnel Start STA 1672. 09 ft 509. 653 m 1650 1700 SLOPE 1750 1800 1850 1900 1950 Undulator Hall Tunnel 2000 2050 SLOPE 2100 2150 2200 24” Vertical Penetration (approx. position) 2250 Beam Dump s. D = 30 μm sh = 30 μm / D sv =50 μm /D sdh = 50 μm sz = 22 μm sx = 47 μm sy =46 μm 09 -27 -06 Alignment Plan for the LCLS Undulator IWAA 2006, 16 Catherine Le. Cocq, SLAC lecocq@slac. stanford. edu

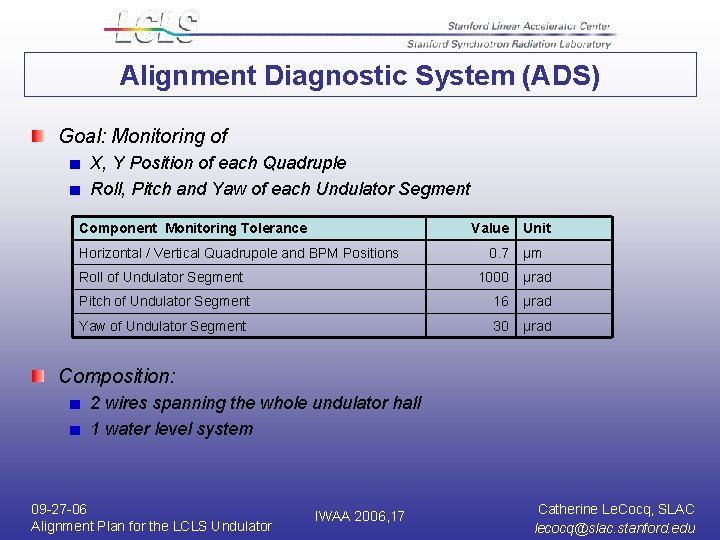
Alignment Diagnostic System (ADS) Goal: Monitoring of X, Y Position of each Quadruple Roll, Pitch and Yaw of each Undulator Segment Component Monitoring Tolerance Value Horizontal / Vertical Quadrupole and BPM Positions Roll of Undulator Segment 0. 7 Unit µm 1000 µrad Pitch of Undulator Segment 16 µrad Yaw of Undulator Segment 30 µrad Composition: 2 wires spanning the whole undulator hall 1 water level system 09 -27 -06 Alignment Plan for the LCLS Undulator IWAA 2006, 17 Catherine Le. Cocq, SLAC lecocq@slac. stanford. edu

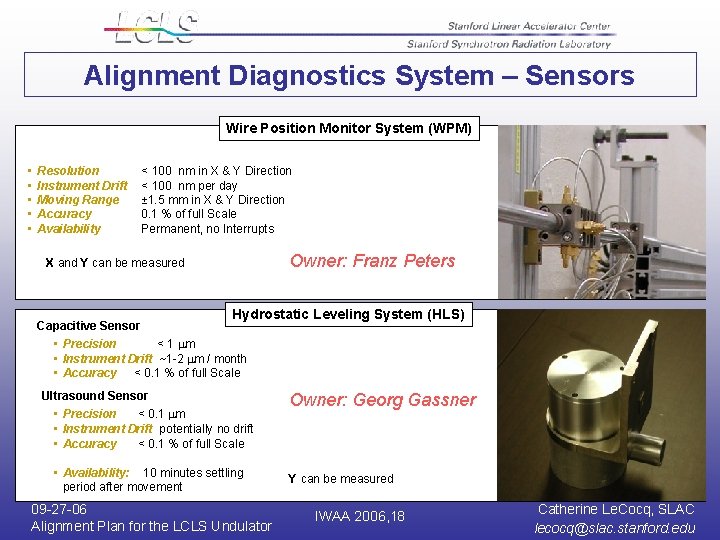
Alignment Diagnostics System – Sensors Wire Position Monitor System (WPM) • • • Resolution Instrument Drift Moving Range Accuracy Availability < 100 nm in X & Y Direction < 100 nm per day ± 1. 5 mm in X & Y Direction 0. 1 % of full Scale Permanent, no Interrupts Owner: Franz Peters X and Y can be measured Hydrostatic Leveling System (HLS) Capacitive Sensor • Precision < 1 mm • Instrument Drift ~1 -2 mm / month • Accuracy < 0. 1 % of full Scale Ultrasound Sensor • Precision < 0. 1 mm • Instrument Drift potentially no drift • Accuracy < 0. 1 % of full Scale • Availability: 10 minutes settling period after movement 09 -27 -06 Alignment Plan for the LCLS Undulator Owner: Georg Gassner Y can be measured IWAA 2006, 18 Catherine Le. Cocq, SLAC lecocq@slac. stanford. edu

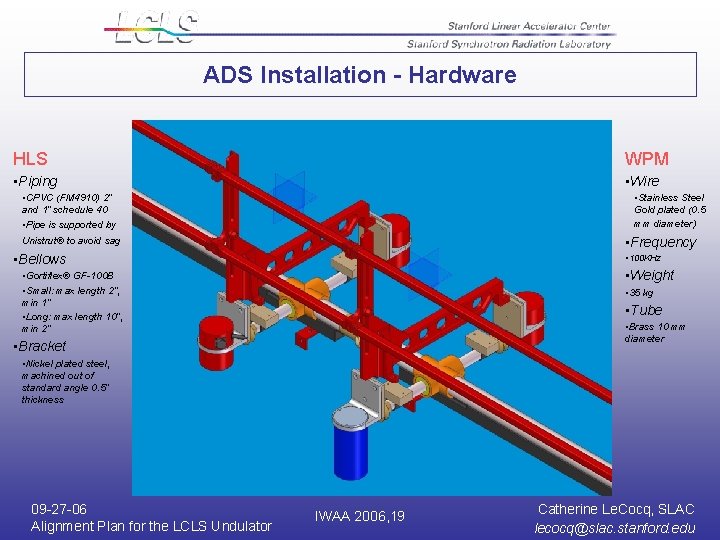
ADS Installation - Hardware HLS WPM • Piping • Wire • CPVC (FM 4910) 2” and 1” schedule 40 • Pipe is supported by • Stainless Steel Gold plated (0. 5 mm diameter) • Frequency Unistrut® to avoid sag • Bellows • 100 KHz • Weight • Gortiflex® GF-100 B • Small: max length 2”, min 1” • Long: max length 10”, min 2” • 35 kg • Tube • Brass 10 mm diameter • Bracket • Nickel plated steel, machined out of standard angle 0. 5” thickness 09 -27 -06 Alignment Plan for the LCLS Undulator IWAA 2006, 19 Catherine Le. Cocq, SLAC lecocq@slac. stanford. edu

End of Presentation 09 -27 -06 Alignment Plan for the LCLS Undulator IWAA 2006, 20 Catherine Le. Cocq, SLAC lecocq@slac. stanford. edu