ALGORITMA PEMROGRAMAN SCRATCH M 12 STORIES TO ANIMATION

- Slides: 58

ALGORITMA & PEMROGRAMAN (SCRATCH) M 12. STORIES TO ANIMATION LINE

Objectives Mahasiswa mampu menstimulasi ide dan kreativitas desain Mahasiswa mampu menerapkan ide dan kreativitas dengan tool Scratch Mahasiswa mampu membuat Sprite dengan tool Scratch Paint Editor Mahasiswa mampu menerapkan Jalur Cerita ke dalam Scratch

Introduction In this Lesson of the topic, we will create an Animation. We will first create a story line. Based on the story line, we will create sprites and scenes, and finally add scripts to put together the story. We will create a Cartoon Animation.

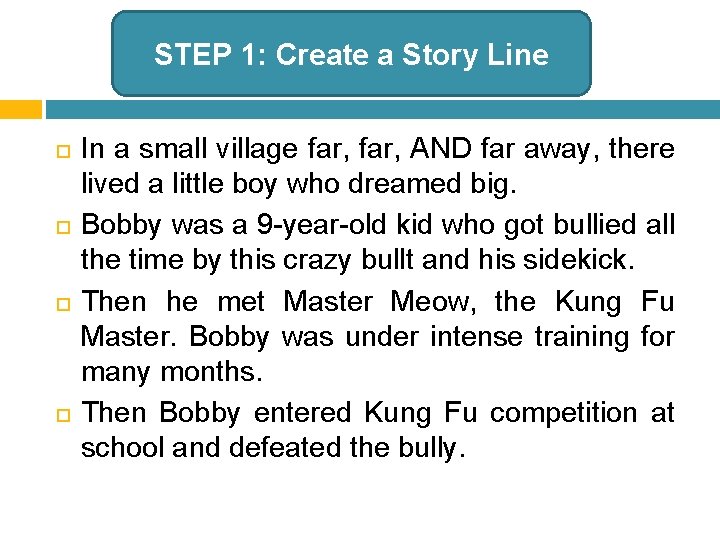
STEP 1: Create a Story Line The first step to create an animation is to have an idea. It could be from a joke you’ve heard or a story you recently read. Or better yet, it could be entirely your own. I’ve created a really simple story as shown in next slide.

STEP 1: Create a Story Line In a small village far, AND far away, there lived a little boy who dreamed big. Bobby was a 9 -year-old kid who got bullied all the time by this crazy bullt and his sidekick. Then he met Master Meow, the Kung Fu Master. Bobby was under intense training for many months. Then Bobby entered Kung Fu competition at school and defeated the bully.

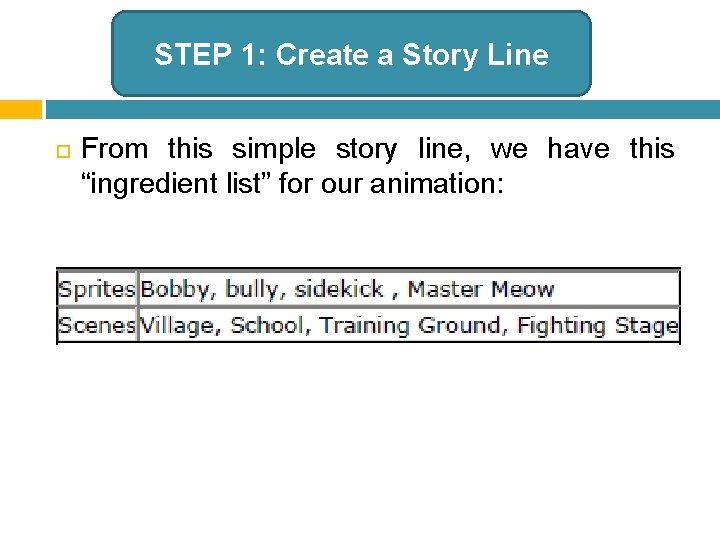
STEP 1: Create a Story Line From this simple story line, we have this “ingredient list” for our animation:

STEP 2: Create Sprites

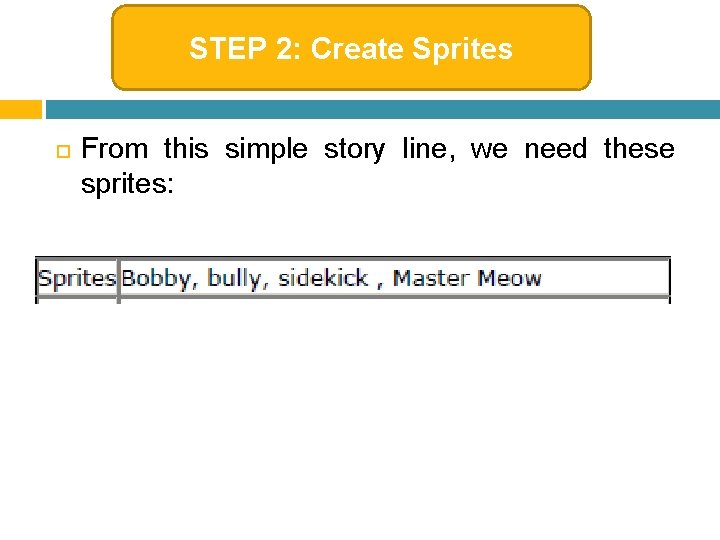
STEP 2: Create Sprites From this simple story line, we need these sprites:

STEP 2: Create Sprites By now, I trust that you should be pretty comfortable drawing your own sprites, so well will just create our sprites by importing images from Scratch library.

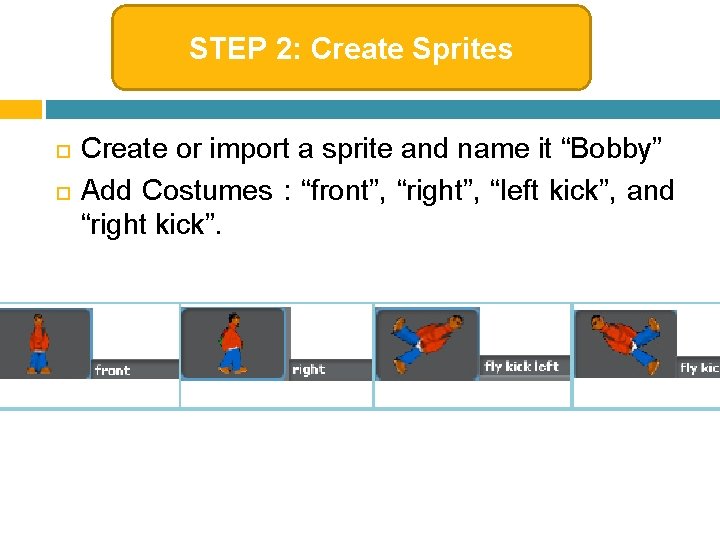
STEP 2: Create Sprites Create or import a sprite and name it “Bobby” Add Costumes : “front”, “right”, “left kick”, and “right kick”.

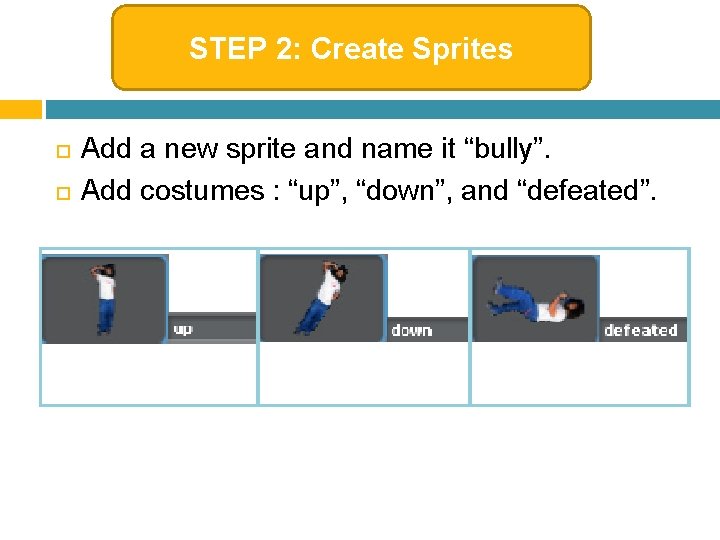
STEP 2: Create Sprites Add a new sprite and name it “bully”. Add costumes : “up”, “down”, and “defeated”.

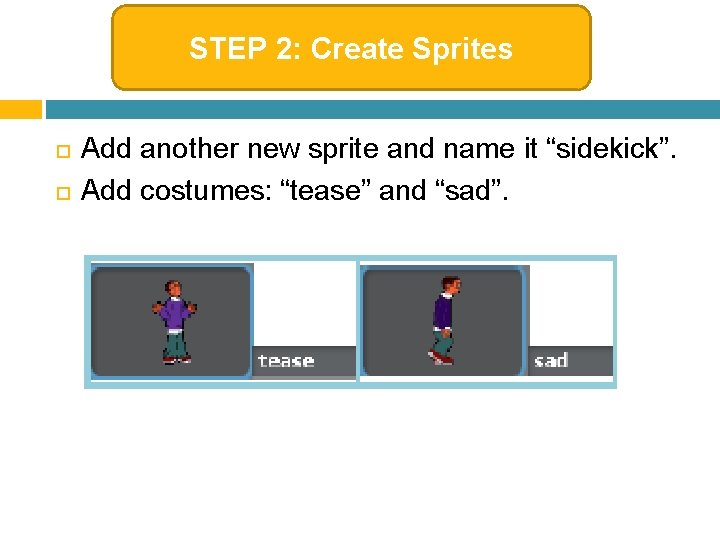
STEP 2: Create Sprites Add another new sprite and name it “sidekick”. Add costumes: “tease” and “sad”.

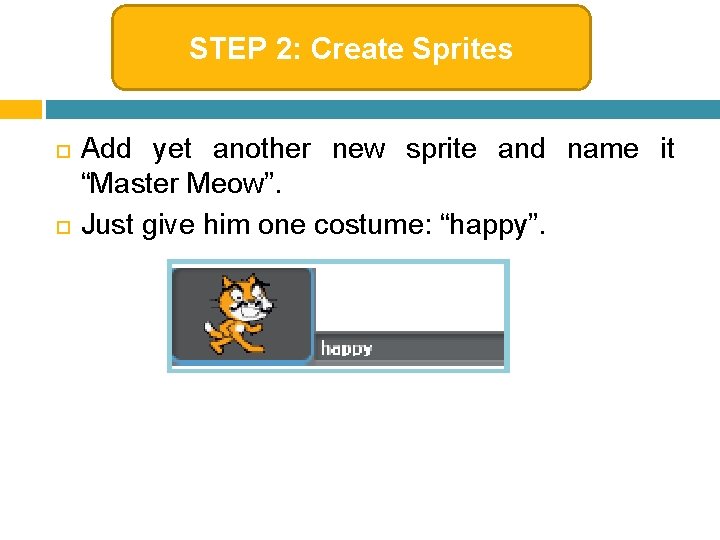
STEP 2: Create Sprites Add yet another new sprite and name it “Master Meow”. Just give him one costume: “happy”.

STEP 2: Create Sprites To create scenes, just add backgrounds for Stage. In the next step, we will create four backgrounds: village, school, training ground, and fighting stage.

STEP 3: Creating the Village Background

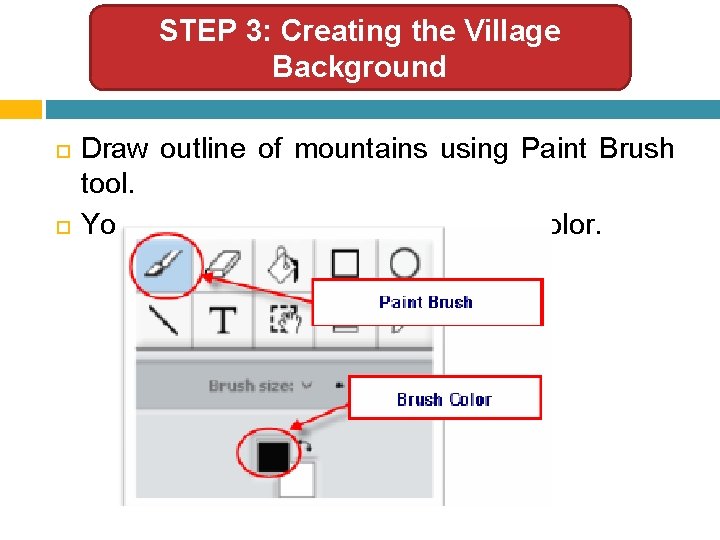
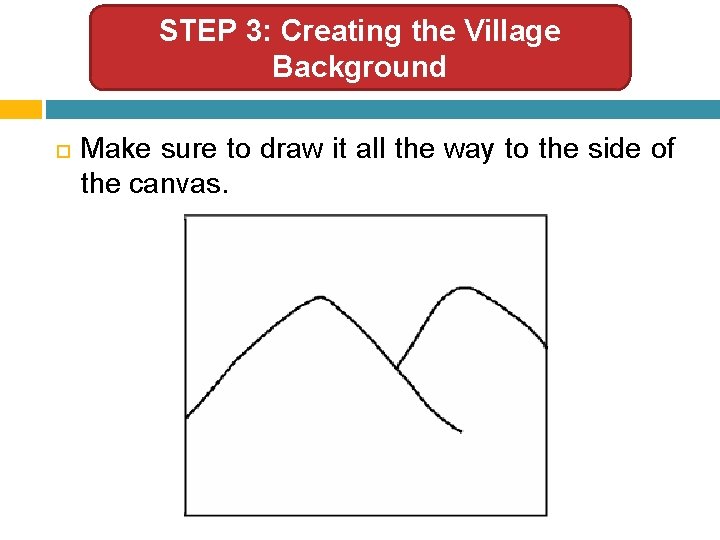
STEP 3: Creating the Village Background Draw outline of mountains using Paint Brush tool. You can change the default Brush Color.

STEP 3: Creating the Village Background Make sure to draw it all the way to the side of the canvas.

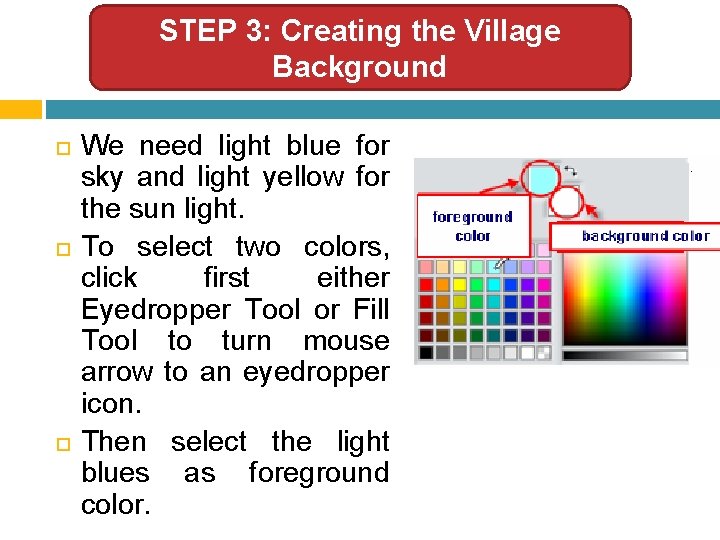
STEP 3: Creating the Village Background We need light blue for sky and light yellow for the sun light. To select two colors, click first either Eyedropper Tool or Fill Tool to turn mouse arrow to an eyedropper icon. Then select the light blues as foreground color.

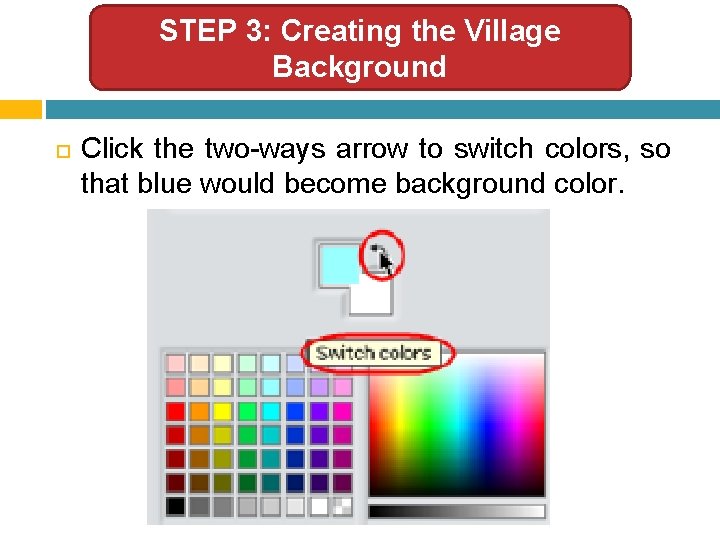
STEP 3: Creating the Village Background Click the two-ways arrow to switch colors, so that blue would become background color.

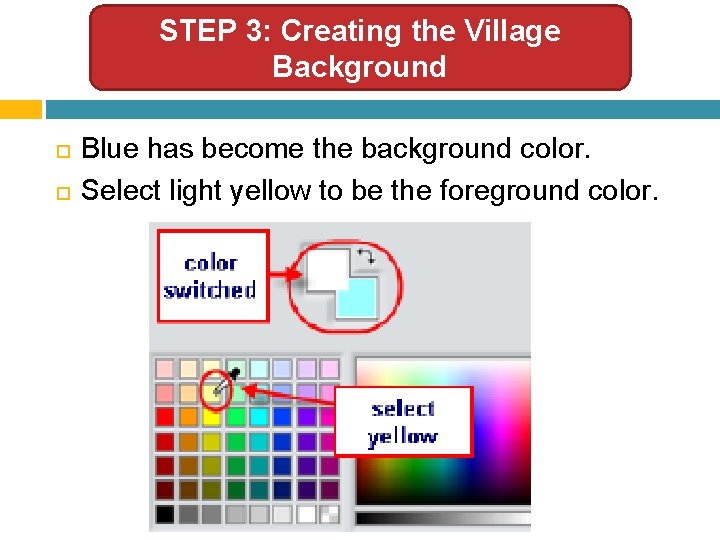
STEP 3: Creating the Village Background Blue has become the background color. Select light yellow to be the foreground color.

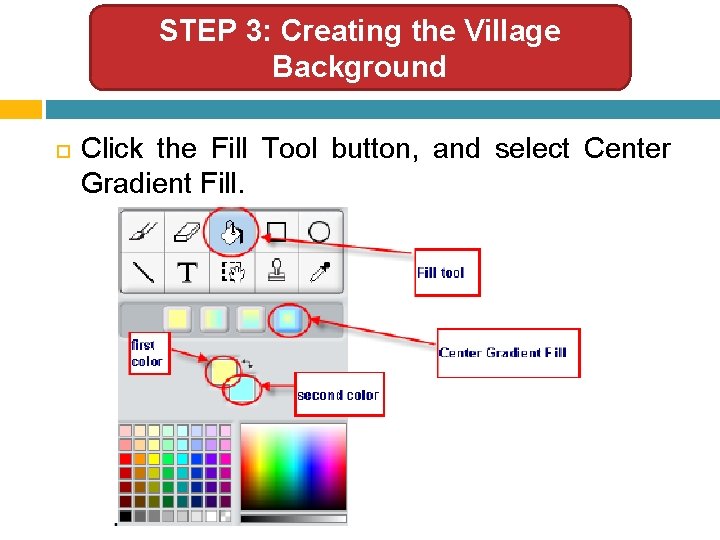
STEP 3: Creating the Village Background Click the Fill Tool button, and select Center Gradient Fill.

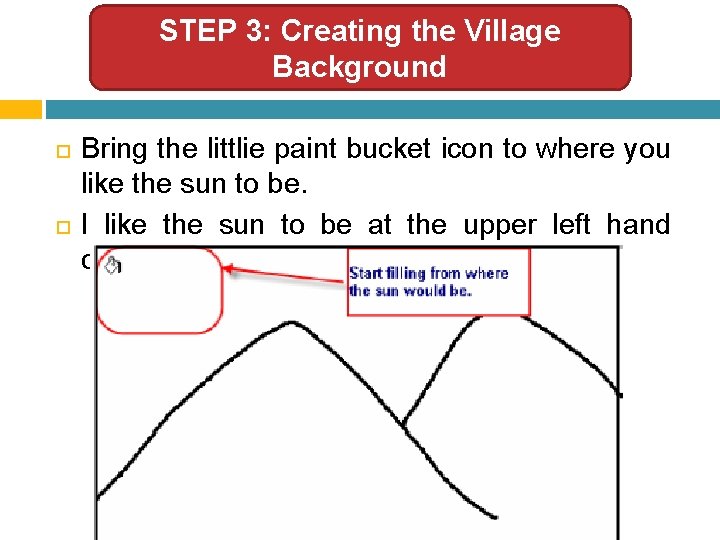
STEP 3: Creating the Village Background Bring the littlie paint bucket icon to where you like the sun to be. I like the sun to be at the upper left hand corner.

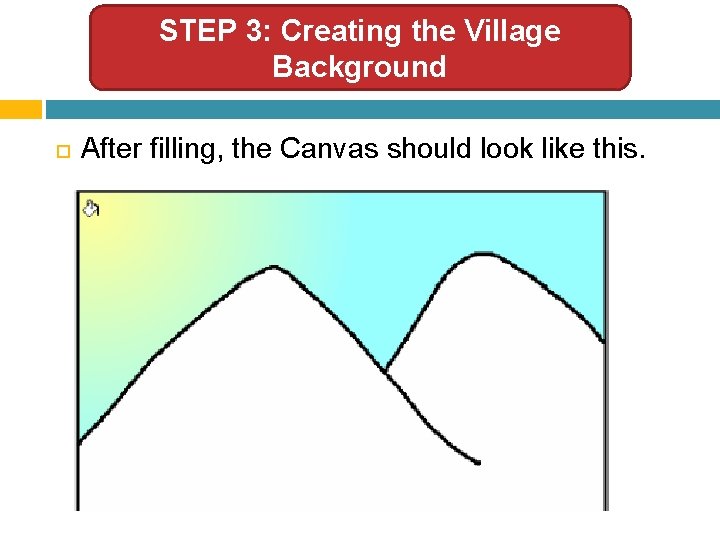
STEP 3: Creating the Village Background After filling, the Canvas should look like this.

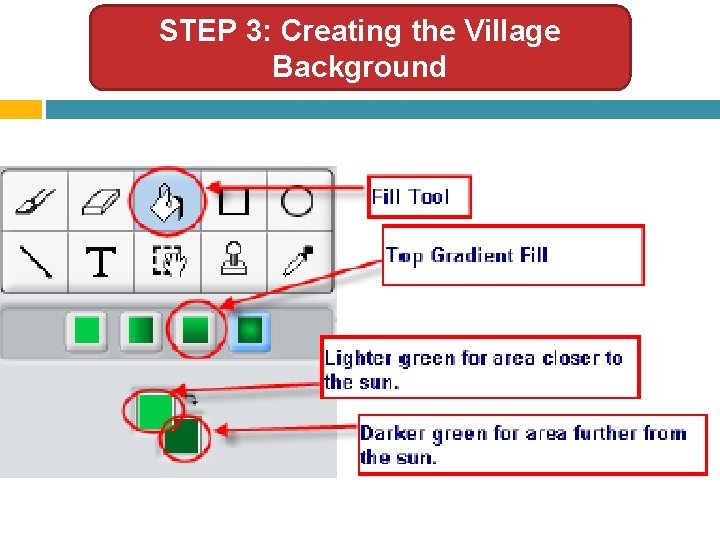
STEP 3: Creating the Village Background Next, we will fill the mountains in the same way. We will first select two color tones: light green for mountaintops, and darker green for area further away, such as foot of the mountains or the mountain in the shadow of the first mountain. But this time, we will use Top Gradient Fill.

STEP 3: Creating the Village Background

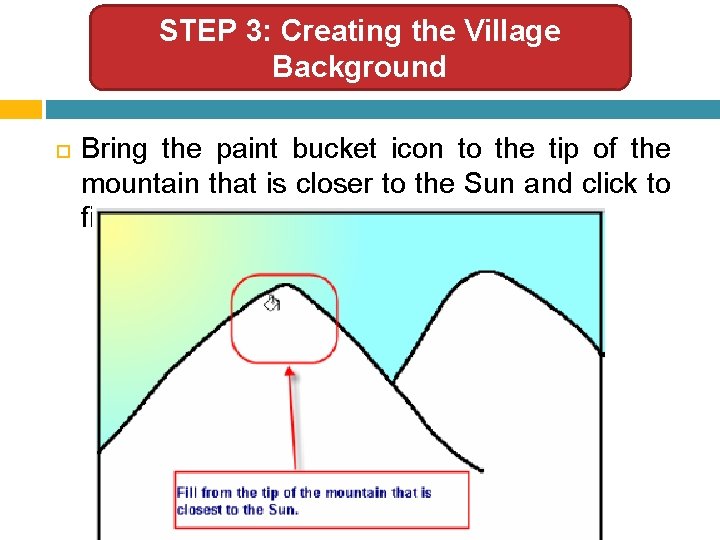
STEP 3: Creating the Village Background Bring the paint bucket icon to the tip of the mountain that is closer to the Sun and click to fill.

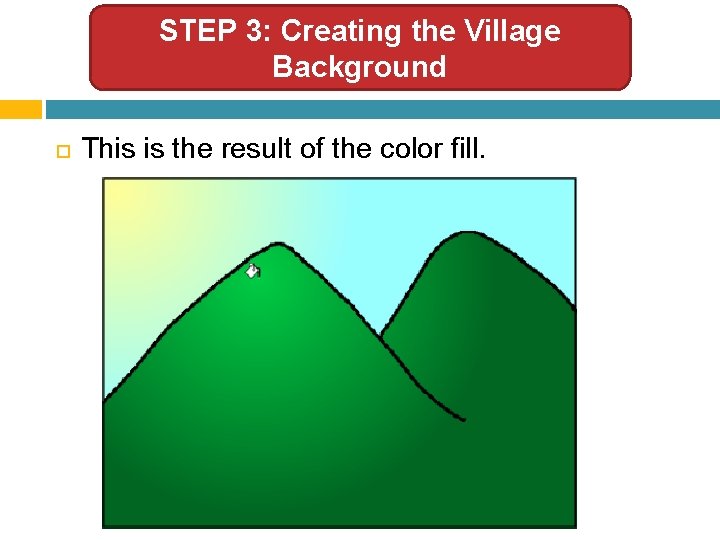
STEP 3: Creating the Village Background This is the result of the color fill.

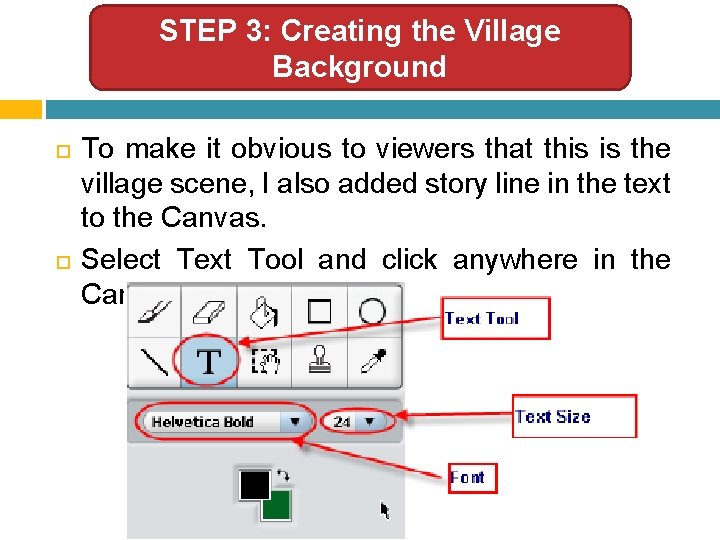
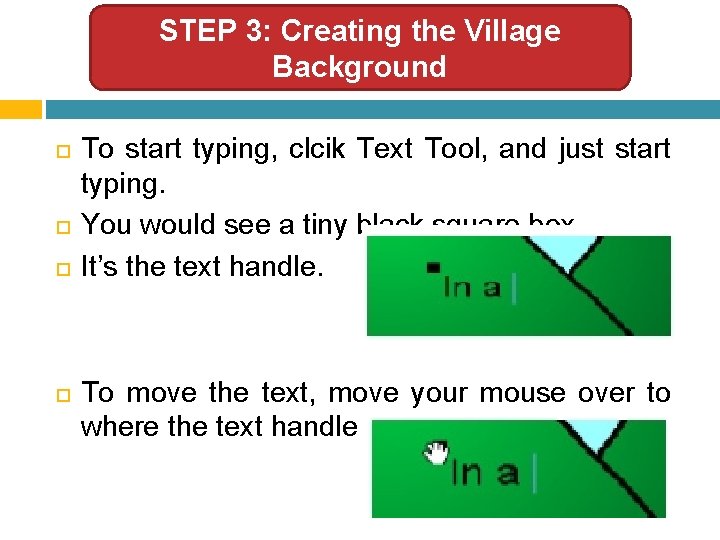
STEP 3: Creating the Village Background To make it obvious to viewers that this is the village scene, I also added story line in the text to the Canvas. Select Text Tool and click anywhere in the Canvas.

STEP 3: Creating the Village Background To start typing, clcik Text Tool, and just start typing. You would see a tiny black square box. It’s the text handle. To move the text, move your mouse over to where the text handle is and drag it.

STEP 4: Creating the School Background

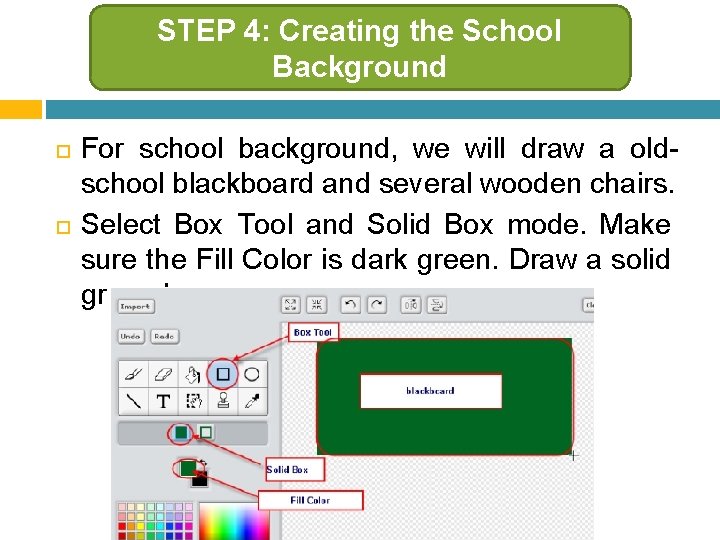
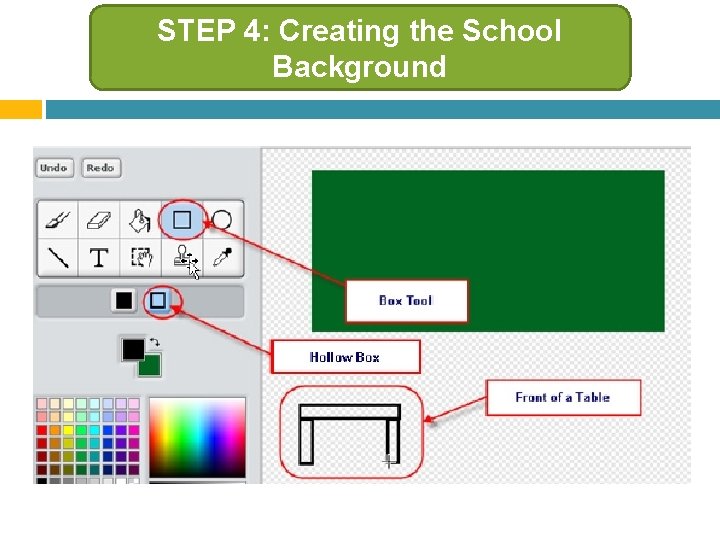
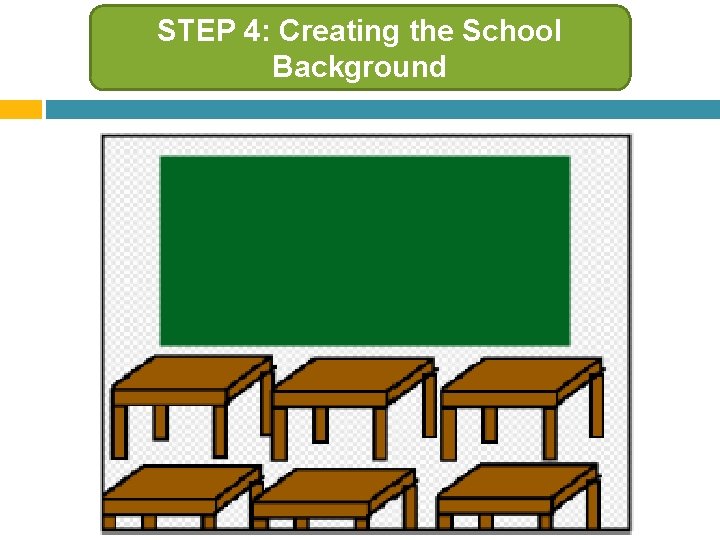
STEP 4: Creating the School Background For school background, we will draw a oldschool blackboard and several wooden chairs. Select Box Tool and Solid Box mode. Make sure the Fill Color is dark green. Draw a solid green box.

STEP 4: Creating the School Background Switch color so the main color will be black. Then select Box Tool and Hollow Box Mode. Create front of a table like shown next slide One Horizontal rectangle on top as side of the table and two vertical rectangles as legs.

STEP 4: Creating the School Background

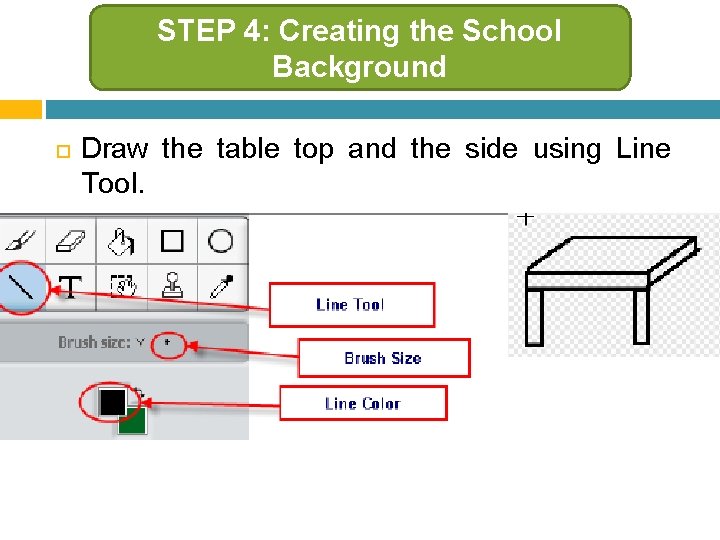
STEP 4: Creating the School Background Draw the table top and the side using Line Tool.

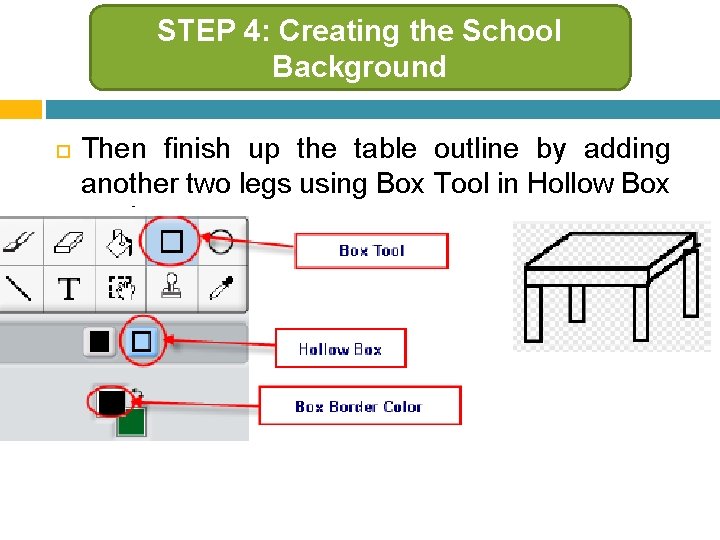
STEP 4: Creating the School Background Then finish up the table outline by adding another two legs using Box Tool in Hollow Box mode.

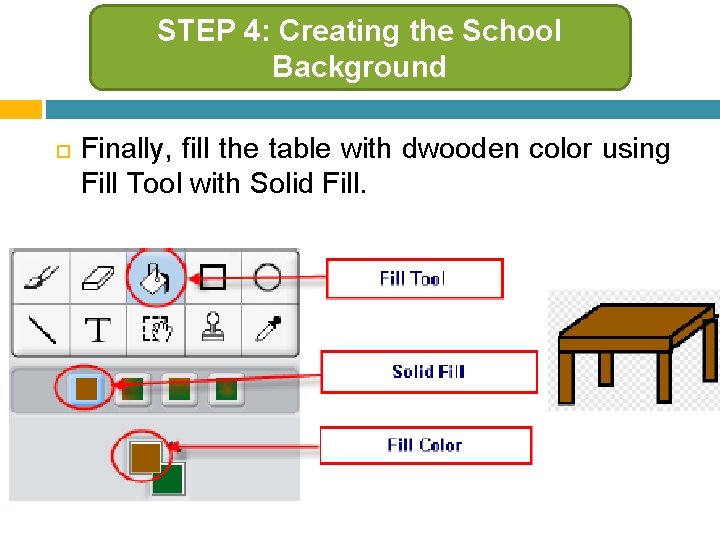
STEP 4: Creating the School Background Finally, fill the table with dwooden color using Fill Tool with Solid Fill.

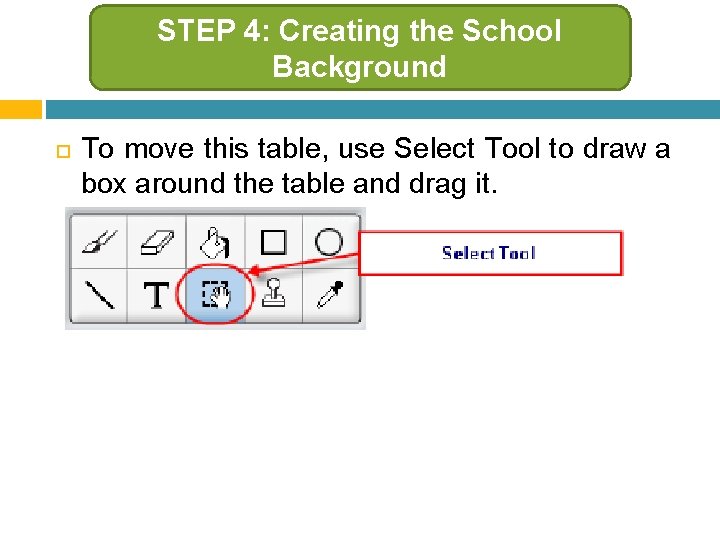
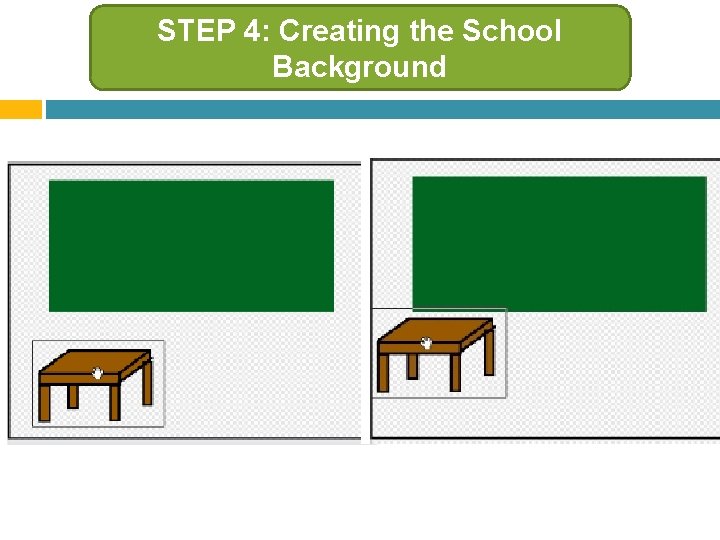
STEP 4: Creating the School Background To move this table, use Select Tool to draw a box around the table and drag it.

STEP 4: Creating the School Background

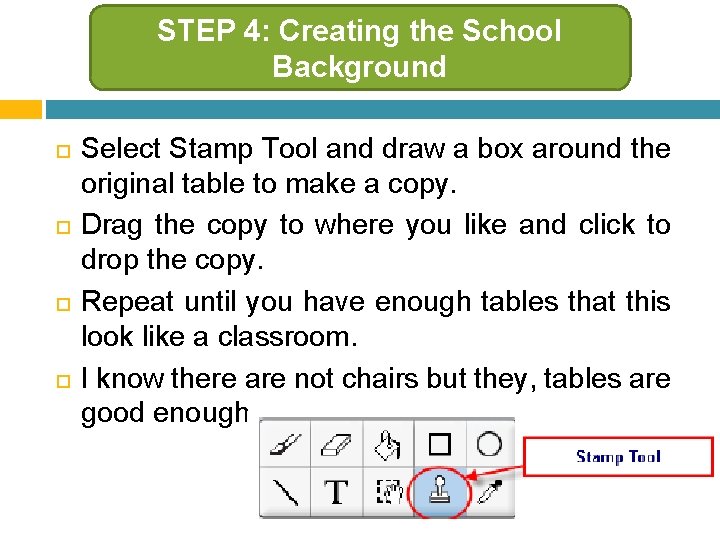
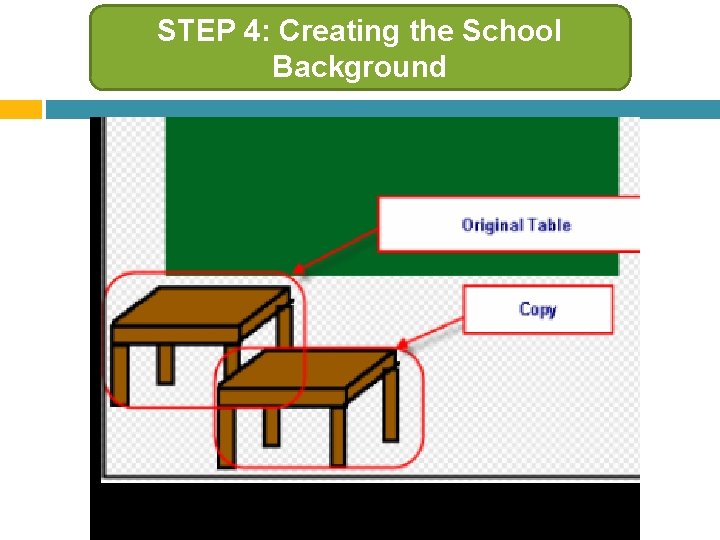
STEP 4: Creating the School Background Select Stamp Tool and draw a box around the original table to make a copy. Drag the copy to where you like and click to drop the copy. Repeat until you have enough tables that this look like a classroom. I know there are not chairs but they, tables are good enough.

STEP 4: Creating the School Background

STEP 4: Creating the School Background

STEP 5: Importing the Training Ground Background

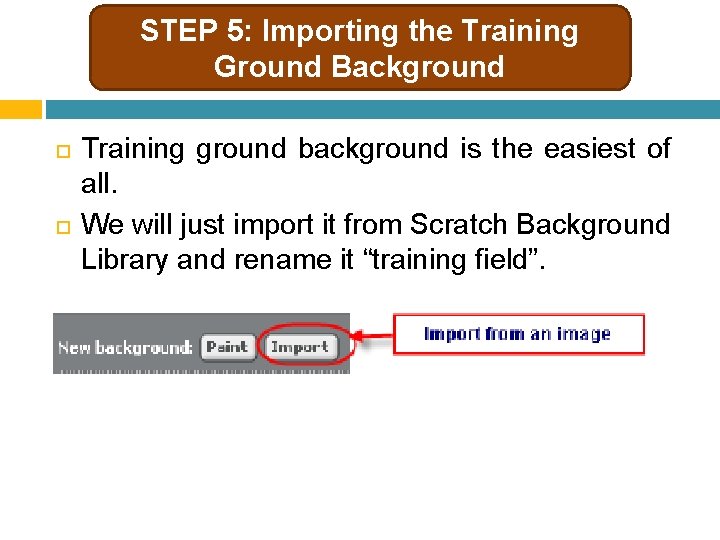
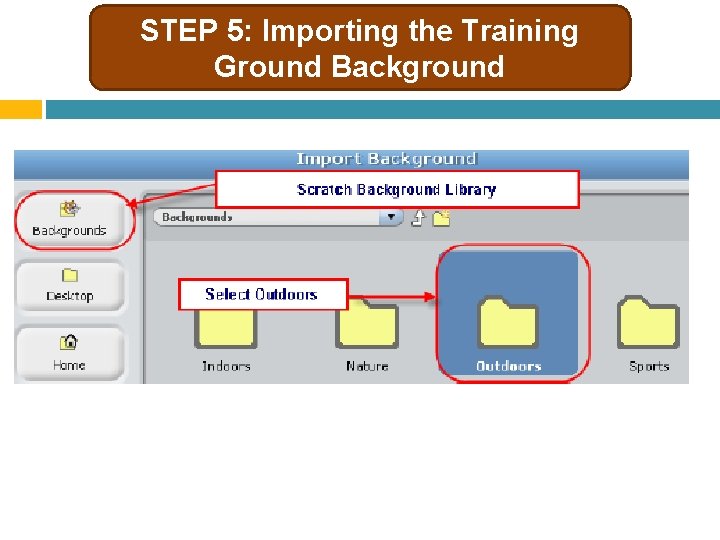
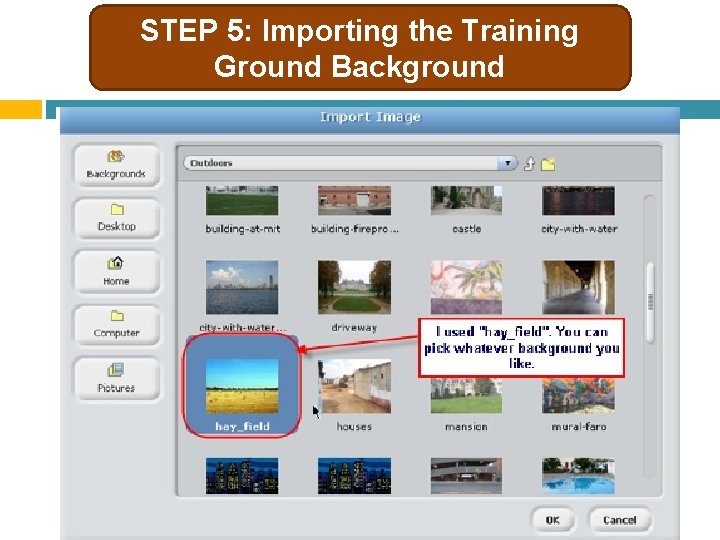
STEP 5: Importing the Training Ground Background Training ground background is the easiest of all. We will just import it from Scratch Background Library and rename it “training field”.

STEP 5: Importing the Training Ground Background

STEP 5: Importing the Training Ground Background

STEP 6: Creating the Fighting Stage Background

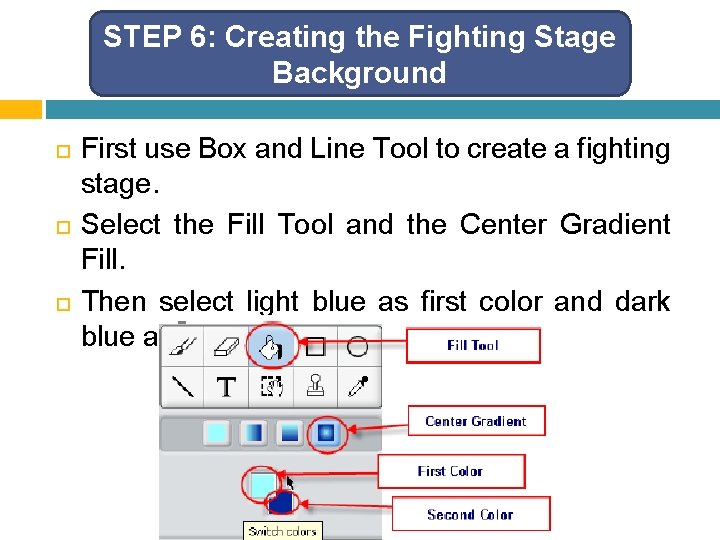
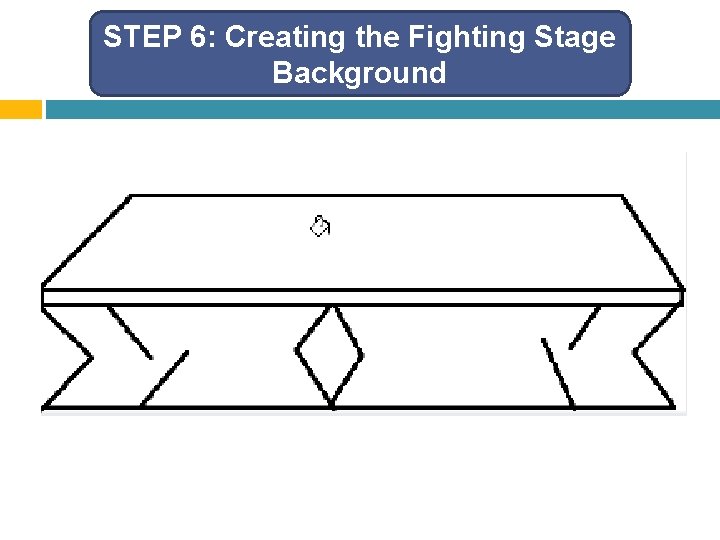
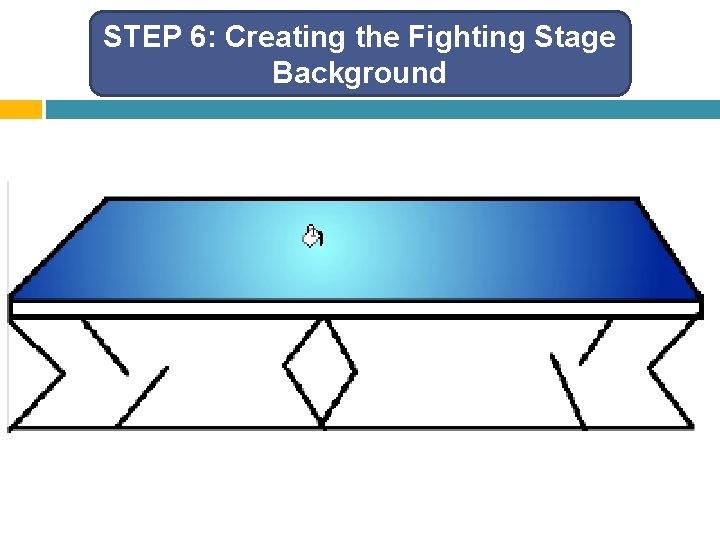
STEP 6: Creating the Fighting Stage Background First use Box and Line Tool to create a fighting stage. Select the Fill Tool and the Center Gradient Fill. Then select light blue as first color and dark blue as second color.

STEP 6: Creating the Fighting Stage Background

STEP 6: Creating the Fighting Stage Background

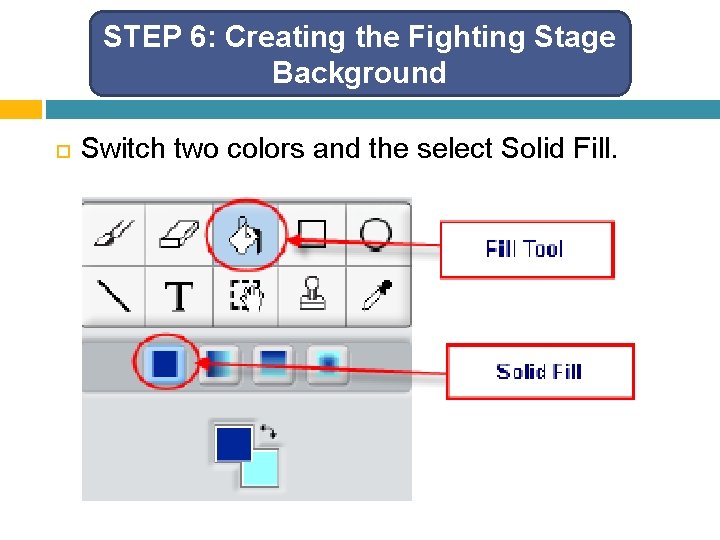
STEP 6: Creating the Fighting Stage Background Switch two colors and the select Solid Fill.

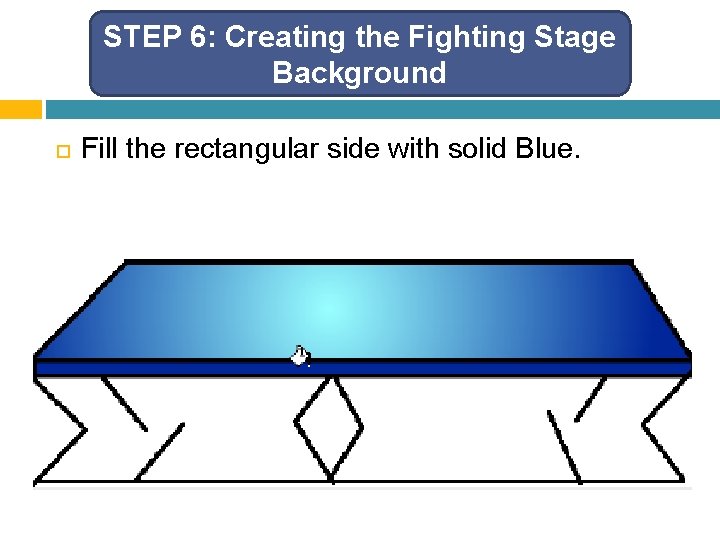
STEP 6: Creating the Fighting Stage Background Fill the rectangular side with solid Blue.

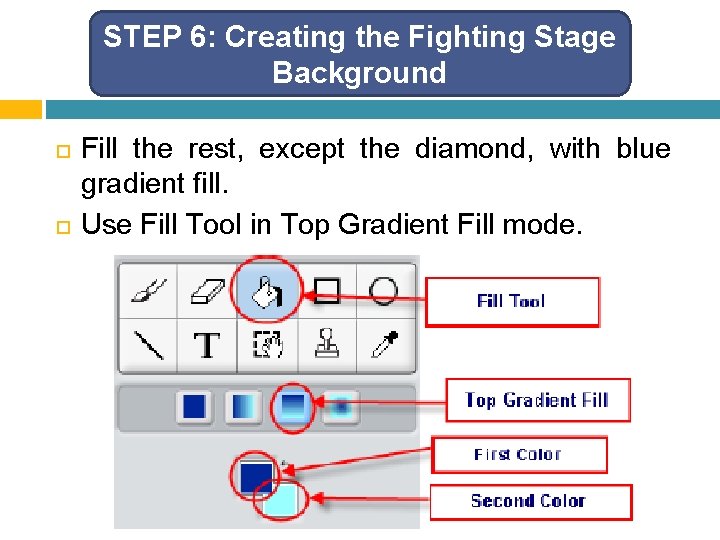
STEP 6: Creating the Fighting Stage Background Fill the rest, except the diamond, with blue gradient fill. Use Fill Tool in Top Gradient Fill mode.

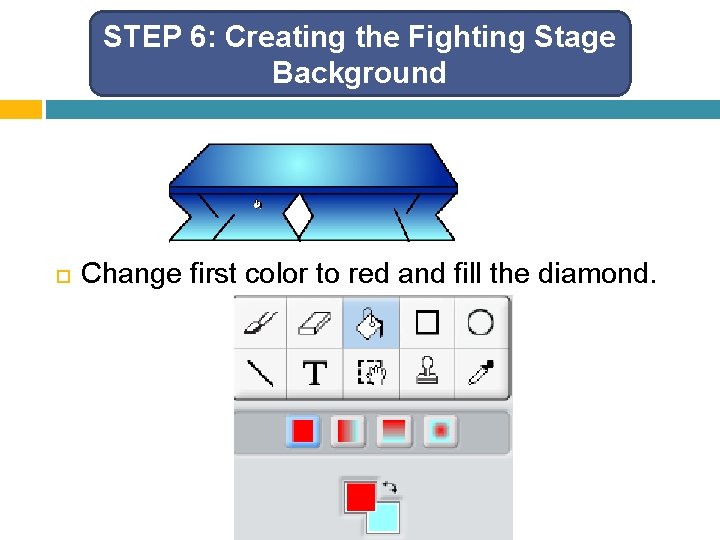
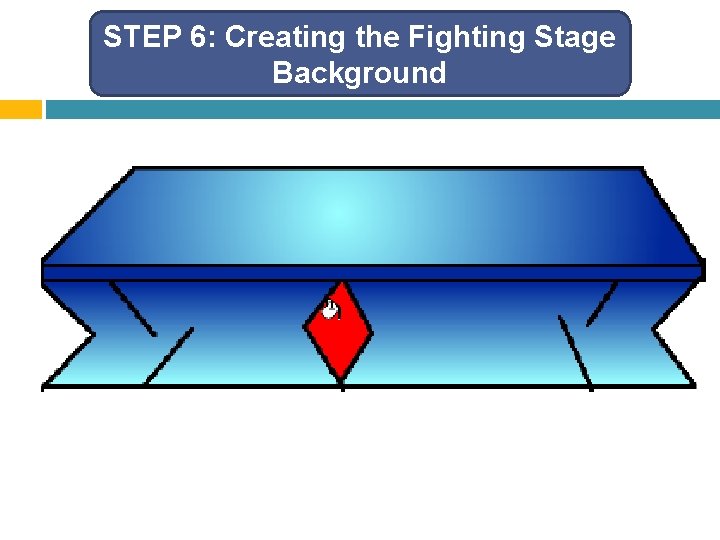
STEP 6: Creating the Fighting Stage Background Change first color to red and fill the diamond.

STEP 6: Creating the Fighting Stage Background

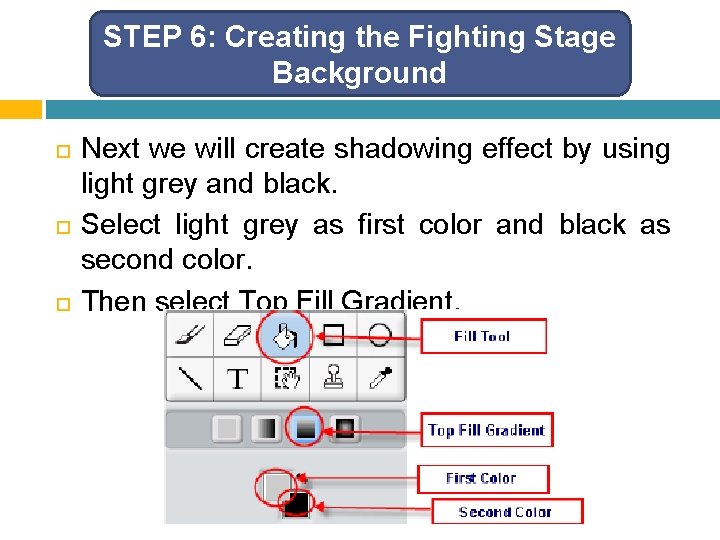
STEP 6: Creating the Fighting Stage Background Next we will create shadowing effect by using light grey and black. Select light grey as first color and black as second color. Then select Top Fill Gradient.

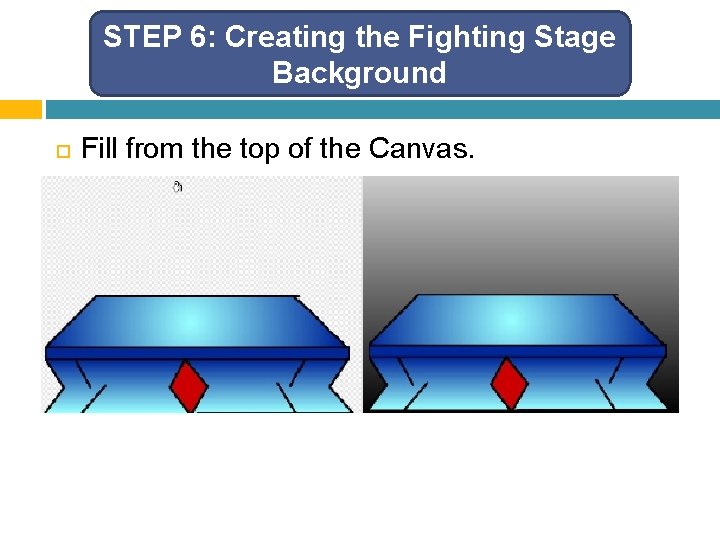
STEP 6: Creating the Fighting Stage Background Fill from the top of the Canvas.

STEP 6: Creating the Fighting Stage Background We are done for this lesson. Try to add scripts in your sprite based on this story.

See, What You Can Do