Advanced Process Control Instrument for Flexographic Plates and
- Slides: 8

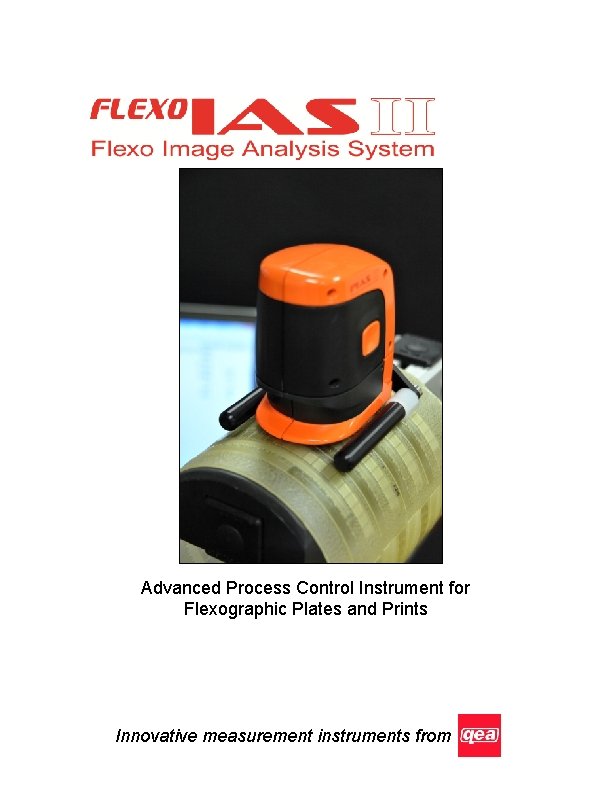
Advanced Process Control Instrument for Flexographic Plates and Prints Innovative measurement instruments from

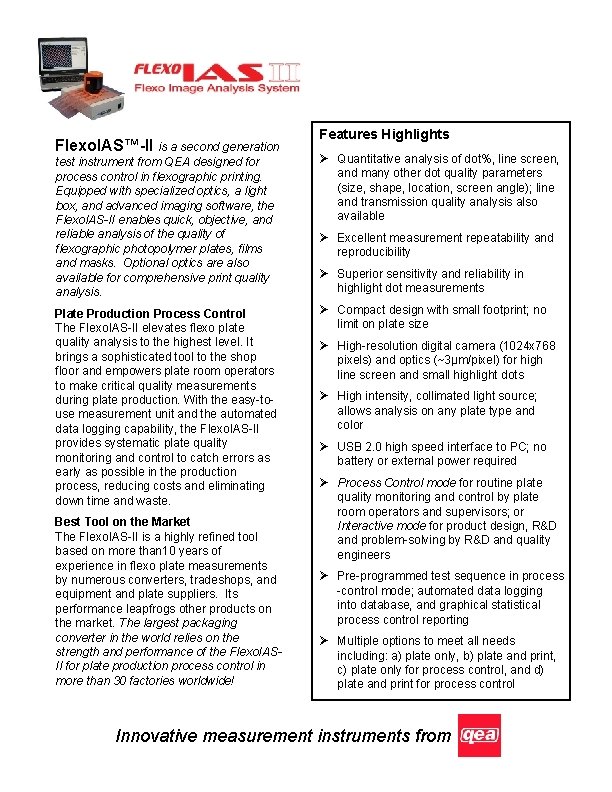
Flexo. IAS™-II is a second generation Features Highlights test instrument from QEA designed for process control in flexographic printing. Equipped with specialized optics, a light box, and advanced imaging software, the Flexo. IAS-II enables quick, objective, and reliable analysis of the quality of flexographic photopolymer plates, films and masks. Optional optics are also available for comprehensive print quality analysis. Ø Quantitative analysis of dot%, line screen, and many other dot quality parameters (size, shape, location, screen angle); line and transmission quality analysis also available Plate Production Process Control The Flexo. IAS-II elevates flexo plate quality analysis to the highest level. It brings a sophisticated tool to the shop floor and empowers plate room operators to make critical quality measurements during plate production. With the easy-touse measurement unit and the automated data logging capability, the Flexo. IAS-II provides systematic plate quality monitoring and control to catch errors as early as possible in the production process, reducing costs and eliminating down time and waste. Ø Compact design with small footprint; no limit on plate size Best Tool on the Market The Flexo. IAS-II is a highly refined tool based on more than 10 years of experience in flexo plate measurements by numerous converters, tradeshops, and equipment and plate suppliers. Its performance leapfrogs other products on the market. The largest packaging converter in the world relies on the strength and performance of the Flexo. IASII for plate production process control in more than 30 factories worldwide! Ø Excellent measurement repeatability and reproducibility Ø Superior sensitivity and reliability in highlight dot measurements Ø High-resolution digital camera (1024 x 768 pixels) and optics (~3µm/pixel) for high line screen and small highlight dots Ø High intensity, collimated light source; allows analysis on any plate type and color Ø USB 2. 0 high speed interface to PC; no battery or external power required Ø Process Control mode for routine plate quality monitoring and control by plate room operators and supervisors; or Interactive mode for product design, R&D and problem-solving by R&D and quality engineers Ø Pre-programmed test sequence in process -control mode; automated data logging into database, and graphical statistical process control reporting Ø Multiple options to meet all needs including: a) plate only, b) plate and print, c) plate only for process control, and d) plate and print for process control Innovative measurement instruments from

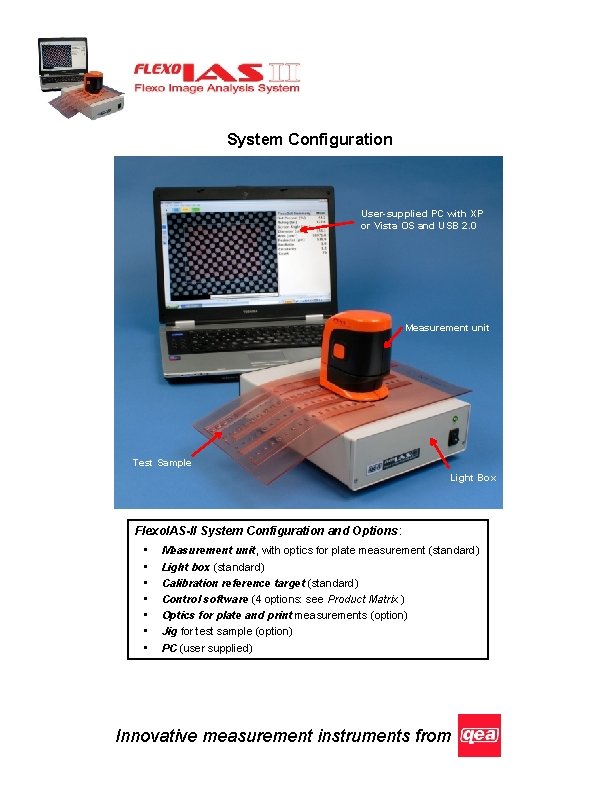
System Configuration User-supplied PC with XP or Vista OS and USB 2. 0 Measurement unit Test Sample Light Box Flexo. IAS-II System Configuration and Options: • • Measurement unit, with optics for plate measurement (standard) Light box (standard) Calibration reference target (standard) Control software (4 options: see Product Matrix ) Optics for plate and print measurements (option) Jig for test sample (option) PC (user supplied) Innovative measurement instruments from

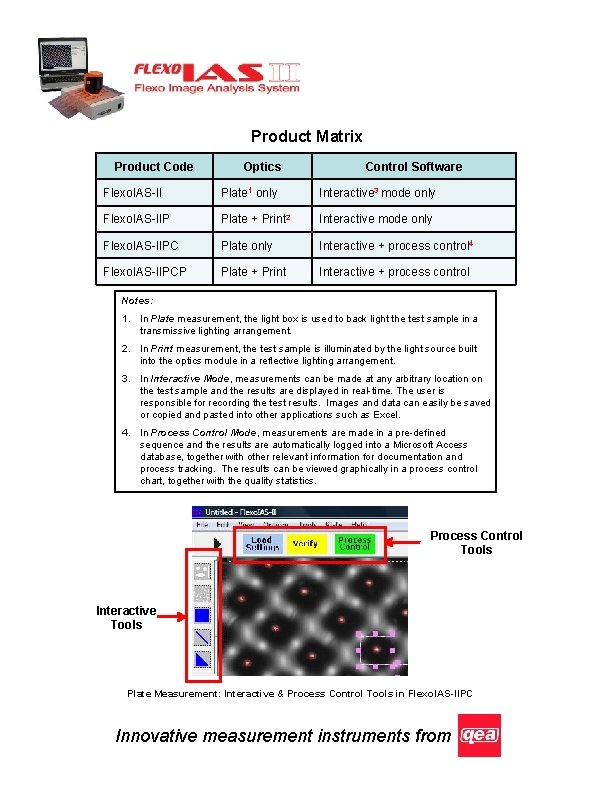
Product Matrix Product Code Optics Control Software Flexo. IAS-II Plate 1 only Interactive 3 mode only Flexo. IAS-IIP Plate + Print 2 Interactive mode only Flexo. IAS-IIPC Plate only Interactive + process control 4 Flexo. IAS-IIPCP Plate + Print Interactive + process control Notes: 1. In Plate measurement, the light box is used to back light the test sample in a transmissive lighting arrangement. 2. In Print measurement, the test sample is illuminated by the light source built into the optics module in a reflective lighting arrangement. 3. In Interactive Mode, measurements can be made at any arbitrary location on the test sample and the results are displayed in real-time. The user is responsible for recording the test results. Images and data can easily be saved or copied and pasted into other applications such as Excel. 4. In Process Control Mode, measurements are made in a pre-defined sequence and the results are automatically logged into a Microsoft Access database, together with other relevant information for documentation and process tracking. The results can be viewed graphically in a process control chart, together with the quality statistics. Process Control Tools Interactive Tools Plate Measurement: Interactive & Process Control Tools in Flexo. IAS-IIPC Innovative measurement instruments from

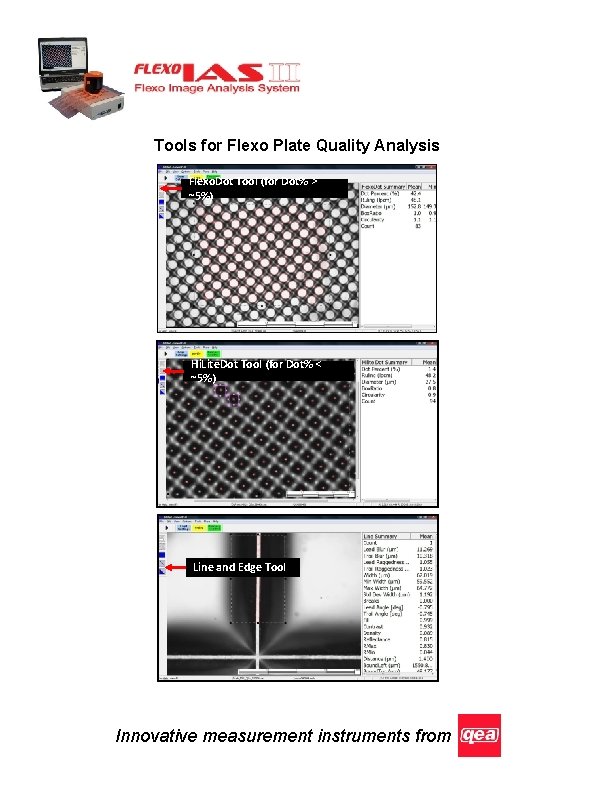
Tools for Flexo Plate Quality Analysis Flexo. Dot Tool (for Dot% > ~5%) Hi. Lite. Dot Tool (for Dot% < ~5%) Line and Edge Tool Innovative measurement instruments from

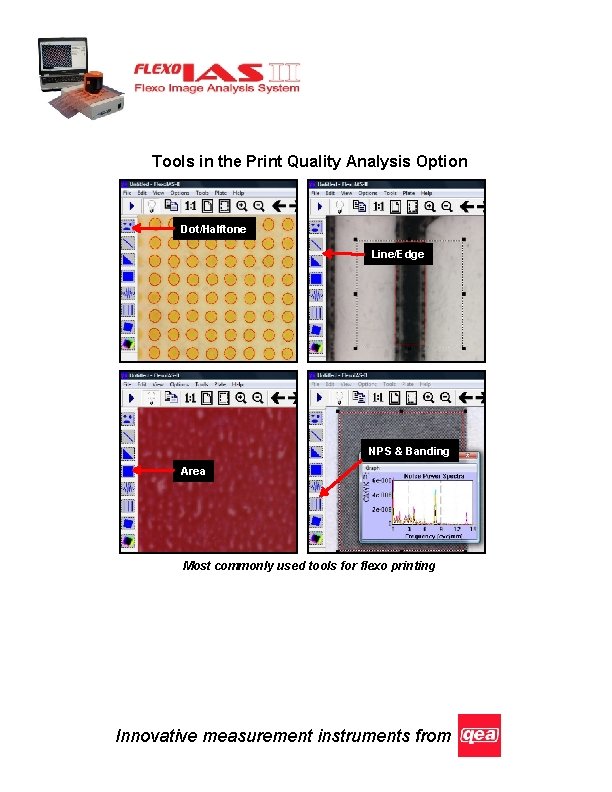
Tools in the Print Quality Analysis Option Dot/Halftone Line/Edge NPS & Banding Area Most commonly used tools for flexo printing Innovative measurement instruments from

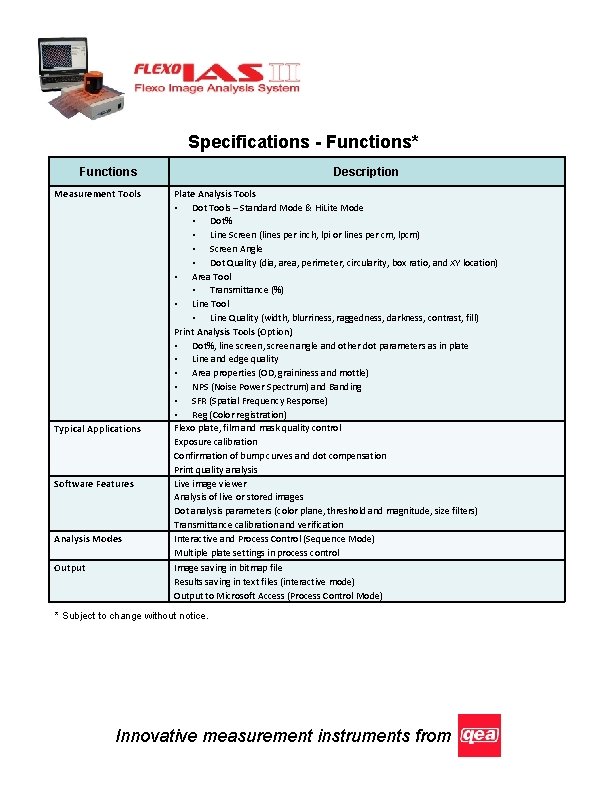
Specifications - Functions* Functions Measurement Tools Typical Applications Software Features Analysis Modes Output Description Plate Analysis Tools • Dot Tools – Standard Mode & Hi. Lite Mode • Dot% • Line Screen (lines per inch, lpi or lines per cm, lpcm) • Screen Angle • Dot Quality (dia, area, perimeter, circularity, box ratio, and XY location) • Area Tool • Transmittance (%) • Line Tool • Line Quality (width, blurriness, raggedness, darkness, contrast, fill) Print Analysis Tools (Option) • Dot%, line screen, screen angle and other dot parameters as in plate • Line and edge quality • Area properties (OD, graininess and mottle) • NPS (Noise Power Spectrum) and Banding • SFR (Spatial Frequency Response) • Reg (Color registration) Flexo plate, film and mask quality control Exposure calibration Confirmation of bump curves and dot compensation Print quality analysis Live image viewer Analysis of live or stored images Dot analysis parameters (color plane, threshold and magnitude, size filters) Transmittance calibration and verification Interactive and Process Control (Sequence Mode) Multiple plate settings in process control Image saving in bitmap file Results saving in text files (interactive mode) Output to Microsoft Access (Process Control Mode) * Subject to change without notice. Innovative measurement instruments from

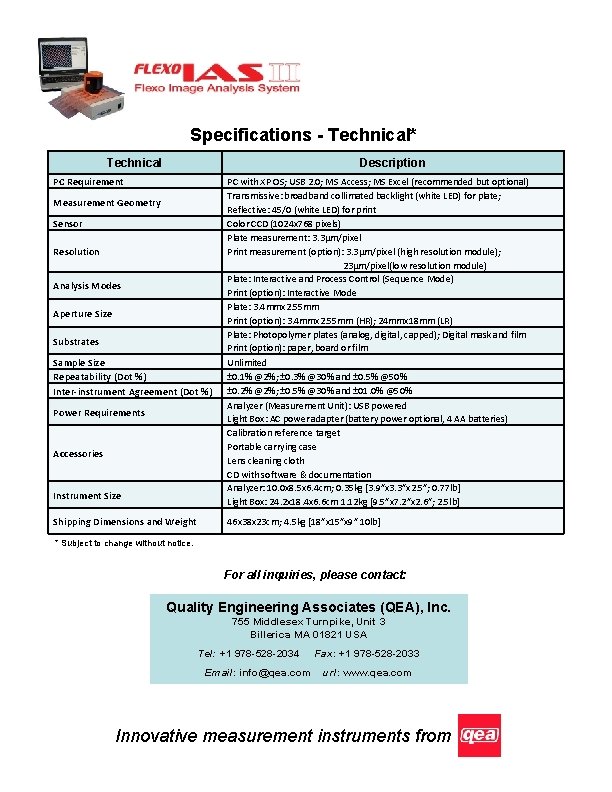
Specifications - Technical* Technical Description PC Requirement Measurement Geometry Sensor Resolution Analysis Modes Aperture Size Substrates Sample Size Repeatability (Dot %) Inter-instrument Agreement (Dot %) Power Requirements Accessories Instrument Size Shipping Dimensions and Weight PC with XP OS; USB 2. 0; MS Access; MS Excel (recommended but optional) Transmissive: broadband collimated backlight (white LED) for plate; Reflective: 45/0 (white LED) for print Color CCD (1024 x 768 pixels) Plate measurement: 3. 3µm/pixel Print measurement (option): 3. 3µm/pixel (high resolution module); 23µm/pixel(low resolution module) Plate: Interactive and Process Control (Sequence Mode) Print (option): Interactive Mode Plate: 3. 4 mmx 2. 55 mm Print (option): 3. 4 mmx 2. 55 mm (HR); 24 mmx 18 mm (LR) Plate: Photopolymer plates (analog, digital, capped); Digital mask and film Print (option): paper, board or film Unlimited ± 0. 1% @2%; ± 0. 3% @30% and ± 0. 5% @50% ± 0. 2% @2%; ± 0. 5% @30% and ± 01. 0% @50% Analyzer (Measurement Unit): USB powered Light Box: AC power adapter (battery power optional, 4 AA batteries) Calibration reference target Portable carrying case Lens cleaning cloth CD with software & documentation Analyzer: 10. 0 x 8. 5 x 6. 4 cm; 0. 35 kg [3. 9”x 3. 3”x 2. 5”; 0. 77 lb] Light Box: 24. 2 x 18. 4 x 6. 6 cm 1. 12 kg [9. 5”x 7. 2”x 2. 6”; 2. 5 lb] 46 x 38 x 23 cm; 4. 5 kg [18”x 15”x 9” 10 lb] * Subject to change without notice. For all inquiries, please contact: Quality Engineering Associates (QEA), Inc. 755 Middlesex Turnpike, Unit 3 Billerica MA 01821 USA Tel: +1 978 -528 -2034 Email: info@qea. com Fax: +1 978 -528 -2033 url: www. qea. com Innovative measurement instruments from