Accuracy Clearness and Completeness DIMENSIONING BASICS Dimensioning Tolerances
Accuracy, Clearness, and Completeness DIMENSIONING BASICS Dimensioning & Tolerances 1
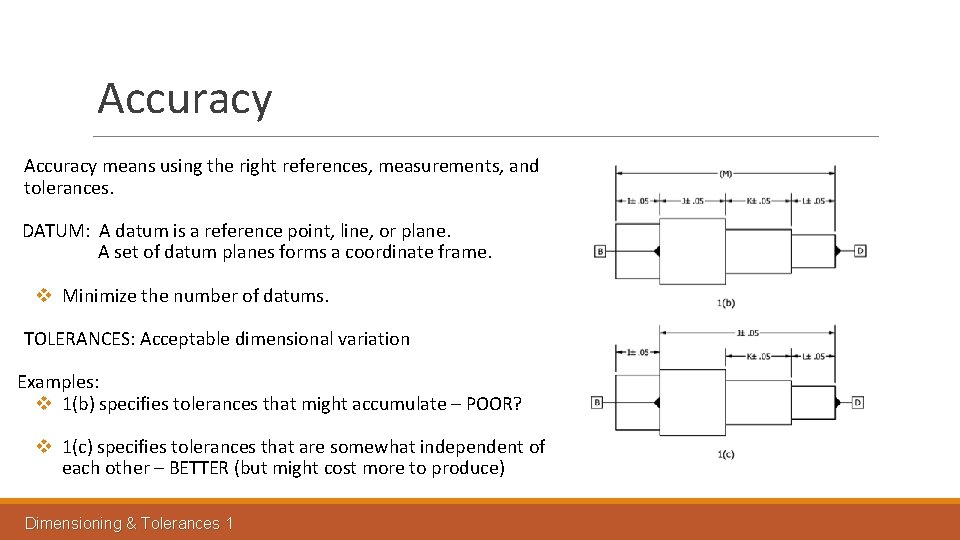
Accuracy means using the right references, measurements, and tolerances. DATUM: A datum is a reference point, line, or plane. A set of datum planes forms a coordinate frame. v Minimize the number of datums. TOLERANCES: Acceptable dimensional variation Examples: v 1(b) specifies tolerances that might accumulate – POOR? v 1(c) specifies tolerances that are somewhat independent of each other – BETTER (but might cost more to produce) Dimensioning & Tolerances 1
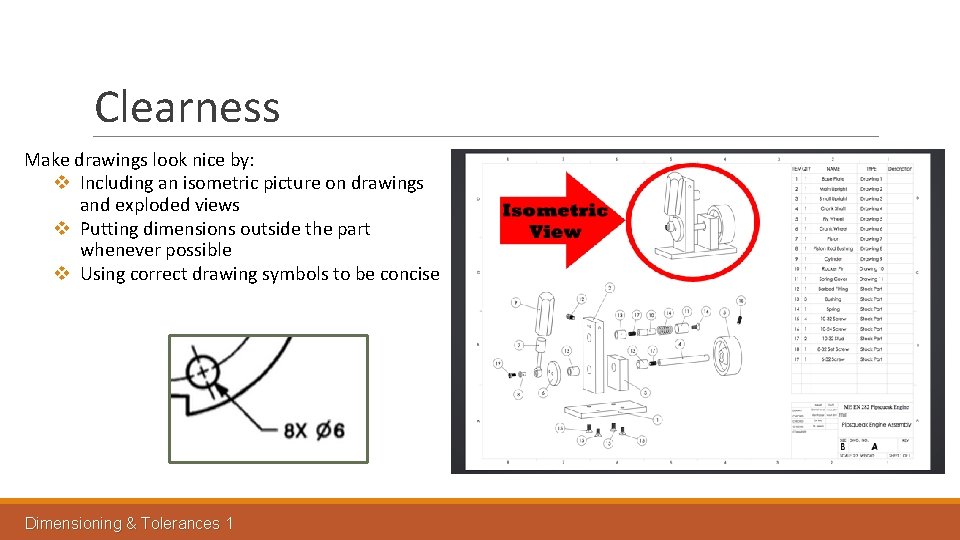
Clearness Make drawings look nice by: v Including an isometric picture on drawings and exploded views v Putting dimensions outside the part whenever possible v Using correct drawing symbols to be concise Dimensioning & Tolerances 1

List of Dimensioning Practices Posted on Learning Suite: http: //www. eng. fiu. edu/mme/robotics/EML 4501 Mech. Design. II/Catalogs/ASME_Y 14. 5 M 1994_Dimensioning_and_Tolerancing. pdf Dimensioning & Tolerances 1
Completeness means Ø Having a complete drawing means that each dimension is labeled. Ø Taking a step back from your drawing to see if you or your partner can see any flaws in the drawing. v Do you have more than one dimension where one would suffice? (over-dimensioned) v Are you missing any dimensions? v Do you include realistic tolerance specifications where necessary? Ø Having a plan and doing partner checks to prevent you from having errors in your drawings. Dimensioning & Tolerances 1
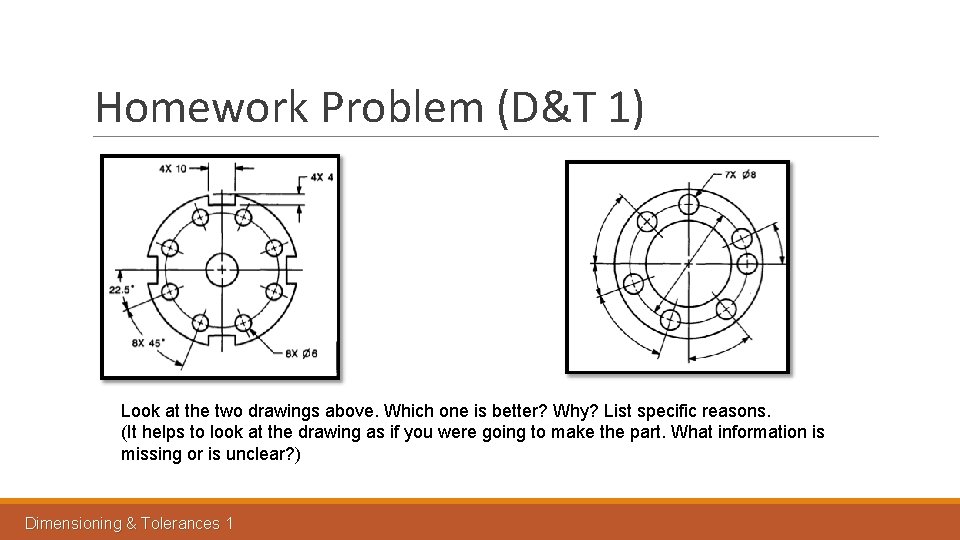
Homework Problem (D&T 1) Look at the two drawings above. Which one is better? Why? List specific reasons. (It helps to look at the drawing as if you were going to make the part. What information is missing or is unclear? ) Dimensioning & Tolerances 1
- Slides: 6