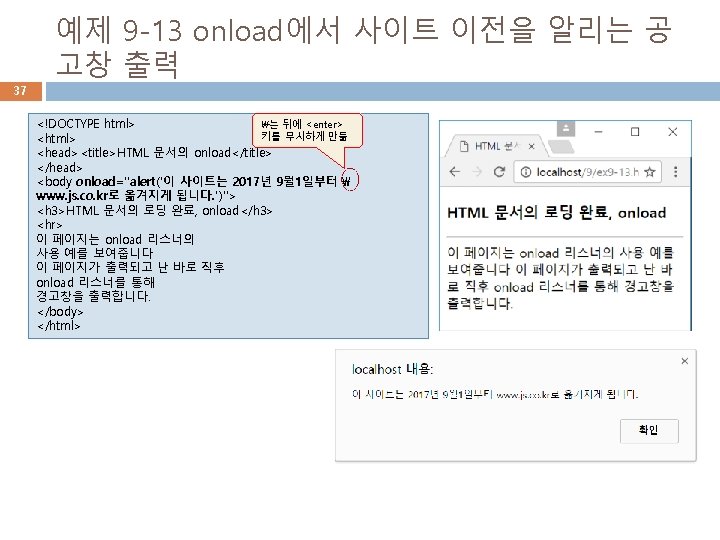
9 1 HTML 6 DOCTYPE html headtitleHTML title


 메소드 활용 9 add. Event. Listener() 메소드 예) p.")
 사용 10 <!DOCTYPE html> <head> <title>add. Event. Listener()를")


 { p. style. background.")


 click 이벤트")

")


로 이미지 로딩 42 <!DOCTYPE html> <html><head><title>new Image()로 이미지 로딩</title>")


 클릭 시")
- Slides: 52
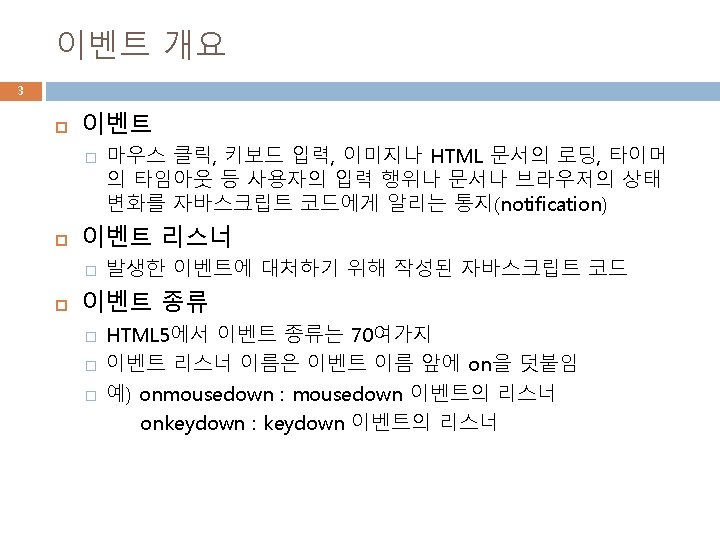
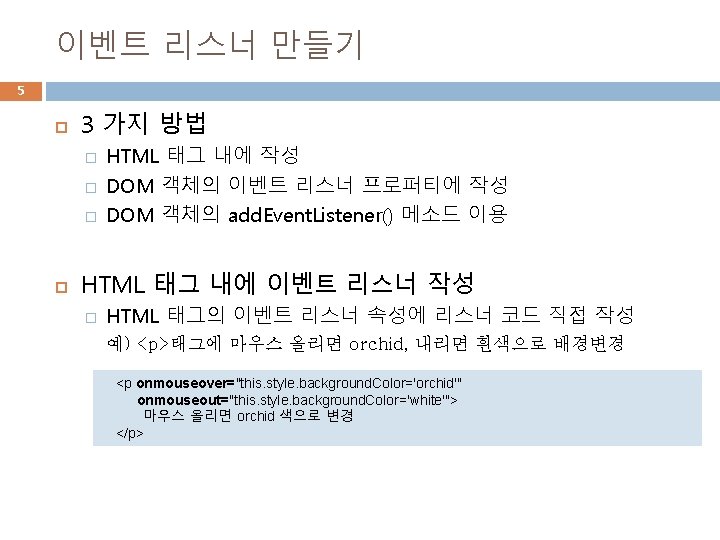
예제 9 -1 HTML 태그 내에 이벤트 리스너 작성 6 <!DOCTYPE html> <head><title>HTML 태그에 리스너 작성</title> </head> <body> <p>HTML 태그에 리스너 작성</p> <hr> <p onmouseover="this. style. background. Color='orchid'" onmouseout="this. style. background. Color='white'"> 마우스 올리면 orchid 색으로 변경</p> </body> </html> 이곳에 마우스를 올리 면 배경색 변함
8 예제 9 -2 DOM 객체의 이벤트 리스너 프로퍼티 에 리스너 등록 <!DOCTYPE html> <head> <title>DOM 객체의 이벤트 리스너 프로퍼티에 함수 등록</title> <script> var p; function init() { // 문서가 완전히 로드되었을 때 호출 p = document. get. Element. By. Id("p"); p. onmouseover = over; // over()를 onmouseover 리스너로 등록 p. onmouseout = out; // out()를 onmouseout 리스너로 등록 } function over() { p. style. background. Color="orchid"; } function out() { p. style. background. Color="white"; } </script> </head> <body onload="init()"> <h 3>DOM 객체의 이벤트 리스너 프로퍼티에 함수 등록</h 3> <hr> <p id="p">마우스 올리면 orchid 색으로 변경</p> </body> </html> 이곳에 마우스를 올리 면 배경색 변함
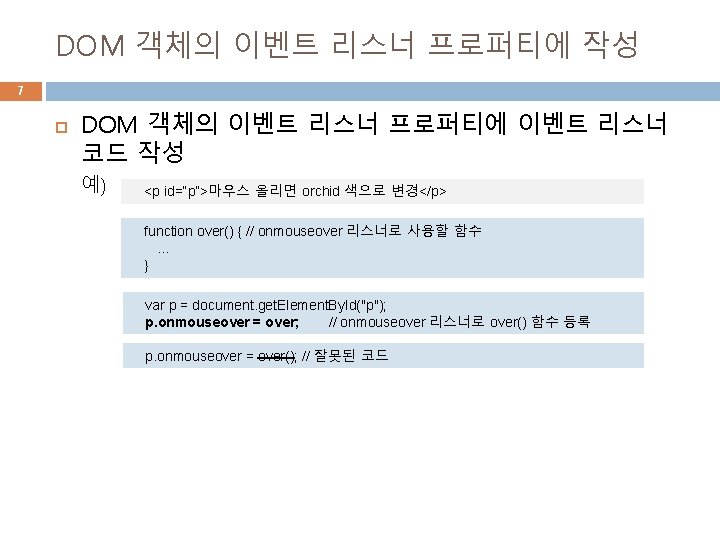
DOM 객체의 add. Event. Listener() 메소드 활용 9 add. Event. Listener() 메소드 예) p. add. Event. Listener("mouseover", over); // onmouseover 리스너로 over() 등록
예제 9– 3 add. Event. Listener() 사용 10 <!DOCTYPE html> <head> <title>add. Event. Listener()를 이용한 리스너 등록</title> <script> var p; function init() { // 문서가 완전히 로드되었을 때 호출 p = document. get. Element. By. Id("p"); p. add. Event. Listener("mouseover", over); // 이벤트 리스너 등록 p. add. Event. Listener("mouseout", out); // 이벤트 리스너 등록 } function over() { p. style. background. Color="orchid"; } function out() { p. style. background. Color="white"; } </script> </head> <body onload="init()"> <h 3>add. Event. Listener()를 이용한 리스너 등록</h 3> 이곳에 마우스를 올리 <hr> 면 배경색 변함 <p id="p">마우스 올리면 orchid 색으로 변경</p> </body> </html>
예제 9 -4 익명 함수로 이벤트 리스너 작성 12 <!DOCTYPE html> <head> <title>익명 함수로 이벤트 리스너 작성</title> <script> var p; function init() { // 문서가 완전히 로드되었을 때 호출 p = document. get. Element. By. Id("p"); p. onmouseover = function () { // 익명 함수 this. style. background. Color = "orchid"; }; p. add. Event. Listener("mouseout", function () { this. style. background. Color="white"; } // 익명 함수 ); } </script> </head> <body onload="init()"> <h 3>익명 함수로 이벤트 리스너 작성</h 3> <hr> <p id="p">마우스 올리면 orchid 색으로 변경</p> </body> 이곳에 마우스를 올리 </html> 면 배경색 변함
이벤트 리스너 작성 방법 4 가지 비교 13 function over() { p. style. background. Color="orchid"; } (1) HTML 태그 <p id="p" onmouseover="this. style. background. Color='orchid'" 마우스 올리면 orchid 색으로 변경 </p> (2) 이벤트 리스너 프로퍼티 function over() { p. style. background. Color="orchid"; } p. onmouseover = over; (3) add. Event. Listener() 메소드 이용 p. add. Event. Listener("mouseover", over); (4) 익명 함수 이용 p. onmouseover = function () { this. style. background. Color="orchid"; }; (5) 익명 함수 이용 p. add. Event. Listener("mouseover", function () { this. style. background. Color="orchid"; } );
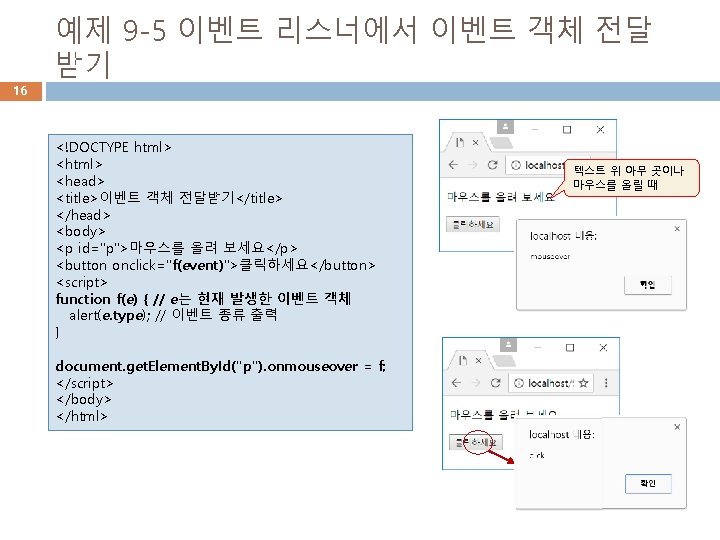
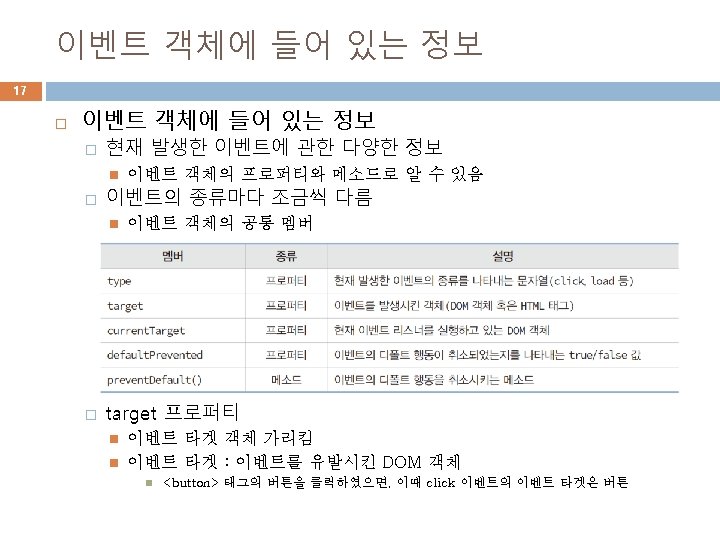
예제 9 -6 이벤트 객체의 프로퍼티 출력 18 <!DOCTYPE html> <head><title>이벤트 객체 프로퍼티</title> </head> <body> <h 3>이벤트 객체의 프로퍼티 출력</h 3> <hr> <p id="p">버튼을 클릭하면 이벤트 객체를 출력합니다. </p> <button onclick="f(event)">클릭하세요</button> <script> function f(e) { // e는 현재 발생한 이벤트 객체 var text = "type: " + e. type + " " + "target: " + e. target + " " + "current. Target: " + e. current. Target + " " + "default. Prevented: " + e. default. Prevented; var p = document. get. Element. By. Id("p"); p. inner. HTML = text; // 이벤트 객체의 프로퍼티 출력 } </script> </body> </html> 버튼을 클릭하면 click 이벤트 객체의 프로퍼 티 출력
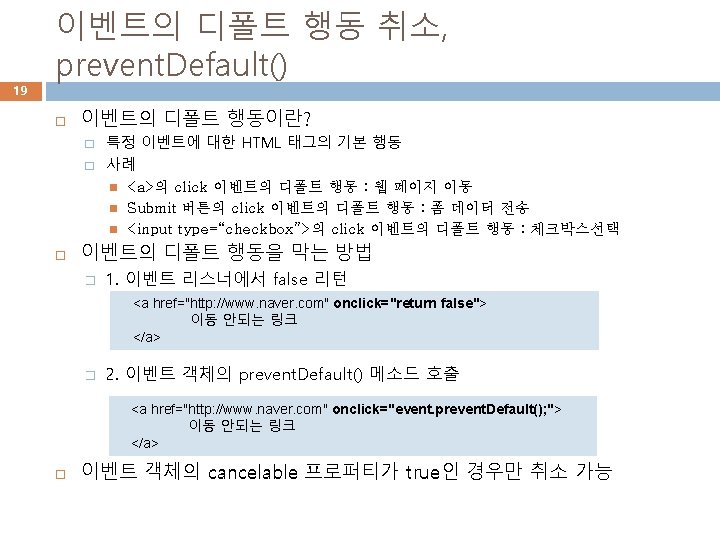
예제 9 -7 이벤트의 디폴트 행동 취소 20 <!DOCTYPE html> <html><head><title>이벤트의 디폴트 행동 취소</title> <script> function query() { var ret = confirm("네이버로 이동하시겠습니까? "); return ret; // confirm()의 리턴 값은 true 또는 false } function no. Action(e) { e. prevent. Default(); // 이벤트의 디폴트 행동 강제취소 } </script> </head> <body> <h 3>이벤트의 디폴트 행동 취소</h 3> <hr> <a href="http: //www. naver. com" onclick="return query()"> 네이버로 이동할 지 물어보는 링크</a> <hr> <form> <input type="checkbox">빵(체크 됨) <input type="checkbox" onclick="no. Action(event)">술(체크 안됨) </form> </body> </html> 취소 버튼을 누르면 네이버로 이동하지 않음
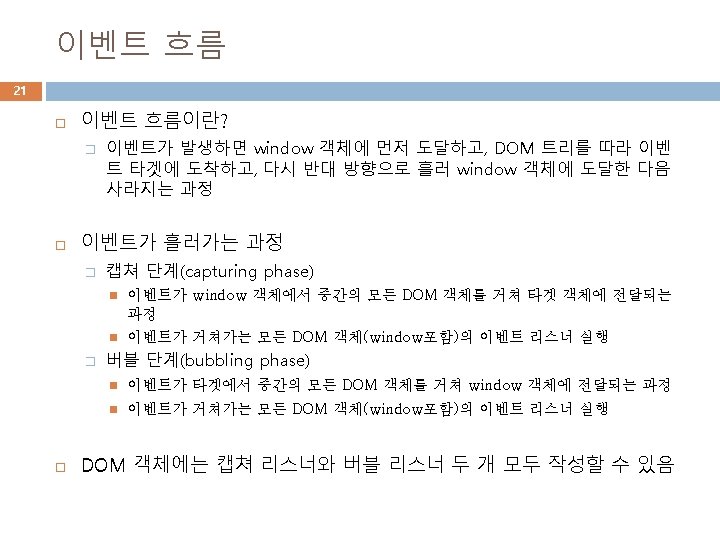
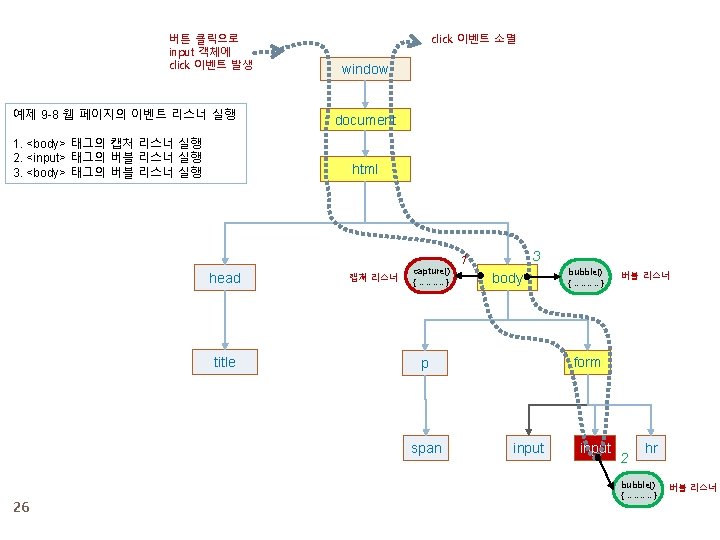
이벤트 흐름 사례 22 샘플 웹 페이지 <!DOCTYPE html> <html><head><title>HTML DOM 트리</title></head> <body> <p style="color: blue" >이것은 <span style="color: red">문장입니다. </span> </p> <form> <input type="text"> <input type="button" value="테스트" id="button"> <hr> </form> </body></html> 버튼 클릭, click 이벤트 발생
버튼 클릭으로 input 객체에 click 이벤트 발생 이벤트 캡쳐 단계 (event capture) click 이벤트 소멸 12 1 window 2 document 11 3 html 10 4 head title 이벤트 버블 단계 (event bubble) body 9 5 p form 8 6 span 23 input 7 input 이벤트 타겟 hr
예제 9 -8 이벤트 흐름 25 <!DOCTYPE html> <html><head><title>이벤트 흐름</title></head> <body> <p style="color: blue">이것은 <span style="color: red" id="span">문장입니다. </span> </p> <form> <input type="text" name="s"> <input type="button" value="테스트" id="button"> <hr> </form> <div id="div" style="color: green"></div> <script> var div = document. get. Element. By. Id("div"); // 이벤트 메시지 출력 공간 var button = document. get. Element. By. Id("button"); // body 객체에 캡쳐 리스너 등록 document. body. add. Event. Listener("click", capture, true); // 켭쳐 단계(1) // 타겟 객체에 버블 리스너 등록 button. add. Event. Listener("click", bubble, false); // 버블 단계(2) // body 객체에 버블 리스너 등록 document. body. add. Event. Listener("click", bubble, false); // 버블 단계(3) function capture(e) { // e는 이벤트 객체 var obj = e. current. Target; // 현재 이벤트를 받은 DOM 객체 var tag. Name = obj. tag. Name; // 태그 이름 div. inner. HTML += " capture 단계 : " + tag. Name + " 태그 " + e. type + "이벤트"; } function bubble(e) { // e는 이벤트 객체 var obj = e. current. Target; // 현재 이벤트를 받은 DOM 객체 var tag. Name = obj. tag. Name; // 태그 이름 div. inner. HTML += " bubble 단계 : " + tag. Name + " 태그 " + e. type + "이벤트"; } </script> </body></html> 버튼을 클릭하면 click 이벤트 발생
예제 9 -9 onclick 리스너로 계산기 만들기 29 <!DOCTYPE html> <html><head><title>onclick</title> <script> function calculate() { var exp = document. get. Element. By. Id("exp"); var result = document. get. Element. By. Id("result"); result. value = eval(exp. value); } </script> </head> <body > <h 3> onclick, 계산기 만들기</h 3> <hr> 계산하고자 하는 수식을 입력하고 계산 버튼을 눌러봐요. ’ <p> <form> 식 <input type="text" id="exp" value=""> 값 <input type="text" id ="result"> <input type="button" value=" 계산 " onclick="calculate()"> </form> </body> </html>
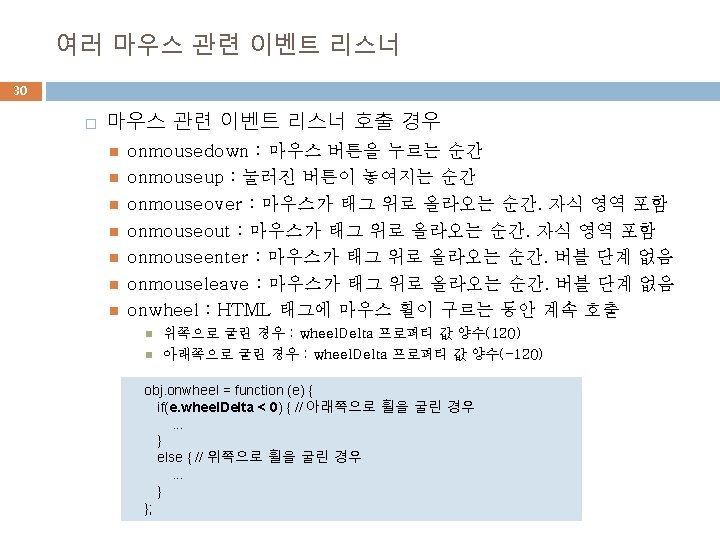
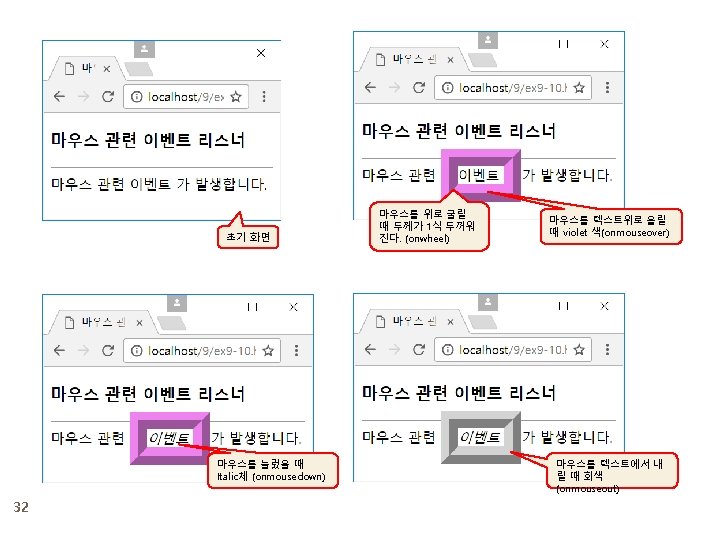
예제 9 -10 마우스 관련 이벤트 리스너 31 <!DOCTYPE html> <html><head><title>마우스 관련 리스너</title> <script> var width=1; // 테두리 두깨 function down(obj) { obj. style. font. Style = "italic"; } function up(obj) { obj. style. font. Style = "normal"; } function over(obj) { obj. style. border. Color = "violet"; // 테두리 폭이 0일 때 색은 보이지 않는다. } function out(obj) { obj. style. border. Color = "lightgray"; } function wheel(e, obj) { // e는 이벤트 객체 if(e. wheel. Delta < 0) { // 휠을 아래로 굴릴 때 width--; // 폭 1 감소 if(width < 0) width = 0; // 폭이 0보다 작아지지 않게 } else // 휠을 위로 굴릴 때 width++; // 폭 1 증가 obj. style. border. Style = "ridge"; obj. style. border. Width = width+"px"; } </script></head> <body > <h 3>마우스 관련 이벤트 리스너</h 3> <hr> <div>마우스 관련 <span onmousedown="down(this)" onmouseup="up(this)" onmouseover="over(this)" onmouseout="out(this)" onwheel="wheel(event, this)">이벤트 </span>가 발생합니다. </div> </body> </html>
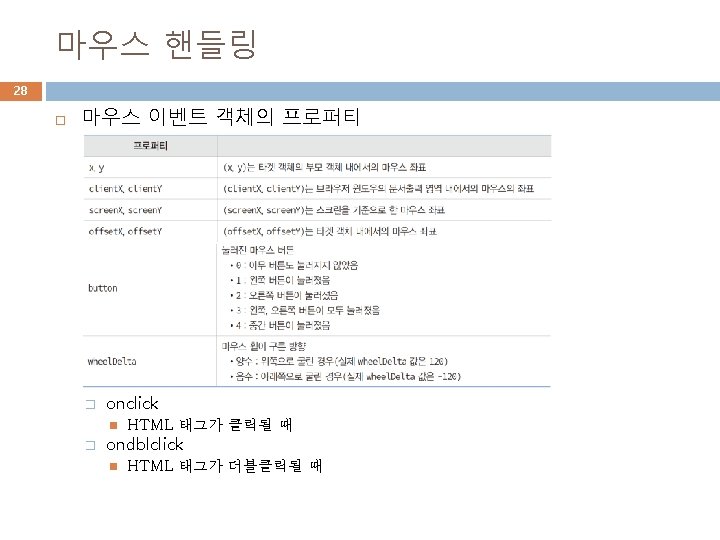
예제 9 -11 onmousemove와 마우스 위치 및 버튼 33 <!DOCTYPE html> <html><head><title>마우스 이벤트 객체의 프로퍼티</title> <style> div { background : skyblue; width : 250 px; } </style> </head> <body> <h 3>마우스 이벤트 객체의 프로퍼티와 onmousemove</h 3> <hr> 이미지 위에 마우스를 움직일 때 onmousemove 리스너가 실행되고, 마우스의 위치를 보여줍니다. <p> <img src="images/beach. png" onmousemove="where(event)"><p> <div id="div"></div> <script> var div = document. get. Element. By. Id("div"); function where(e) { var text = "버튼=" + e. button + " "; text += "(screen. X, screen. Y)=" + e. screen. X + ", “ + e. screen. Y + " "; text += "(client. X, client. Y)=" + e. client. X + ", " + e. client. Y + " "; text += "(offset. X, offset. Y)=" + e. offset. X + ", " + e. offset. Y + " "; text += "(x, y)=" + e. x + ", " + e. y + "n"; div. inner. HTML = text; } </script> </body> </html> 96 202 (88, 46) 두 좌표가 같은 이유는 <img>객체의 부모가 <body>로서, 브라우 저 윈도우이기 때문
예제 9 -14 onload로 이미지의 크기 알아내기 40 <!DOCTYPE html> <head><title>onload로 이미지 크기 출력</title> <script> function change. Image() { var sel = document. get. Element. By. Id("sel"); var img = document. get. Element. By. Id("my. Img"); img. onload = function () { // 이미지 크기 출력 var my. Span = document. get. Element. By. Id("my. Span"); my. Span. inner. HTML = img. width + "x" + img. height; } var index= selected. Index; // 선택된 옵션 인덱스 img. src = sel. options[index]. value; // <option>의 value 속성 } </script> </head> <body onload="change. Image()"> <h 3>onload로 이미지 크기 출력</h 3> <hr> <form> <select id="sel" onchange="change. Image()"> <option value="images/apple. png">사과 <option value="images/banana. png">바나나 <option value="images/mango. png">망고 </select> <span id="my. Span">이미지 크기</span> </form> <p><img id="my. Img" src="images/apple. png" alt=". "></p> </body> </html> banana. png의 이미지 크기
예제 9 -15 new Image()로 이미지 로딩 42 <!DOCTYPE html> <html><head><title>new Image()로 이미지 로딩</title> <script> // 미리 로딩해둘 이미지 이름 배열 var files = ["images/penguins. jpg", "images/lighthouse. jpg", "images/Chrysanthemum. jpg", "images/Desert. jpg", "images/Hydrangeas. jpg", "images/Jellyfish. jpg", "images/Koala. jpg", "images/Tulips. jpg"]; var imgs = new Array(); for(var i=0; i<files. length; i++) { imgs[i] = new Image(); // 이미지 객체 생성 imgs[i]. src = files[i]; // 이미지 로딩 } // 다음 이미지 출력 var next = 1; function change(img) { img. src = imgs[next]. src; // 이미지 변경 next++; // 다음 이미지 next %= imgs. length; // 개수를 넘으면 처음으로 } </script></head> <body> <h 3>new Image()로 이미지 로딩</h 3> <hr> 이미지를 클릭하면 다음 이미지를 보여줍니다. <p> <img style="border: 20 px ridge wheat" src="images/penguins. jpg" alt=". " width="200" height="200" onclick="change(this)"> </body></html> 클릭하면 다음 이미 지를 보여준다.
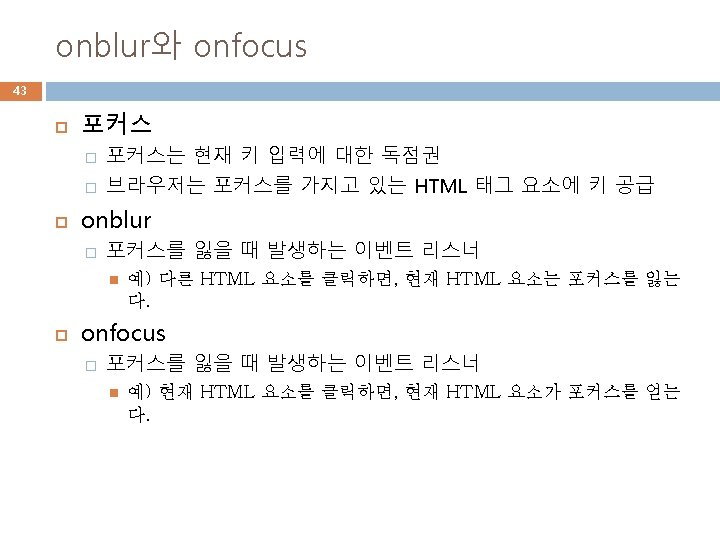
44 예제 9 -16 onfocus와 onblur, 입력 없이 다른 창 으로 갈 수 없음 <!DOCTYPE html> <head><title>onfocus와 onblur</title> <script> function check. Filled(obj) { if(obj. value == "") { alert("enter name!"); obj. focus(); // obj에 다시 포커스 } } </script> </head> <body onload="document. get. Element. By. Id('name'). focus(); "> <h 3>onfocus와 onblur</h 3> <hr> <p>이름을 입력하지 않고 다른 창으로 이동할 수 없습니다. </p> <form> 이름 <input type="text" id="name" onblur="check. Filled(this)"><p> 학번 <input type="text"> </form> </body> </html> 이름을 입력하지 않 은 상태에서 다른 곳을 클릭하면 아래 의 경고 창 출력
라디오버튼과 체크박스 45 라디오버튼 객체 � <input type="radio">로 만들어진 라디오 버튼 DOM 객체 <form> <input type="radio" name="city" value="seoul">서울 <input type="radio" name="city" value="busan">부산 <input type="radio" name="city" value="chunchen">춘천 </form> � 라디오 버튼 객체들 알아내기 var kcity = document. get. Elements. By. Name("city"); // kcity[0], kcity[1], kcity[2] 체크박스 객체 � <input type="checkbox">로 만들어진 체크박스 DOM 객체
예제 9 -17 선택된 라디오버튼 알아내기 46 <!DOCTYPE html> <head><title>선택된 라디오버튼 알아내기</title> <script> function find. Checked() { var found = null; var kcity = document. get. Elements. By. Name("city"); for(var i=0; i<kcity. length; i++) { if(kcity[i]. checked == true) found = kcity[i]; } if(found != null) alert(found. value + "이 선택되었음"); else alert("선택된 것이 없음"); } </script> </head> <body> <h 3>버튼을 클릭하면 선택된 라디오 버튼의 value를 출력합니다. </h 3> <hr> <form> <input type="radio" name="city" value="seoul" checked>서울 <input type="radio" name="city" value="busan">부산 <input type="radio" name="city" value="chunchen">춘천 <input type="button" value="find checked" onclick="find. Checked()"> </form> </body> </html>
예제 9– 18 체크박스로 선택한 물품 계산 47 <!DOCTYPE html> <head><title>선택된 물품 계산하기</title> <script> var sum=0; function calc(c. Box) { if(c. Box. checked) sum += parse. Int(c. Box. value); else sum -= parse. Int(c. Box. value); document. get. Element. By. Id("sumtext"). value = sum; } </script> </head> <body> <h 3>물품을 선택하면 금액이 자동 계산됩니다</h 3> <hr> <form> <input type="checkbox" name="hap" value="10000" onclick="calc(this)">모자 1만원 <input type="checkbox" name="shose" value="30000" onclick="calc(this)">구두 3만원 <input type="checkbox" name="bag" value="80000" onclick="calc(this)">명품가방 8만원 지불하실 금액 <input type="text" id="sumtext" value="0" > </form> </body> </html>
select 객체와 onchange 48 select 객체는 <select> 태그로 만들어진 콤보박스 � option 객체는 <option>태그로 표현되는 옵션 아이템 <select id="fruits"> <option value="1">딸기</option> <option value="2" selected>바나나</option> <option value="3">사과</option> </select> � 선택된 옵션 알아내기 var sel = document. get. Element. By. Id("fruits"); var index = selected. Index; // index는 선택 상태의 옵션 인덱스 � 옵션 선택 selected. Index = 2; // 3번째 옵션 “사과” 선택 sel. options[2]. selected = true; // 3번째 옵션 “사과” 선택 � select와 onchange 리스너 선택된 옵션이 변경되면 select 객체의 onchange 리스너 호출 <select id="fruits" onchange="draw. Image()">. . . </select>
예제 9 -19 select 객체에서 선택한 과일 출력 49 <!DOCTYPE html> <head> <title>select 객체에서 선택한 과일출력</title> <script> function draw. Image() { var sel = document. get. Element. By. Id("fruits"); var img = document. get. Element. By. Id("fruitimage"); img. src = sel. options[sel. selected. Index]. value; } </script> </head> <body onload="draw. Image()"> <h 3>select 객체에서 선택한 과일 출력</h 3> <hr> 과일을 선택하면 이미지가 출력됩니다. <p> <form> <select id="fruits" onchange="draw. Image()"> <option value="images/strawberry. png">딸기 <option value="images/banana. png" selected>바나나 <option value="images/apple. png">사과 </select> <img id="fruitimage" src="images/banana. gif" alt=""> </form> </body> </html>
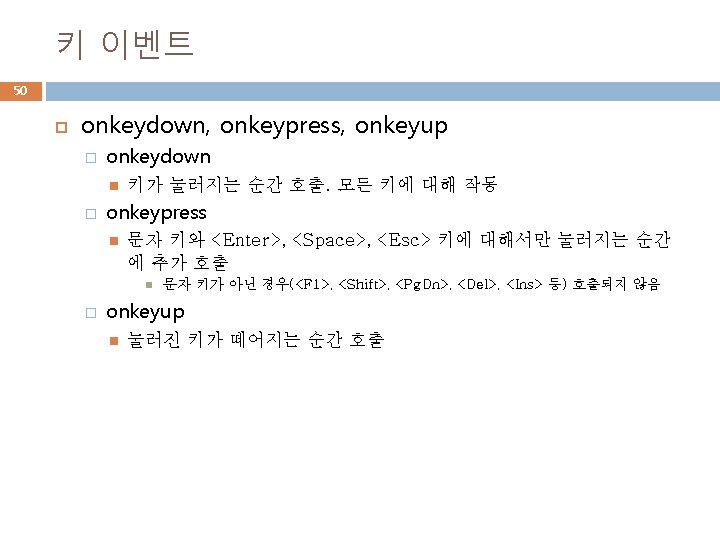
51 예제 9 -20 키 이벤트 리스너와 이벤트 객체의 프 로퍼티 <!DOCTYPE html> <html><head><title>키 이벤트</title> <script> function what. Key. Down(e) { var str = ""; var div = document. get. Element. By. Id("div"); div. inner. HTML = ""; // div 객체 내용을 지운다. if(e. alt. Key) { if(e. alt. Left) str += "왼쪽 Alt 키가 눌러졌습니다"; else str += "오른쪽 Alt 키가 눌러졌습니다. "; str += " "; } <body> <h 3>키 리스너와 키 이벤트 객체의 프로퍼티</h 3> <hr> 텍스트 창에 키를 눌러 보세요. Alt, Shift, Ctrl 키도 가능합니다. <input type="text" id="text" onkeydown="what. Key. Down(event)"> <div id="div" style="background-color: skyblue; width: 250 px; height: 50 px"> </div> </body> </html> if(e. shift. Key) { if(e. shift. Left) str += "왼쪽 Shift 키가 눌러졌습니다. "; else str += "오른쪽 Shift 키가 눌러졌습니다. "; str += " "; } if(e. ctrl. Key) { if(e. ctrl. Left) str += "왼쪽 Ctrl 키가 눌러졌습니다. "; else str += "오른쪽 Ctrl 키가 눌러졌습니다"; str += " "; } str += String. from. Char. Code(e. key. Code) + "키가 눌려졌습니다. " div. inner. HTML = str; // div 객체에 문자열을 출력한다. } </script> </head>
onreset과 onsubmit 52 onreset � � onsubmit � � reset 버튼(<input type="rest">) 클릭 시 false를 리턴하면 폼이 초기화되지 않음 submit(<input type="rest">) 버튼 클릭 시 false를 리턴하면 폼 전송하지 않음 리스너 작성 <form onreset=". . . " onsubmit=". . . ">