2 USING MEASURING INSTRUMENTS PROPERLY 1 VERNIER CALIPERS
- Slides: 14

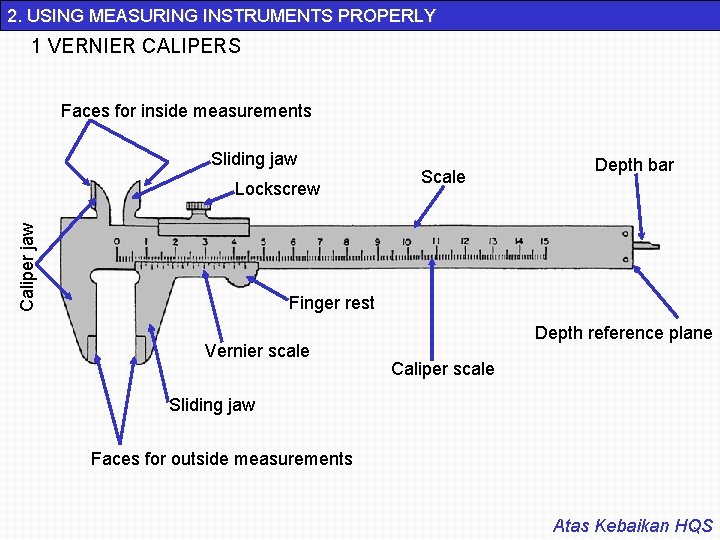
2. USING MEASURING INSTRUMENTS PROPERLY 1 VERNIER CALIPERS Faces for inside measurements Sliding jaw Caliper jaw Lockscrew Scale Depth bar Finger rest Vernier scale Depth reference plane Caliper scale Sliding jaw Faces for outside measurements Atas Kebaikan HQS

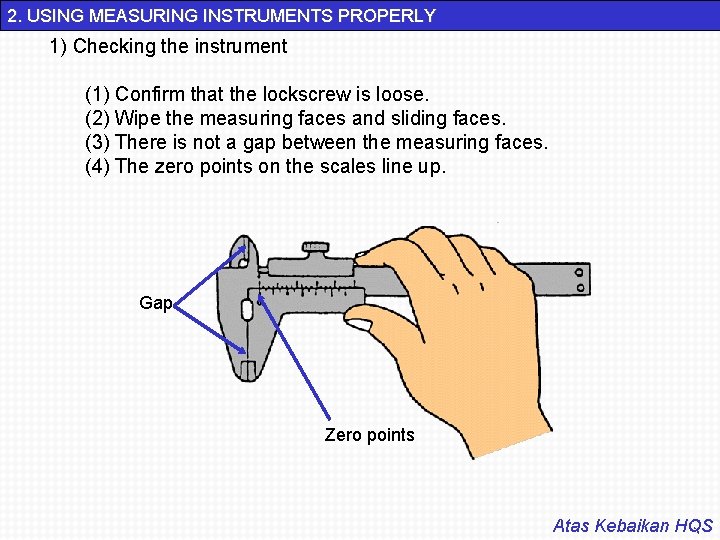
2. USING MEASURING INSTRUMENTS PROPERLY 1) Checking the instrument (1) Confirm that the lockscrew is loose. (2) Wipe the measuring faces and sliding faces. (3) There is not a gap between the measuring faces. (4) The zero points on the scales line up. Gap Zero points Atas Kebaikan HQS

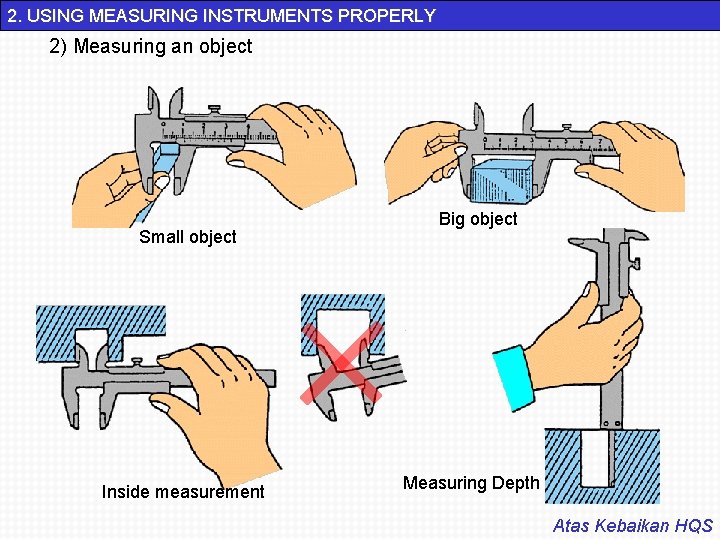
2. USING MEASURING INSTRUMENTS PROPERLY 2) Measuring an object Small object Inside measurement Big object Measuring Depth Atas Kebaikan HQS

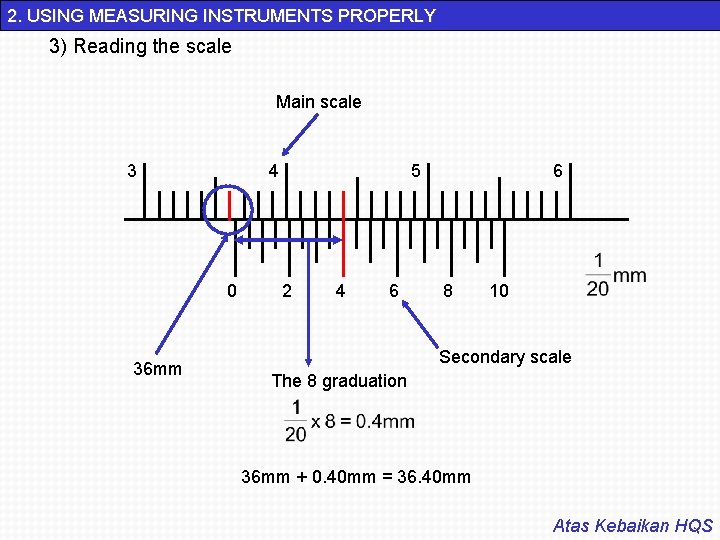
2. USING MEASURING INSTRUMENTS PROPERLY 3) Reading the scale Main scale 3 4 0 36 mm 5 2 4 6 6 8 10 Secondary scale The 8 graduation 36 mm + 0. 40 mm = 36. 40 mm Atas Kebaikan HQS

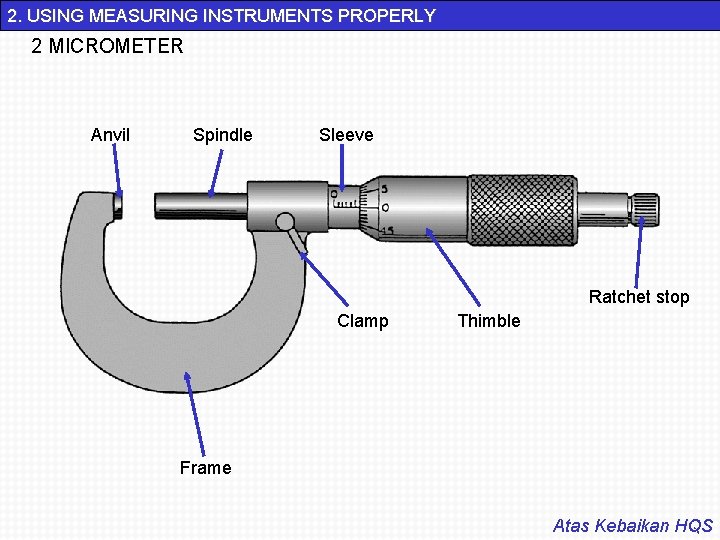
2. USING MEASURING INSTRUMENTS PROPERLY 2 MICROMETER Anvil Spindle Sleeve Ratchet stop Clamp Thimble Frame Atas Kebaikan HQS

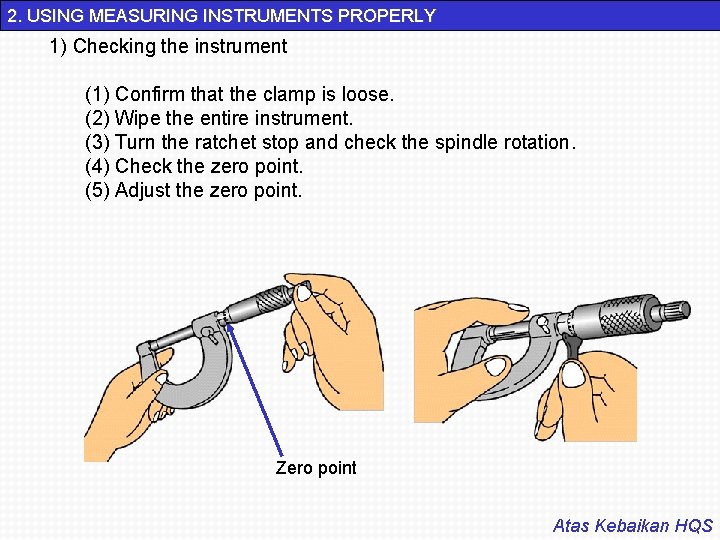
2. USING MEASURING INSTRUMENTS PROPERLY 1) Checking the instrument (1) Confirm that the clamp is loose. (2) Wipe the entire instrument. (3) Turn the ratchet stop and check the spindle rotation. (4) Check the zero point. (5) Adjust the zero point. Zero point Atas Kebaikan HQS

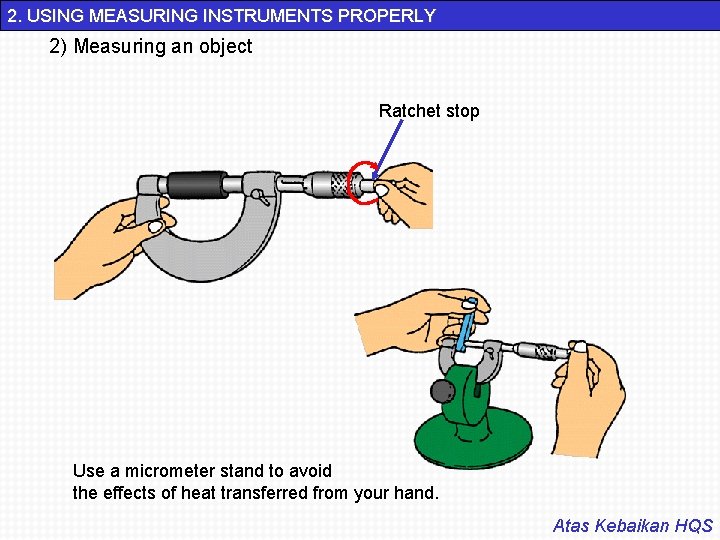
2. USING MEASURING INSTRUMENTS PROPERLY 2) Measuring an object Ratchet stop Use a micrometer stand to avoid the effects of heat transferred from your hand. Atas Kebaikan HQS

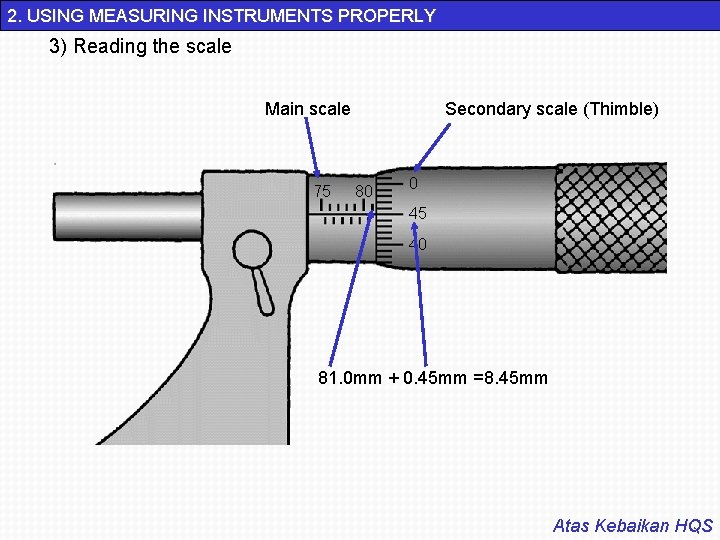
2. USING MEASURING INSTRUMENTS PROPERLY 3) Reading the scale Main scale 75 Secondary scale (Thimble) 80 0 45 40 81. 0 mm + 0. 45 mm =8. 45 mm Atas Kebaikan HQS

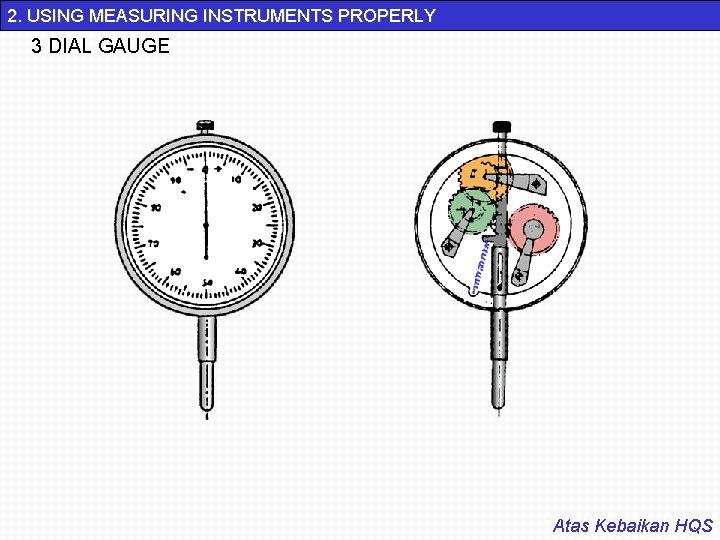
2. USING MEASURING INSTRUMENTS PROPERLY 3 DIAL GAUGE Atas Kebaikan HQS

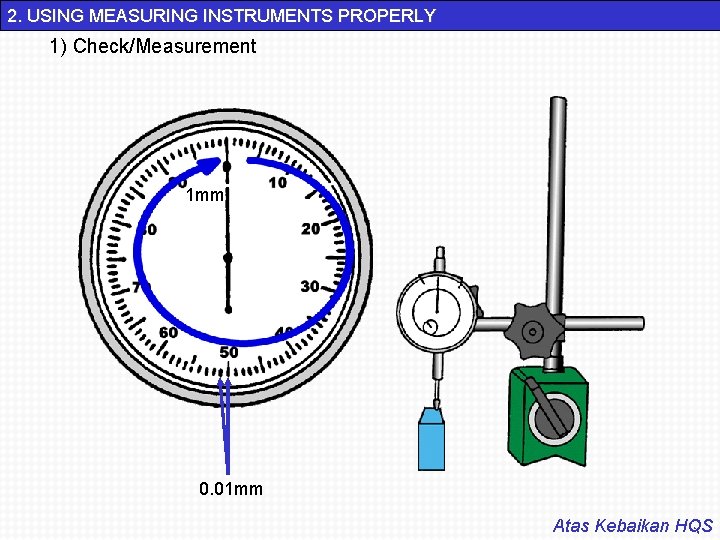
2. USING MEASURING INSTRUMENTS PROPERLY 1) Check/Measurement 1 mm 0. 01 mm Atas Kebaikan HQS

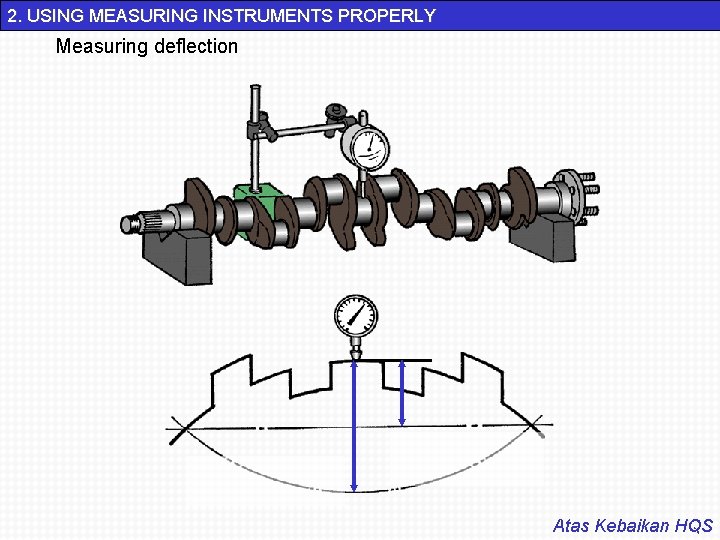
2. USING MEASURING INSTRUMENTS PROPERLY Measuring deflection Atas Kebaikan HQS

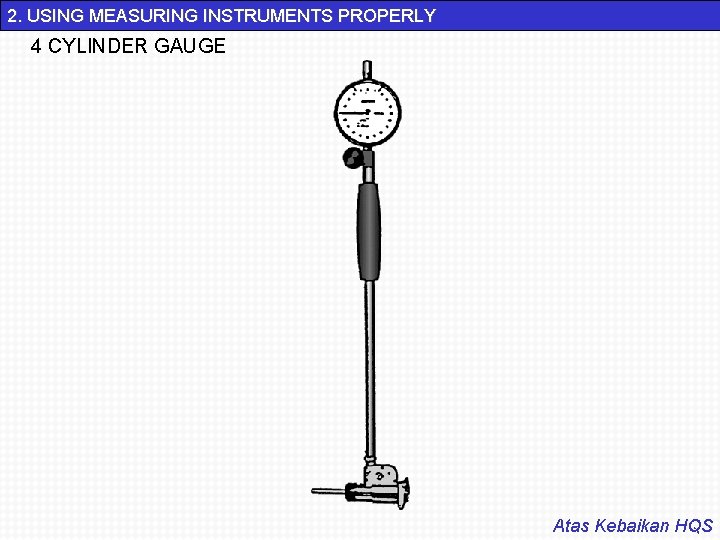
2. USING MEASURING INSTRUMENTS PROPERLY 4 CYLINDER GAUGE Atas Kebaikan HQS

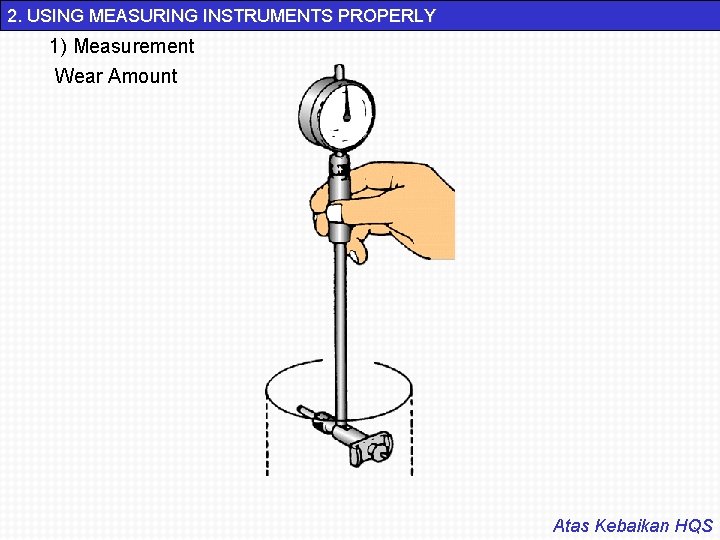
2. USING MEASURING INSTRUMENTS PROPERLY 1) Measurement Wear Amount Atas Kebaikan HQS

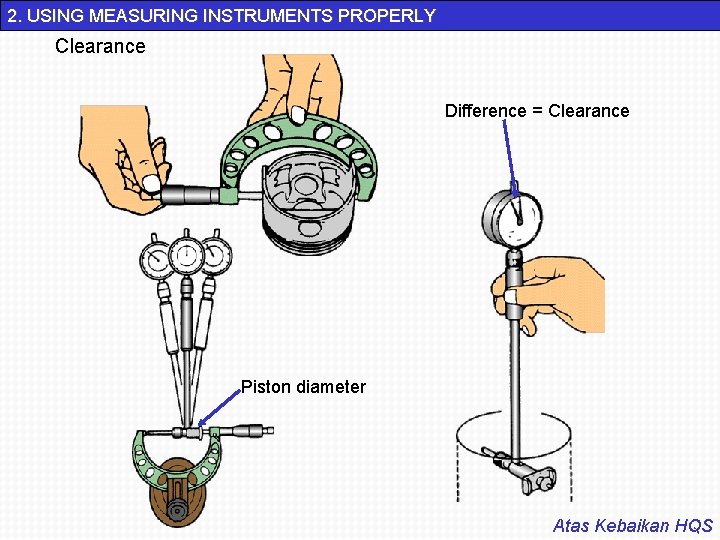
2. USING MEASURING INSTRUMENTS PROPERLY Clearance Difference = Clearance Piston diameter Atas Kebaikan HQS