2 6 Angular Chap 11 Starting Angular Chap


 개발에 활용. RESTful API, Mongo.")

 � � 모델과 뷰 사이에 실제")

을 이용한 Angular 메인모듈 생성")
 <!– index. html --> <!DOCTYPE")


을 제작해보자.")
 are Web apps that load a")


![Angular의 모듈과 컨트롤러 생성 29 public/js/app. js angular. module('router. App', [ ]) router. App을](https://slidetodoc.com/presentation_image/4efcc9f6046aa44565ed8139e031c64d/image-29.jpg "Angular의 모듈과 컨트롤러 생성 29 public/js/app. js angular. module('router. App', [ ]) router. App을")

의 템플릿을 가져와")


- Slides: 48
2 6. Angular Chap 11. Starting Angular Chap 12. Angular Routing Chap 13. Animating Angular Applications
Node와 Angular의 비교 3 Node � � Back-end (서버측) 개발에 활용. RESTful API, Mongo. DB를 활용한 CRUD Angular � � � Front-end (클라이언트측) 개발의 최전선 핵심 기술 Superheroic Java. Script MVC Framework 웹앱을 위한 확장 HTML https: //angularjs. org/
Angular 2. 0 open 4 https: //angular. io/
Angular의 중요 개념 6 1. Data-binding (데이터 결합) � � 모델과 뷰 사이에 실제 데이터를 자동 반영. 사용자의 별도 노력 이 필요하지 않음 Single true source of data “The compilation step produces a live view. Any changes to the view are immediately reflected in the model, and any changes in the model are propagated to the view. The model is the single-source-of-truth for the application state, greatly simplifying the programming model for the developer. You can think of the view as simply an instant projection of your model. ”
첫번째 Angular 예제 10 Angular 앱의 생성 angular. module( )을 이용한 Angular 메인모듈 생성 (first. App) Controller 선언 (main. Controller) 현재 페이지의 객체를 vm이라는 변수로 뷰모델과 바인딩 변수 생성 (message) 리스트 변수 생성 (computers) // app. js // name our angular app angular. module('first. App', []). controller('main. Controller', function() { // bind this to vm (view-model) var vm = this; // define variables and objects on this // this lets them be available to our views // define a basic variable vm. message = 'Hey there! Come and see how good I look!'; // define a list of items vm. computers = [ { name: 'Macbook Pro', color: 'Silver', nerdness: 7 }, { name: 'Yoga 2 Pro', color: 'Gray', nerdness: 6 }, { name: 'Chromebook', color: 'Black', nerdness: 5 } ]; });
첫번째 Angular 예제 11 Angular 앱의 적용 (index. html) <!– index. html --> <!DOCTYPE html> <html lang="en"> <head> <meta charset="UTF-8"> <title>My First Angular Application!</title> <!-- CSS --> <!-- load bootstrap and our stylesheet --> <link rel="stylesheet" href="http: //maxcdn. bootstrapcdn. com/bootstrap/3. 2. 0/css/bootstrap. min. css"> <style> body { padding-top: 50 px; } Bootstrap CSS를 CDN에서 불러오기 </style> 디바이스의 화면크기에 맞추어 스타일 자동 변경 화면이 작은 모바일 디바이스에 적합한 페이지 작성 </head> <!-- JS --> <!-- load angular and our custom application --> <script src="http: //ajax. googleapis. com/ajax/libs/angularjs/1. 3. 8/angular. min. js"></script> <script src="js/app. js"></script> 앞에서 생성한 Angular app을 불러오기 Angular. js를 CDN에서 불러오기 * CDN - Content Delivery Network 여러곳의 IDC 또는 ISP에 동일한 컨텐츠를 올려놓고, 접속자가 사용하는 인터넷전용회선의 종류에 따라 가장 가까운 곳에서 컨텐츠를 불러들일 수 있도록 지원하는 서비스
첫번째 Angular 예제 12 ng-app: angular app을 지정하는 지시자 <!-- declare our angular application and angular controller --> <body class="container" ng-app="first. App" ng-controller="main. Controller as main"> <div class="jumbotron"> <!-- display the message --> <h 2>This is my message: </h 2> {{ main. message }} <!-- display the list using ng-repeat --> <h 2>This is my list: </h 2> <table class="table-bordered"> <thead> <tr> </thead> <tbody> </table> </div> </body> </html> </tbody> </tr> ng-controller: 컨트롤러를 지정하는 지시자 컨트롤러를 main이라는 이름으로 사용 생성한 앱을 body에 적용 {{ }}는 컨트롤러에서 정의된 변수를 view에 보여줌 <td>Name</td> <td>Color</td> <td>Nerd Level</td> <tr ng-repeat="computer in main. computers"> <td>{{ computer. name }}</td> <td>{{ computer. color }}</td> <td>{{ computer. nerdness }}</td> </tr> ng-repeat는 리스트 변수의 값들을 모두 보여줌 자바스크립트의 foreach 구문과 동일한 역할
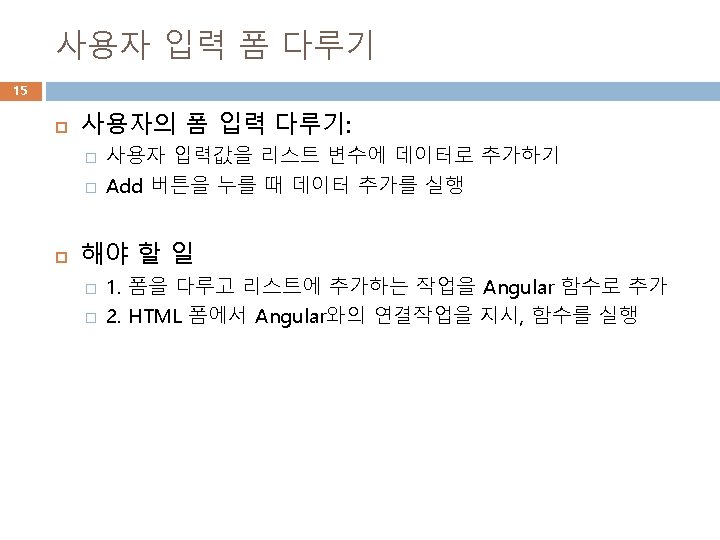
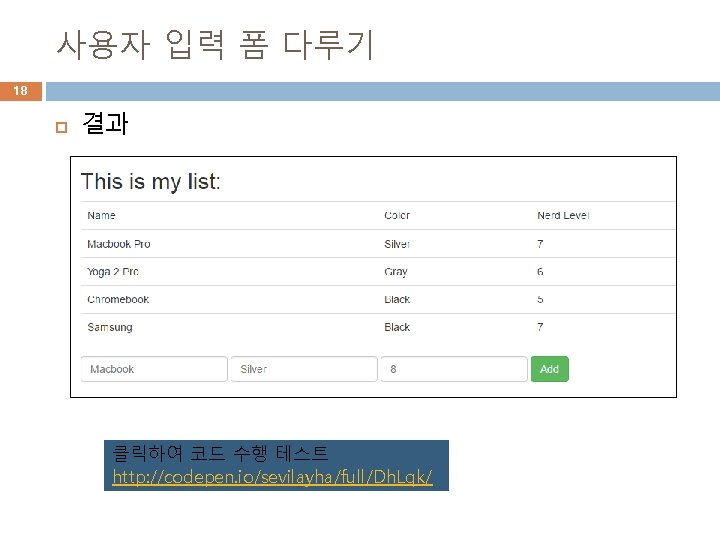
Data-binding 추가 14 사용자 입력과 뷰의 데이터를 결합하는 사례 <!-- form to update the message variable using ng-model --> <div class="form-group"> <label>Message</label> <input type="text" class="form-control" ng-model="main. message"> </div> 사용자 입력 양식 사용자 입력을 받아 main. message로 전달 <div class="jumbotron"> <!-- display the message --> <h 2>This is my message: </h 2> {{ main. message }} </div> ng-model 지시자는 사용자 입력과 앱의 변수를 결합 사용자 입력이 뷰에 즉시 반영됨 클릭하여 코드 수행 테스트 http: //codepen. io/sevilayha/full/Dh. Lqk/
사용자 입력 폼 다루기 16 App. js에 add. Computer 함수 추가 // information that comes from our form vm. computer. Data = {}; vm. add. Computer = function() { 사용자가 입력한 vm. computer. Data 값들을 // add a computer to the list vm. computers 리스트로 푸시 vm. computers. push({ name: vm. computer. Data. name, color: vm. computer. Data. color, nerdness: vm. computer. Data. nerdness }); }; // after our computer has been added, clear the form vm. computer. Data = {};
사용자 입력 폼 다루기 17 Index. html에 사용자입력 폼 추가 <!-- form to add computer to the list --> <form class="form-inline" ng-submit="main. add. Computer()"> <input type="text" class="form-control" placeholder="Macbook" ng-model="main. computer. Data. name"> <input type="text" class="form-control" placeholder="Silver" ng-model="main. computer. Data. color"> <input type="number" class="form-control" placeholder="8" ng-model="main. computer. Data. nerdness"> <button type="submit" class="btn btn-success">Add</button> </form> 사용자가 입력하는 세개의 값을 main. computer. Data의 name, color, nerdness 변수로 받아들여 add. Computer( ) 함수로 전달 Add 버튼을 누를 경우 add. Computer( ) 함수를 실행 add. Computer( ) 함수에서는 이 값들을 vm. computers 리스트로 푸시 뷰의 테이블에 즉시 반영됨 (data-binding)
사용자 입력 폼 다루기 19 Model ng-model View {{ Controller ng-controller }}, ng-view
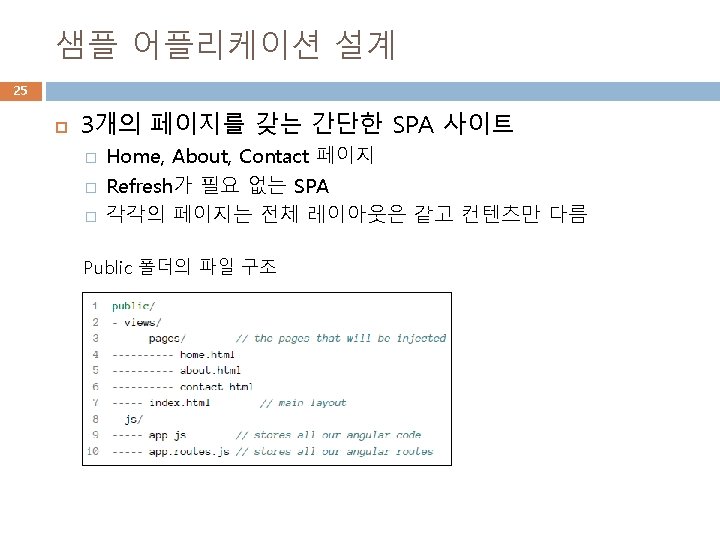
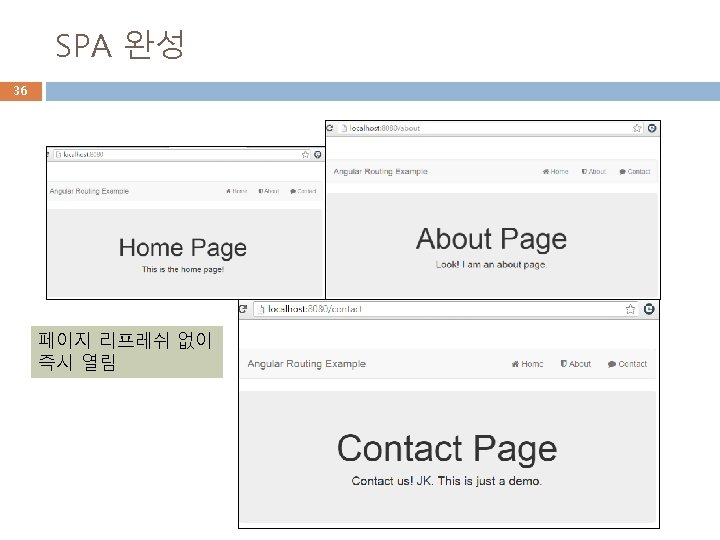
두번째 예제 – Angular 라우팅 20 3개의 페이지를 갖는 single page application (SPA)을 제작해보자. � � � Home About Contact
Single Page Application 이란? 21 Single-Page Applications (SPAs) are Web apps that load a single HTML page and dynamically update that page as the user interacts with the app. SPAs use AJAX and HTML 5 to create fluid and responsive Web apps, without constant page reloads. 별도의 페이지를 새로 읽어오는 방식이 아니라 페이지 레이아웃은 그대로 사용하고 필요한 업데이트 데이터만 ajax로 읽어옴
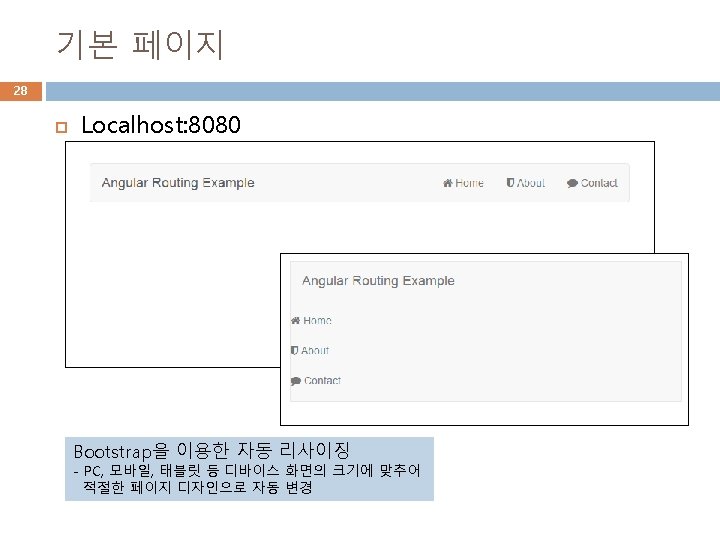
Server. js 24 서버 프로그램 // server. js // get the things we need var express = require('express'); var app = express(); var path = require('path'); // set the public folder to serve public assets app. use(express. static(__dirname + '/public')); Index. html 파일을 제공하는 기능 // set up our one route to the index. html file app. get('*', function(req, res) { res. send. File(path. join(__dirname + '/public/views/index. html')); }); // start the server on port 8080 (http: //localhost: 8080) app. listen(8080); console. log('Magic happens on port 8080. '); 서버 실행 nodemon server. js 간단한 index. html 페이지 작성 브라우저로 확인 http: //localhost: 8080
Index. html 생성 26 <!DOCTYPE html> <head> <meta charset="utf-8"> <title>My Routing App!</title> <!-- set the base path for angular routing --> <base href="/"> Bootstrap과 Font Awesome을 <!-- CSS --> 이용한 스타일 활용 <!-- load bootstrap and fontawesome via CDN --> <link rel="stylesheet" href="//netdna. bootstrapcdn. com/bootstrap/3. 0. 0/css/bootstrap. min. css"> <link rel="stylesheet" href="//netdna. bootstrapcdn. com/font-awesome/4. 0. 0/css/font-awesome. css"> <style> body { padding-top: 50 px; } </style> </head> <!-- JS --> Angular와 angular-route를 활용 <!-- load angular and angular-route via CDN --> <script src="//ajax. googleapis. com/ajax/libs/angularjs/1. 3. 8/angular. min. js"></script> <script src="//ajax. googleapis. com/ajax/libs/angularjs/1. 3. 8/angular-route. js"></script> <script src="js/app. routes. js"></script> <script src="js/app. js"></script> 우리가 생성할 angular 앱을 포함 - app. js, app. routes. js
Index. html 생성 27 <body class="container" ng-app="router. App" ng-controller="main. Controller as main"> 페이지에 angular app과 controller를 적용 <!-- HEADER AND NAVBAR --> <header> <nav class="navbar-default"> <div class="navbar-header"> <a class="navbar-brand" href="/">Angular Routing Example</a> </div> 3개의 메뉴 생성 메뉴별 루트 지정 </header> </nav> <ul class="nav navbar-right"> <li><a href="/"><i class="fa fa-home"></i> Home</a></li> <li><a href="/about"><i class="fa fa-shield"></i> About</a></li> <li><a href="/contact"><i class="fa fa-comment"></i> Contact</a></li> </ul> <!-- MAIN CONTENT AND INJECTED VIEWS --> <main> <!-- angular templating will go here --> <!-- this is where content will be injected --> <div ng-view></div> </main> </body> </html> ng-view를 메인 섹션에 설정 Ajax로 읽어오는 데이터를 이곳에 삽입 나머지 레이아웃은 그대로 사용
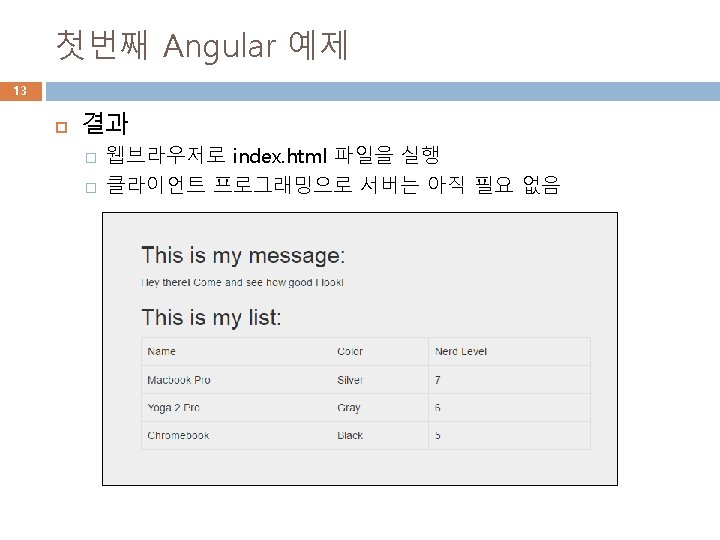
Angular의 모듈과 컨트롤러 생성 29 public/js/app. js angular. module('router. App', [ ]) router. App을 정의 // create the controller and inject Angular's // this will be the controller for the ENTIRE site. controller('main. Controller', function() { var vm = this; // create a big. Message variable to display in our view vm. big. Message = 'A smooth sea never made a skilled sailor. '; }) 페이지별 컨트롤러 등록 main. Controller // home page specific controller('home. Controller', function() { var vm = this; vm. message = 'This is the home page!'; }) 페이지별 컨트롤러 등록 home. Controller // about page controller('about. Controller', function() { var vm = this; vm. message = 'Look! I am an about page. '; }) 페이지별 컨트롤러 등록 about. Controller // contact page controller('contact. Controller', function() { var vm = this; vm. message = 'Contact us! JK. This is just a demo. '; }); 페이지별 컨트롤러 등록 contact. Controller
Angular 어플리케이션의 적용 30 Index. html의 body에 앱과 메인컨트롤러 등록 <body class="container" ng-app="router. App" ng-controller="main. Controller as main"> <main> 섹션에 big. Message 표시 <main> </main> <div class="jumbotron"> <h 1>{{ main. big. Message }}</h 1> </div> <!-- angular templating will go here --> <!-- this is where content will be injected -->
Main Layout에 페이지 삽입하기 31 ng-view는 메인 레이아웃에 현재 루트((/home, /about, /contact)의 템플릿을 가져와 삽입하도록 하는 지시자 � � Angular route (ng. Route) 는 현재 URL에 맞는 view 파일을 가져 와 ng-view 섹션에 삽입함 <main> 섹션에 다음과 같이 ng-view 영역을 생성 <main> </main> <!-- angular templating will go here --> <!-- this is where content will be injected --> <div ng-view></div>
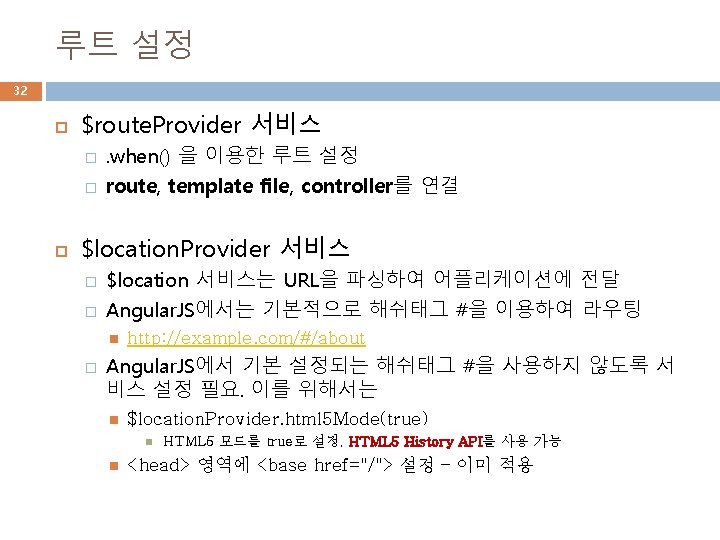
루트 설정 33 public/js/app. routes. js // inject ng. Route for all our routing needs angular. module('router. Routes', ['ng. Route']) // configure our routes. config(function($route. Provider, $location. Provider) { $route. Provider // route for the home page. when('/', { template. Url : 'views/pages/home. html', controller : 'home. Controller', controller. As: 'home' }) // route for the about page. when('/about', { template. Url : 'views/pages/about. html', controller : 'about. Controller', controller. As: 'about' }) // route for the contact page. when('/contact', { template. Url : 'views/pages/contact. html', controller : 'contact. Controller', controller. As: 'contact' }); $location. Provider. html 5 Mode(true); }); template. Url의 파일을 읽어와서 ng-view 영역에 삽입 HTML 5 모드를 true로 설정, HTML 5 History API를 사용 가능
루트 설정 34 메인 앱에 루트 삽입 � public/js/app. js angular. module('router. App', [‘router. Routes’]) public/js/app. routes. js angular. module('router. Routes', ['ng. Route'])
Html 페이지 등록 35 About. html Contact. html Home. html . when('/', { template. Url : 'views/pages/home. html', controller : 'home. Controller', controller. As: 'home' }) <div class="jumbotron text-center"> <h 1>About Page</h 1> <p>{{ about. message }}</p> </div> <div class="jumbotron text-center"> <h 1>Contact Page</h 1> <p>{{ contact. message }}</p> </div> <div class="jumbotron text-center"> <h 1>Home Page</h 1> <p>{{ home. message }}</p> </div> Html 파일의 기본형식을 갖추지 않고 <div> </div> 영역만 있는 페이지 컨트롤러에서 정의한 메시지를 읽어와서 보여줌
전체 구조 리뷰 37 index. html 모듈, 컨트롤러를 적용 ng-app=“router. App” app. js 모듈, 컨트롤러 생성 router. App, [router. Routes] main. Controller home. Controller ng-controller=“main. Controller” about. Controller contact. Controller ng-view app. route. js pages 루트 정의 router. Routes, [ng. Route] home. html about. html contact. html . when('/', { template. Url : 'views/pages/home. html', controller : 'home. Controller', controller. As: 'home'. when('/about', { template. Url : 'views/pages/about. html', controller : 'about. Controller', controller. As: 'about'. when('/contact', { template. Url : 'views/pages/contact. html', controller : 'contact. Controller', controller. As: 'contact'
애니메이션 적용하기 42 ng. Animate 모듈을 적용하는 3단계 � � � 1. Link to the angular-animate. js file (angular-animate. js 파일을 CDN에서 읽어오기) 2. Inject the ng. Animate module into our main Angular module (ng. Animate 모듈을 메인 Angular 모듈에 삽입) 3. Add the animate. css stylesheet to have prebuilt CSS animations (스타일시트에 애니메이션 정의)
애니메이션 적용하기 43 1. Index. html 수정 angular-animate. js, animate. min. css 파일을 CDN에서 읽어오기 <link rel="stylesheet" href="//cdnjs. cloudflare. com/ajax/libs/animate. css/3. 1. 1/animate. min. css"> <script src="//ajax. googleapis. com/ajax/libs/angularjs/1. 3. 8/angular-animate. js"></script>
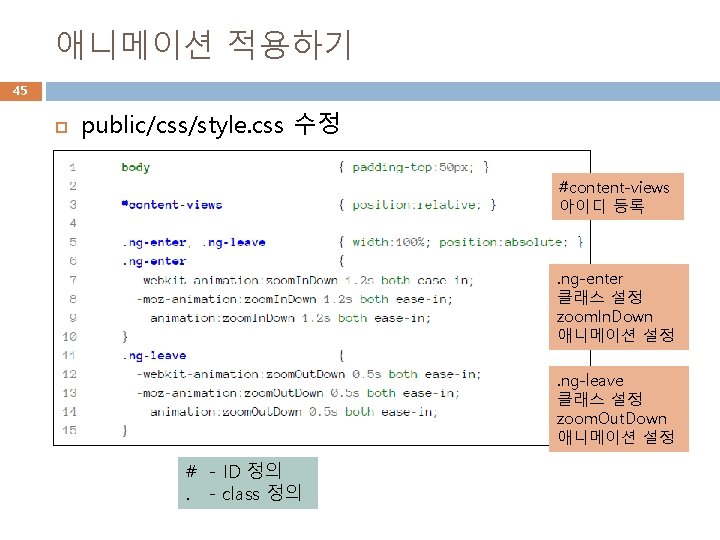
애니메이션 적용하기 44 2. Angular 모듈에 ng. Animate 모듈 삽입 angular. module('router. App', ['router. Routes', 'ng. Animate']) 3. CSS 애니메이션 삽입 � � public/css/style. css 파일 생성 Index. html에 CSS 설정 <link rel="stylesheet" href="css/style. css"> ng-view를 위한 이름 등록 � ng-view 영역을 content-view라는 id를 가진 영역 안에 넣음
애니메이션 적용하기 46 Index. html에 css 파일 적용 <head> <meta charset="utf-8"> <title>My Routing App!</title> <!-- set the base path for angular routing --> <base href="/"> <!-- CSS --> <!-- load bootstrap and fontawesome via CDN --> <link rel="stylesheet" href="//netdna. bootstrapcdn. com/bootstrap/3. 0. 0/css/bootstrap. min. css"> <link rel="stylesheet" href="//netdna. bootstrapcdn. com/font-awesome/4. 0. 0/css/font-awesome. css"> <link rel="stylesheet" href="//cdnjs. cloudflare. com/ajax/libs/animate. css/3. 1. 1/animate. min. css"> <link rel="stylesheet" href="css/style. css"> </head> <!-- JS --> <!-- load angular and angular-route via CDN --> <script src="//ajax. googleapis. com/ajax/libs/angularjs/1. 3. 8/angular. min. js"></script> <script src="//ajax. googleapis. com/ajax/libs/angularjs/1. 3. 8/angular-route. js"></script> <script src="//ajax. googleapis. com/ajax/libs/angularjs/1. 3. 8/angular-animate. js"></script> <script src="js/app. routes. js"></script> <script src="js/app. js"></script>
요약 48 Angular는 front-end 개발에 널리 사용되는 MVC 기반 프레임워크 � Data-binding, Dependency injection, Directives 이용 다뤄 본 예제 � � � 1. Data-binding 예제 2. 라우팅을 이용한 SPA 3. Angular animation