2 1 Line Conventions Introduction to Engineering Design
- Slides: 15

2. 1 Line Conventions Introduction to Engineering Design © 2012 Project Lead The Way, Inc.

Line Conventions • Lines of varying style and thickness are used in specific ways to develop and communicate graphic messages about an object’s geometry. The next few slides show some basic line conventions and their use.

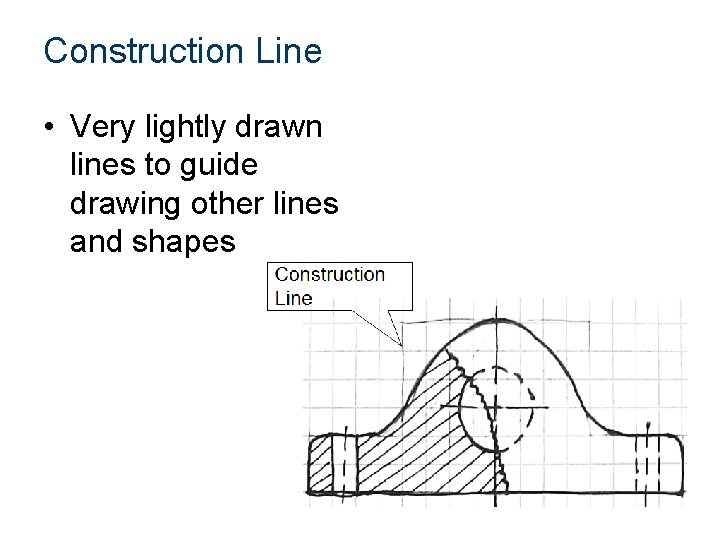
Construction Line • Very lightly drawn lines to guide drawing other lines and shapes

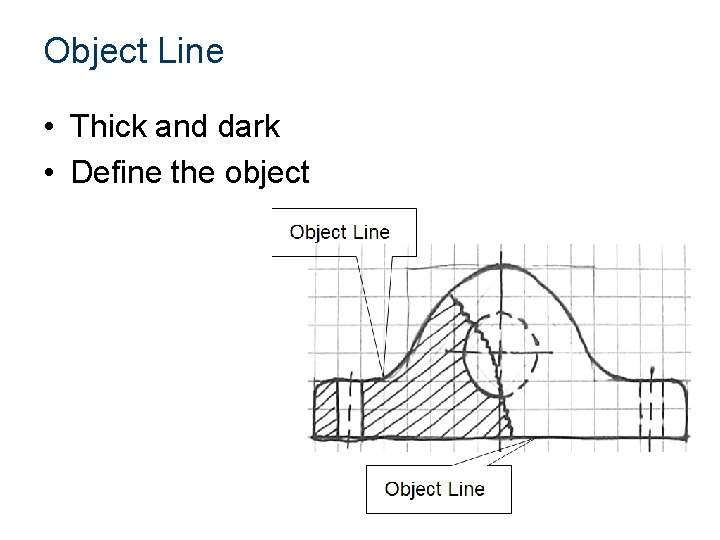
Object Line • Thick and dark • Define the object

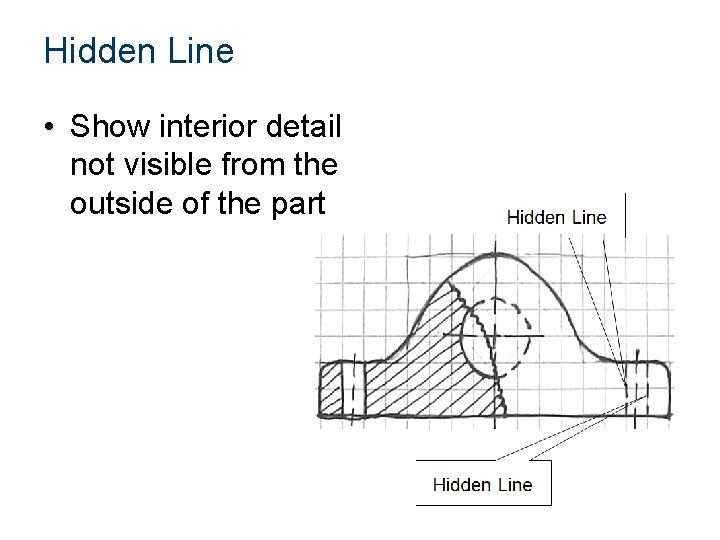
Hidden Line • Show interior detail not visible from the outside of the part

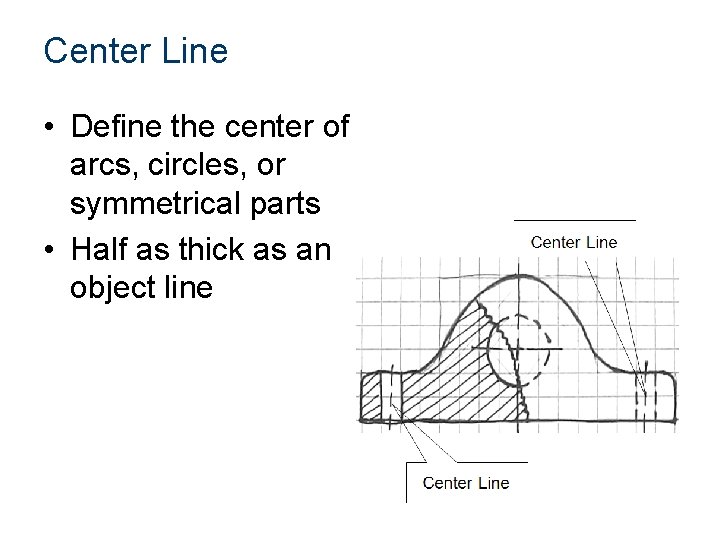
Center Line • Define the center of arcs, circles, or symmetrical parts • Half as thick as an object line

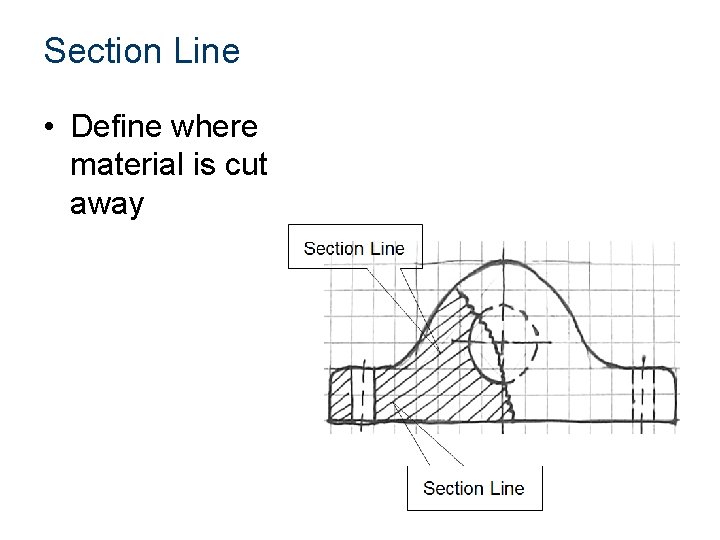
Section Line • Define where material is cut away

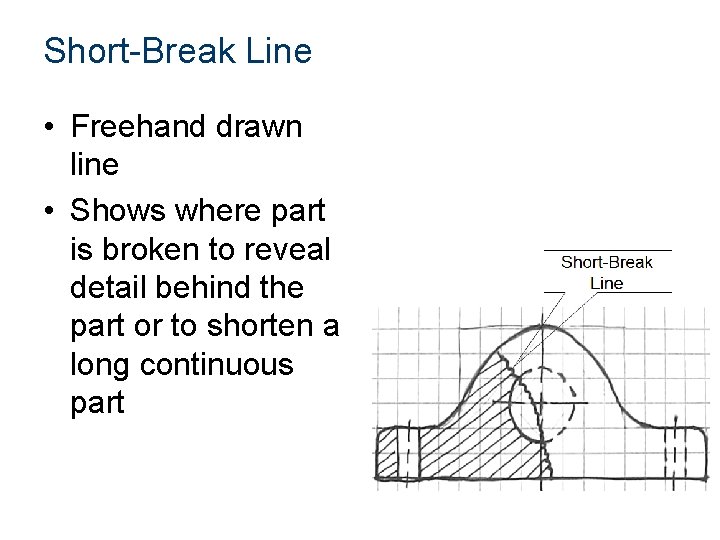
Short-Break Line • Freehand drawn line • Shows where part is broken to reveal detail behind the part or to shorten a long continuous part

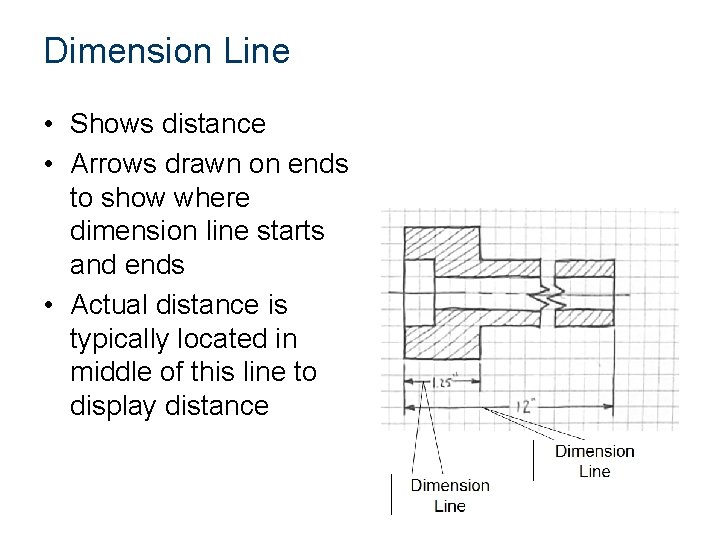
Dimension Line • Shows distance • Arrows drawn on ends to show where dimension line starts and ends • Actual distance is typically located in middle of this line to display distance

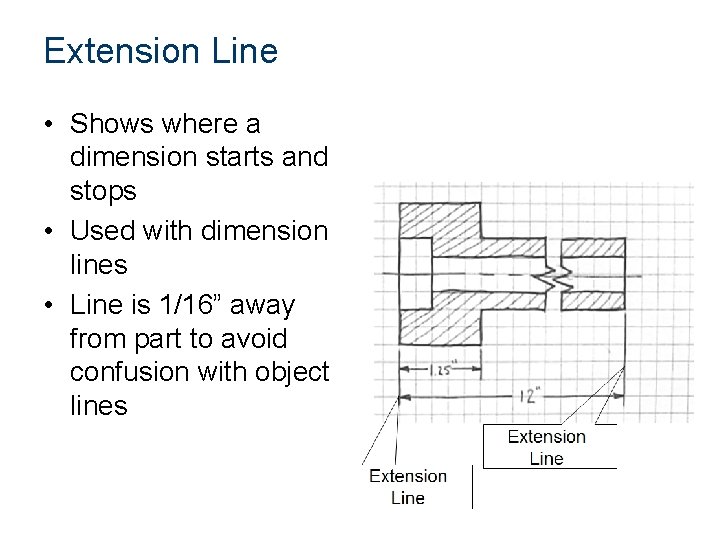
Extension Line • Shows where a dimension starts and stops • Used with dimension lines • Line is 1/16” away from part to avoid confusion with object lines

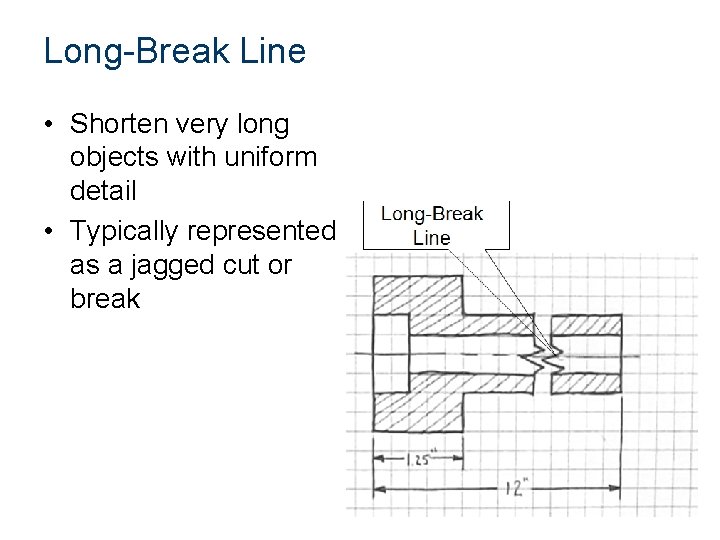
Long-Break Line • Shorten very long objects with uniform detail • Typically represented as a jagged cut or break

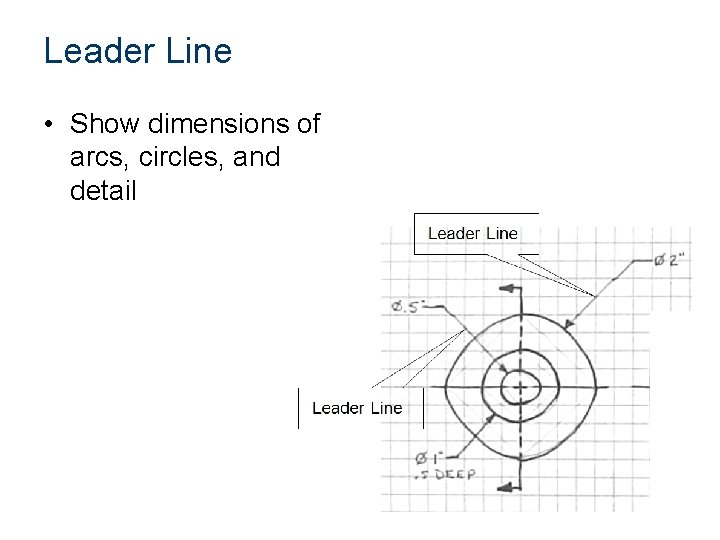
Leader Line • Show dimensions of arcs, circles, and detail

Line Conventions • These standards relate to technical drawing (more precise than freehand sketching). • Use these standards as a guide when sketching.

Precedence of Lines • Complex object sketches may require different line types to overlap. • Line precedence must be used. • Rules that govern line precedence in sketches and technical drawings – Object lines take precedence over hidden and center lines. – Hidden lines take precedence over center lines. – Cutting plane lines take precedence over all others.

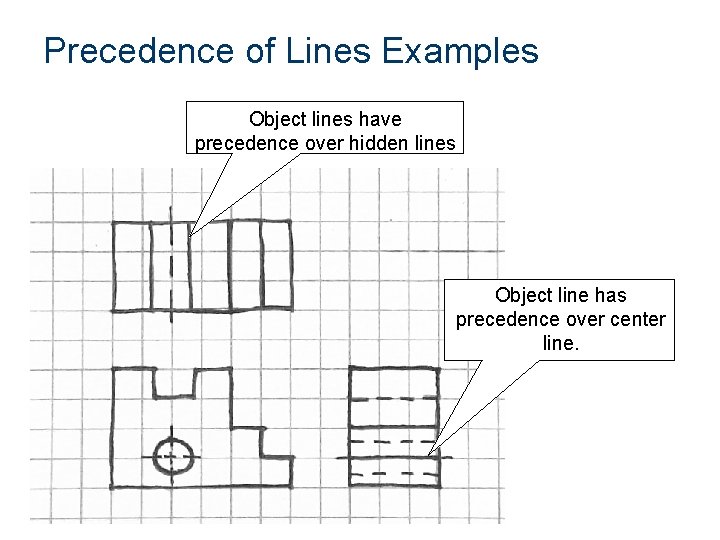
Precedence of Lines Examples Object lines have precedence over hidden lines Object line has precedence over center line.