12 MEASURING SYSTEMS AND TOOLS Automotive Technology Fifth



- Slides: 27

12 MEASURING SYSTEMS AND TOOLS Automotive Technology, Fifth Edition James Halderman © 2011 Pearson Education, Inc. All Rights Reserved

12 MEASURING SYSTEMS AND TOOLS FREQUENTLY ASKED QUESTION: What Weighs a Gram? To better understand the metric system measurements, it is often helpful to visualize a certain object and relate it to a metric unit of measure. For example, the following objects weigh about 1 gram. • A dollar bill • A small paper clip Automotive Technology, Fifth Edition James Halderman © 2011 Pearson Education, Inc. All Rights Reserved

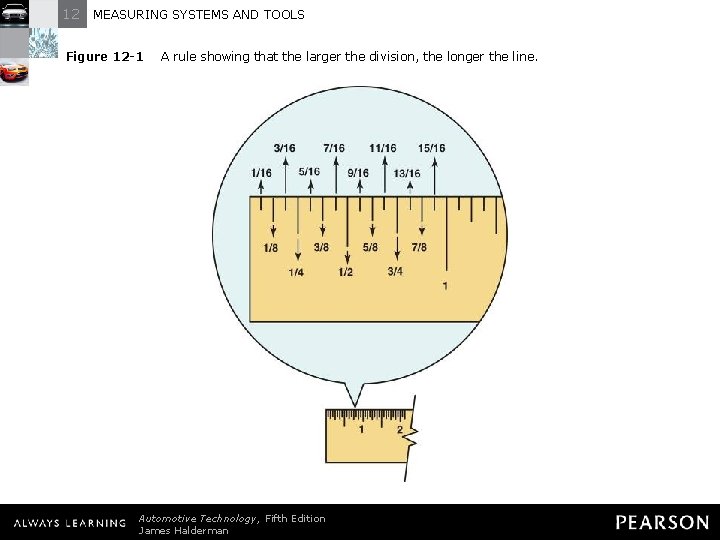
12 MEASURING SYSTEMS AND TOOLS Figure 12 -1 A rule showing that the larger the division, the longer the line. Automotive Technology, Fifth Edition James Halderman © 2011 Pearson Education, Inc. All Rights Reserved

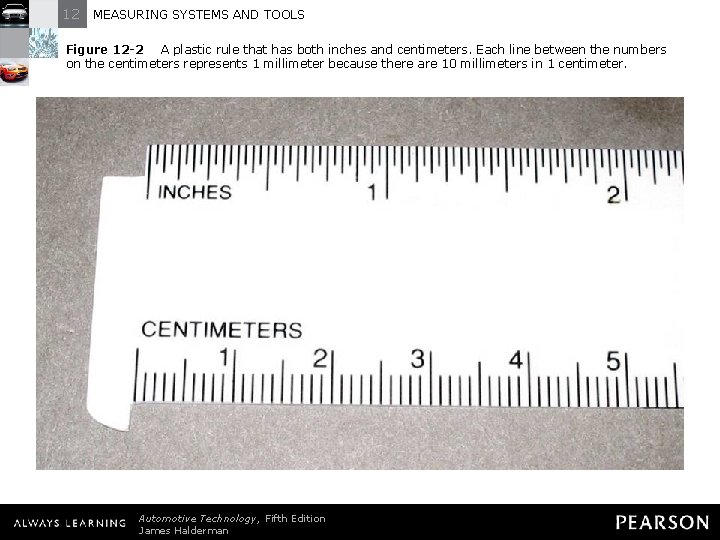
12 MEASURING SYSTEMS AND TOOLS Figure 12 -2 A plastic rule that has both inches and centimeters. Each line between the numbers on the centimeters represents 1 millimeter because there are 10 millimeters in 1 centimeter. Automotive Technology, Fifth Edition James Halderman © 2011 Pearson Education, Inc. All Rights Reserved

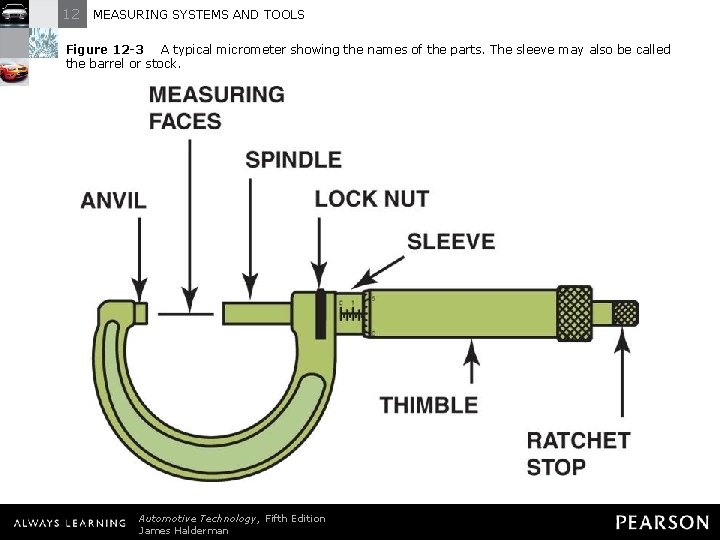
12 MEASURING SYSTEMS AND TOOLS Figure 12 -3 A typical micrometer showing the names of the parts. The sleeve may also be called the barrel or stock. Automotive Technology, Fifth Edition James Halderman © 2011 Pearson Education, Inc. All Rights Reserved

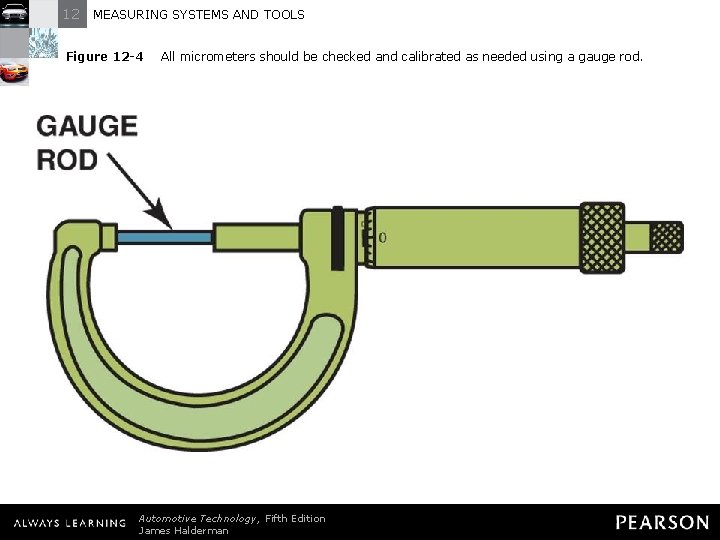
12 MEASURING SYSTEMS AND TOOLS Figure 12 -4 All micrometers should be checked and calibrated as needed using a gauge rod. Automotive Technology, Fifth Edition James Halderman © 2011 Pearson Education, Inc. All Rights Reserved

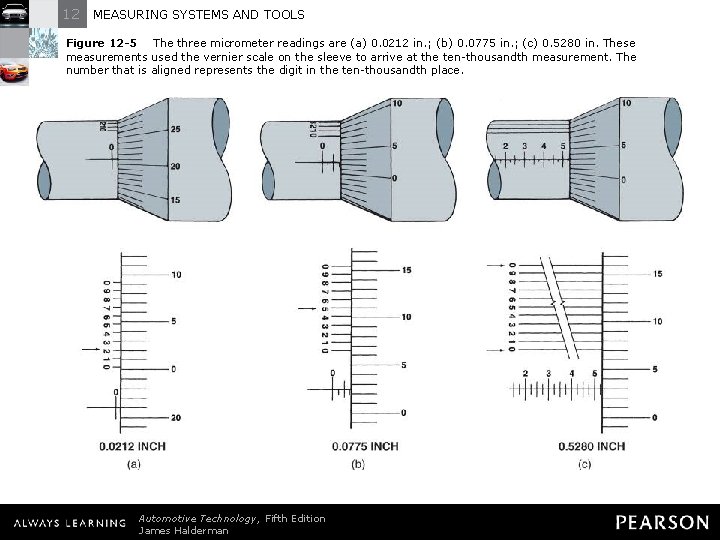
12 MEASURING SYSTEMS AND TOOLS Figure 12 -5 The three micrometer readings are (a) 0. 0212 in. ; (b) 0. 0775 in. ; (c) 0. 5280 in. These measurements used the vernier scale on the sleeve to arrive at the ten-thousandth measurement. The number that is aligned represents the digit in the ten-thousandth place. Automotive Technology, Fifth Edition James Halderman © 2011 Pearson Education, Inc. All Rights Reserved

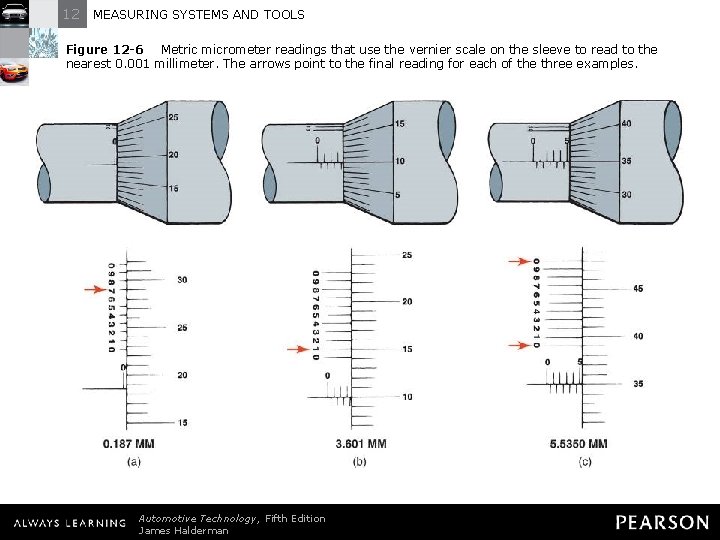
12 MEASURING SYSTEMS AND TOOLS Figure 12 -6 Metric micrometer readings that use the vernier scale on the sleeve to read to the nearest 0. 001 millimeter. The arrows point to the final reading for each of the three examples. Automotive Technology, Fifth Edition James Halderman © 2011 Pearson Education, Inc. All Rights Reserved

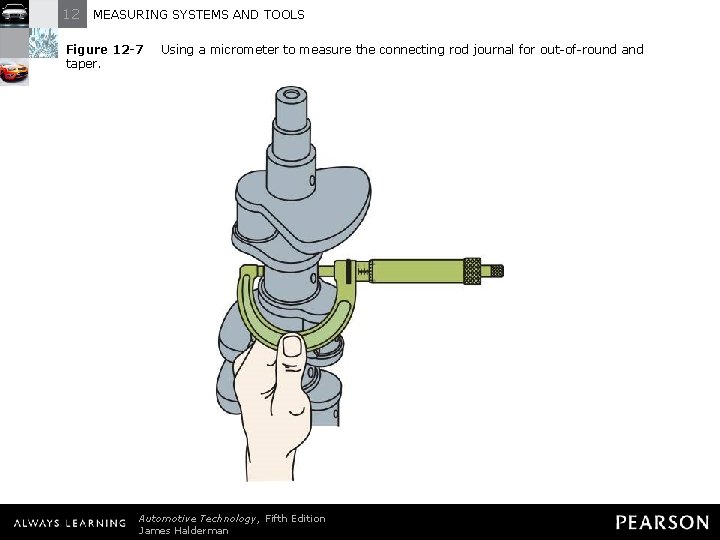
12 MEASURING SYSTEMS AND TOOLS Figure 12 -7 taper. Using a micrometer to measure the connecting rod journal for out-of-round and Automotive Technology, Fifth Edition James Halderman © 2011 Pearson Education, Inc. All Rights Reserved

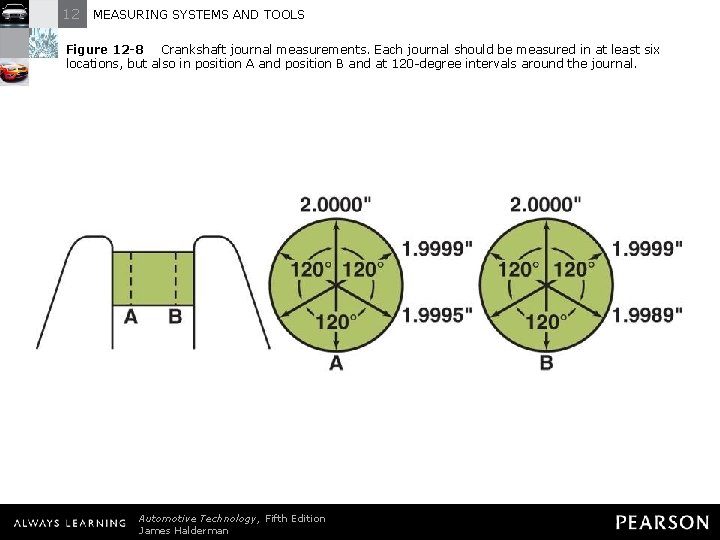
12 MEASURING SYSTEMS AND TOOLS Figure 12 -8 Crankshaft journal measurements. Each journal should be measured in at least six locations, but also in position A and position B and at 120 -degree intervals around the journal. Automotive Technology, Fifth Edition James Halderman © 2011 Pearson Education, Inc. All Rights Reserved

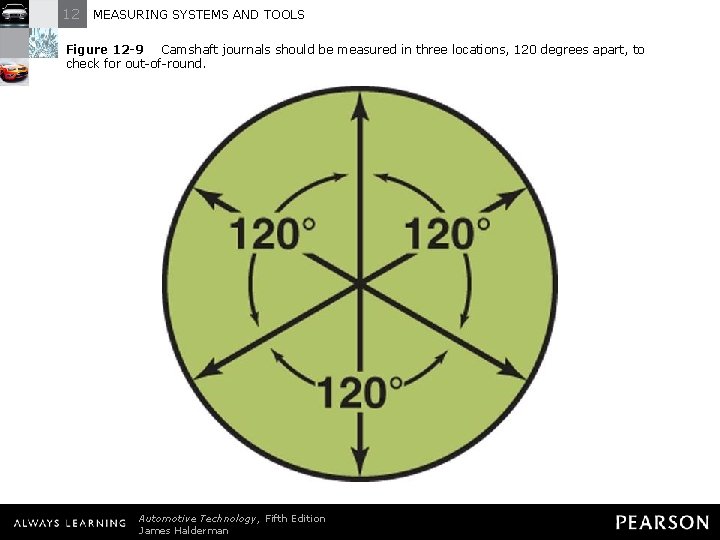
12 MEASURING SYSTEMS AND TOOLS Figure 12 -9 Camshaft journals should be measured in three locations, 120 degrees apart, to check for out-of-round. Automotive Technology, Fifth Edition James Halderman © 2011 Pearson Education, Inc. All Rights Reserved

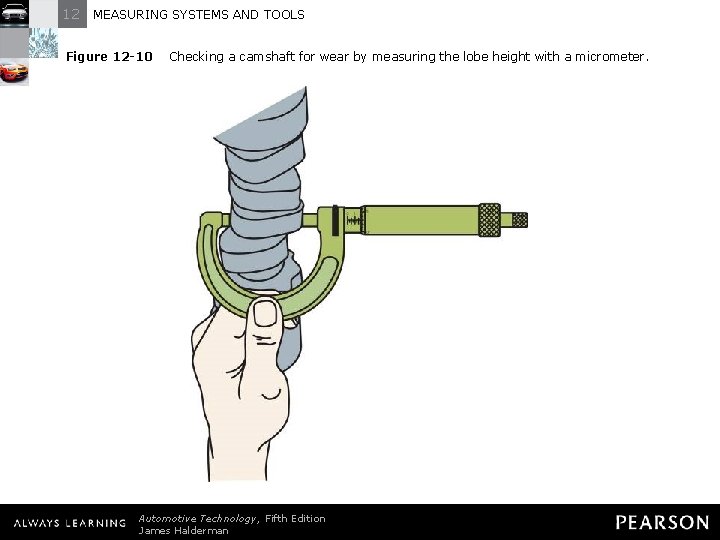
12 MEASURING SYSTEMS AND TOOLS Figure 12 -10 Checking a camshaft for wear by measuring the lobe height with a micrometer. Automotive Technology, Fifth Edition James Halderman © 2011 Pearson Education, Inc. All Rights Reserved

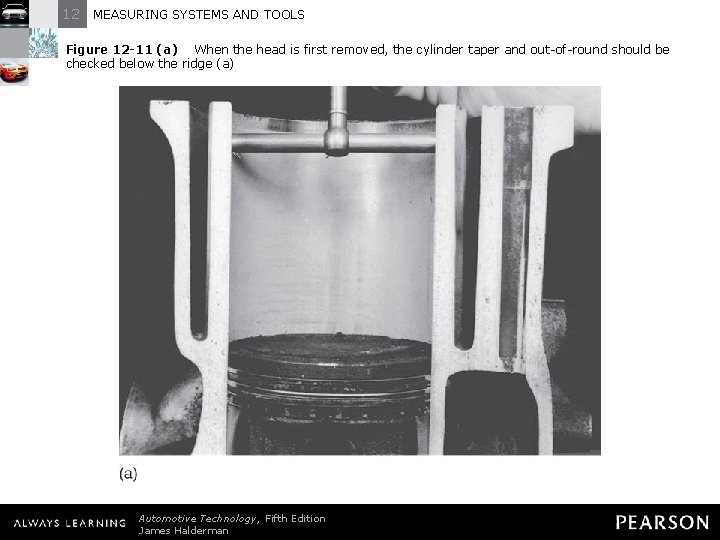
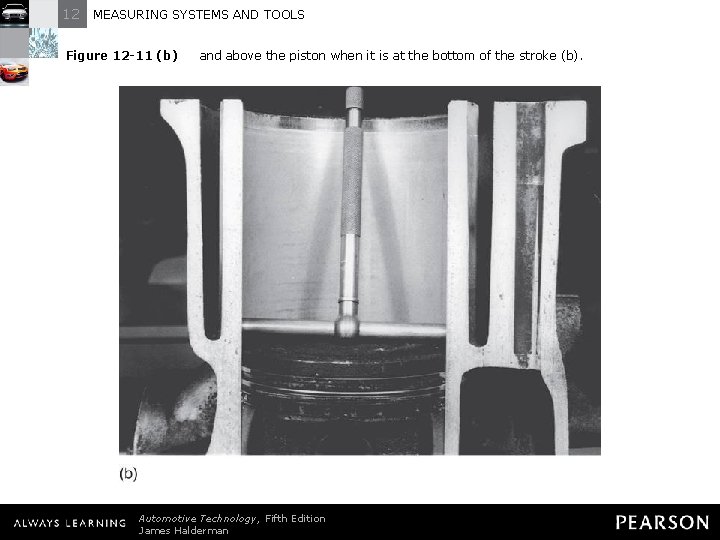
12 MEASURING SYSTEMS AND TOOLS Figure 12 -11 (a) When the head is first removed, the cylinder taper and out-of-round should be checked below the ridge (a) Automotive Technology, Fifth Edition James Halderman © 2011 Pearson Education, Inc. All Rights Reserved

12 MEASURING SYSTEMS AND TOOLS Figure 12 -11 (b) and above the piston when it is at the bottom of the stroke (b). Automotive Technology, Fifth Edition James Halderman © 2011 Pearson Education, Inc. All Rights Reserved

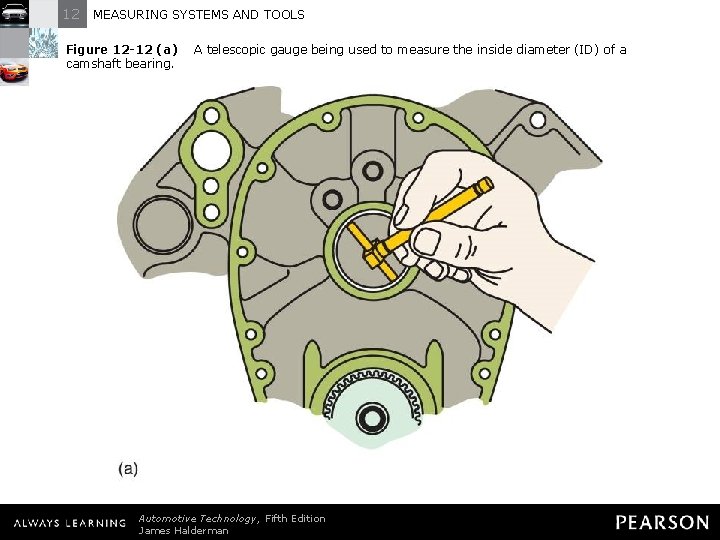
12 MEASURING SYSTEMS AND TOOLS Figure 12 -12 (a) camshaft bearing. A telescopic gauge being used to measure the inside diameter (ID) of a Automotive Technology, Fifth Edition James Halderman © 2011 Pearson Education, Inc. All Rights Reserved

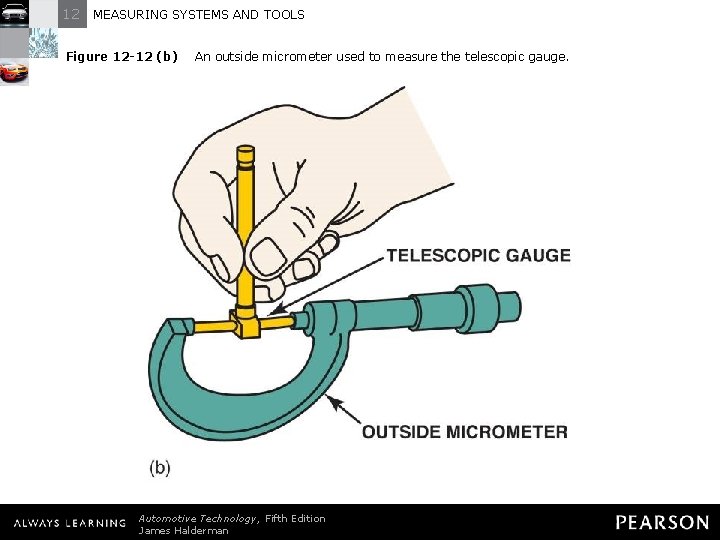
12 MEASURING SYSTEMS AND TOOLS Figure 12 -12 (b) An outside micrometer used to measure the telescopic gauge. Automotive Technology, Fifth Edition James Halderman © 2011 Pearson Education, Inc. All Rights Reserved

12 MEASURING SYSTEMS AND TOOLS FREQUENTLY ASKED QUESTION: What Is the Difference Between the Word Gage and Gauge? The word gauge means “measurement or dimension to a standard of reference. ” The word gauge can also be spelled gage. Therefore, in most cases, the words mean the same. INTERESTING NOTE: One vehicle manufacturing representative told me that gage was used rather than gauge because even though it is the second acceptable spelling of the word, it is correct and it saved the company a lot of money in printing costs because the word gage has one less letter! One letter multiplied by millions of vehicles with gauges on the dash and the word gauge used in service manuals adds up to a big savings to the manufacturer. Automotive Technology, Fifth Edition James Halderman © 2011 Pearson Education, Inc. All Rights Reserved

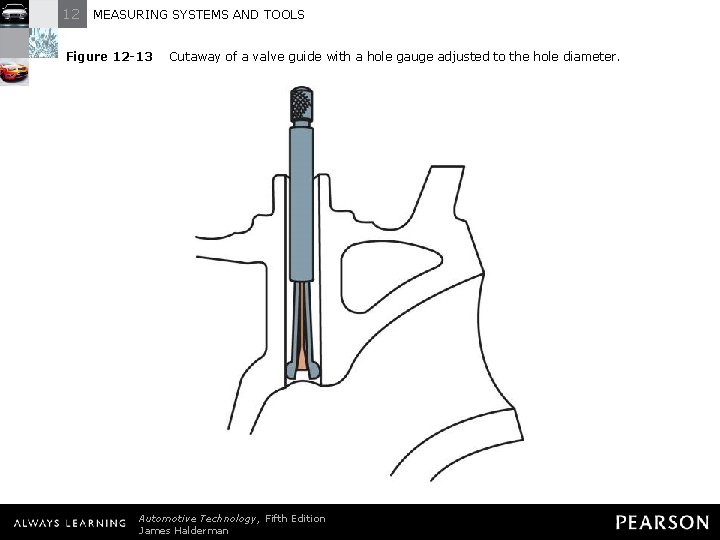
12 MEASURING SYSTEMS AND TOOLS Figure 12 -13 Cutaway of a valve guide with a hole gauge adjusted to the hole diameter. Automotive Technology, Fifth Edition James Halderman © 2011 Pearson Education, Inc. All Rights Reserved

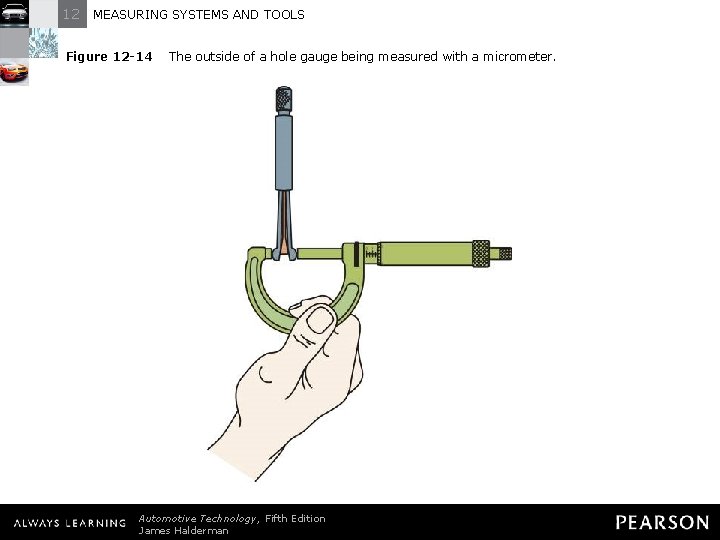
12 MEASURING SYSTEMS AND TOOLS Figure 12 -14 The outside of a hole gauge being measured with a micrometer. Automotive Technology, Fifth Edition James Halderman © 2011 Pearson Education, Inc. All Rights Reserved

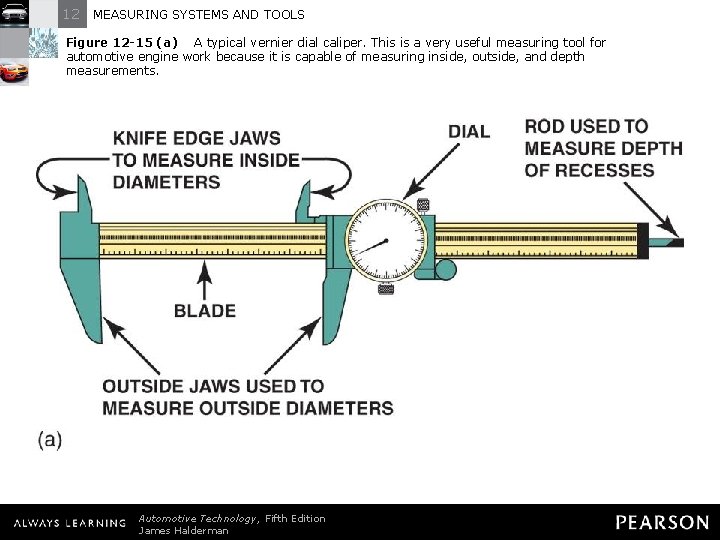
12 MEASURING SYSTEMS AND TOOLS Figure 12 -15 (a) A typical vernier dial caliper. This is a very useful measuring tool for automotive engine work because it is capable of measuring inside, outside, and depth measurements. Automotive Technology, Fifth Edition James Halderman © 2011 Pearson Education, Inc. All Rights Reserved

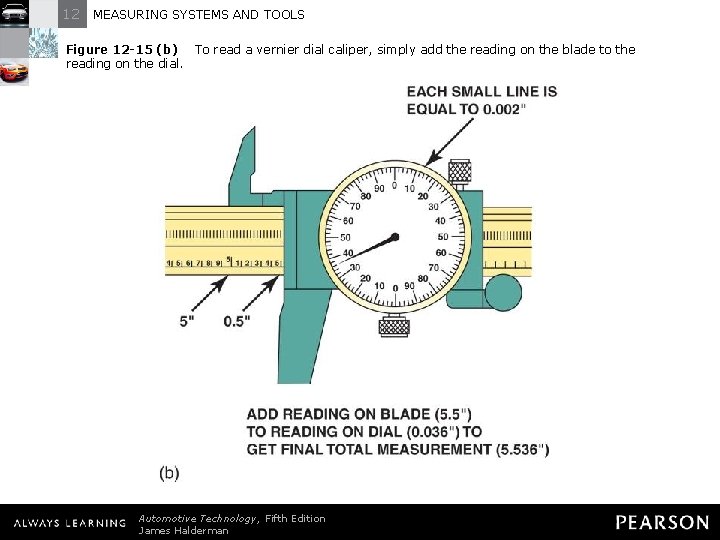
12 MEASURING SYSTEMS AND TOOLS Figure 12 -15 (b) To read a vernier dial caliper, simply add the reading on the blade to the reading on the dial. Automotive Technology, Fifth Edition James Halderman © 2011 Pearson Education, Inc. All Rights Reserved

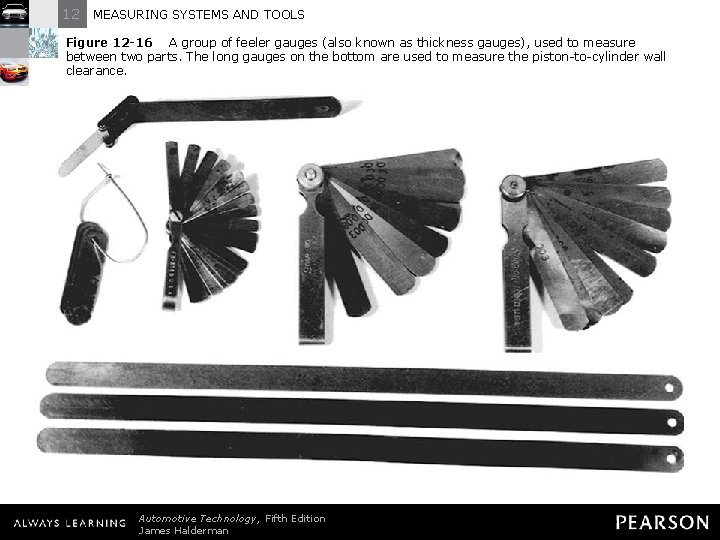
12 MEASURING SYSTEMS AND TOOLS Figure 12 -16 A group of feeler gauges (also known as thickness gauges), used to measure between two parts. The long gauges on the bottom are used to measure the piston-to-cylinder wall clearance. Automotive Technology, Fifth Edition James Halderman © 2011 Pearson Education, Inc. All Rights Reserved

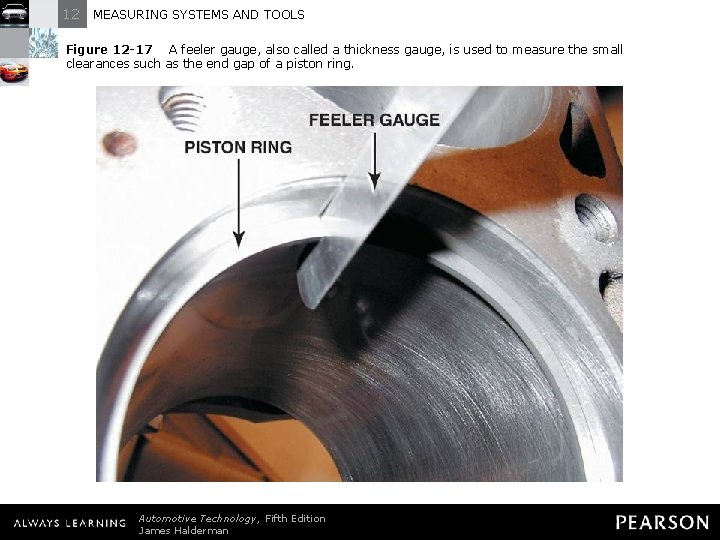
12 MEASURING SYSTEMS AND TOOLS Figure 12 -17 A feeler gauge, also called a thickness gauge, is used to measure the small clearances such as the end gap of a piston ring. Automotive Technology, Fifth Edition James Halderman © 2011 Pearson Education, Inc. All Rights Reserved

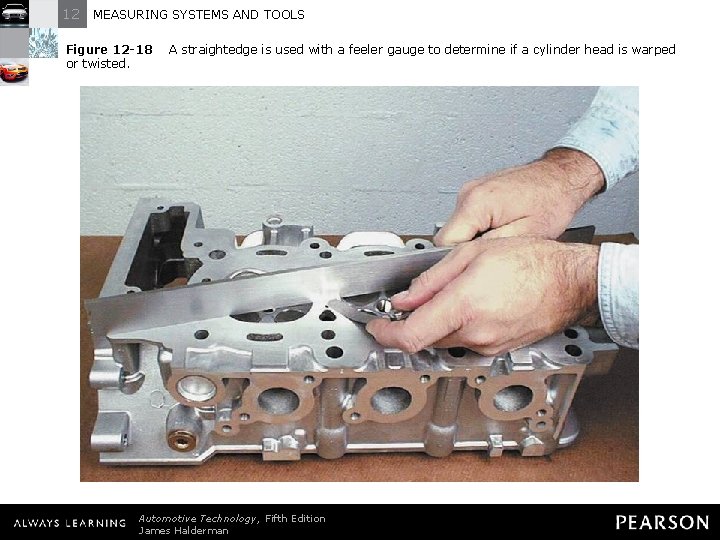
12 MEASURING SYSTEMS AND TOOLS Figure 12 -18 or twisted. A straightedge is used with a feeler gauge to determine if a cylinder head is warped Automotive Technology, Fifth Edition James Halderman © 2011 Pearson Education, Inc. All Rights Reserved

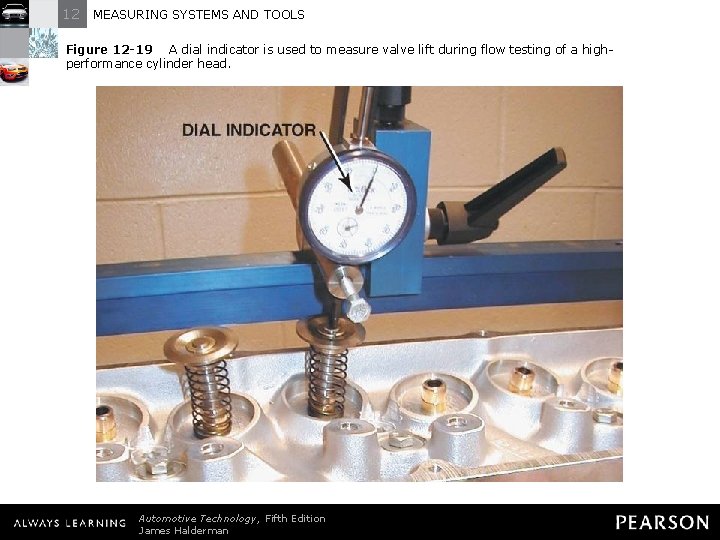
12 MEASURING SYSTEMS AND TOOLS Figure 12 -19 A dial indicator is used to measure valve lift during flow testing of a highperformance cylinder head. Automotive Technology, Fifth Edition James Halderman © 2011 Pearson Education, Inc. All Rights Reserved

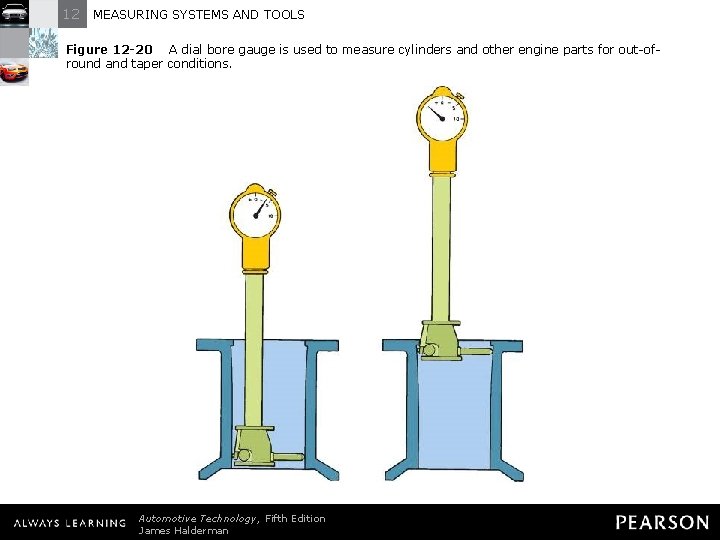
12 MEASURING SYSTEMS AND TOOLS Figure 12 -20 A dial bore gauge is used to measure cylinders and other engine parts for out-ofround and taper conditions. Automotive Technology, Fifth Edition James Halderman © 2011 Pearson Education, Inc. All Rights Reserved

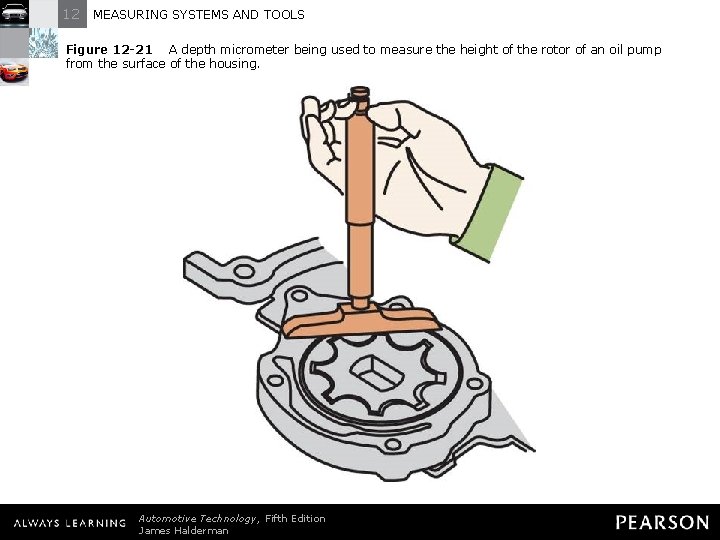
12 MEASURING SYSTEMS AND TOOLS Figure 12 -21 A depth micrometer being used to measure the height of the rotor of an oil pump from the surface of the housing. Automotive Technology, Fifth Edition James Halderman © 2011 Pearson Education, Inc. All Rights Reserved