11 T dipole Titanium pole wedges Short Summary

- Slides: 14

11 T dipole – Titanium pole wedges: Short Summary of the Manufacturing Contract and Machining Details A. Dallocchio EN-MME-FS A. Dallocchio, CERN – October 2020

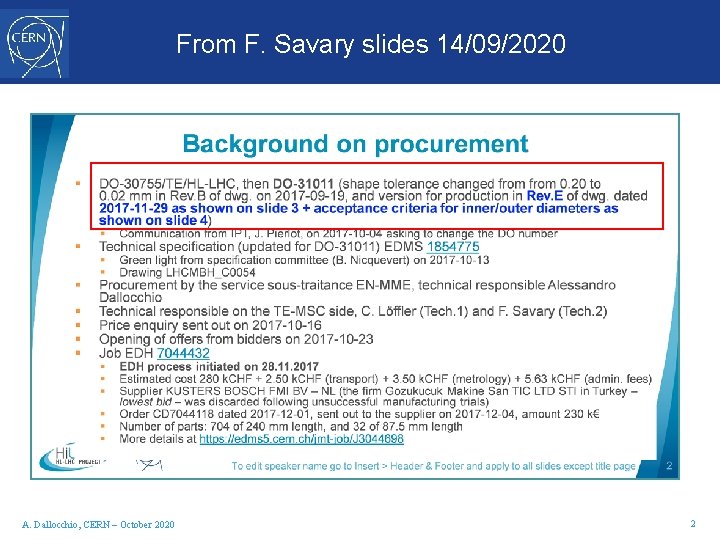
From F. Savary slides 14/09/2020 A. Dallocchio, CERN – October 2020 2

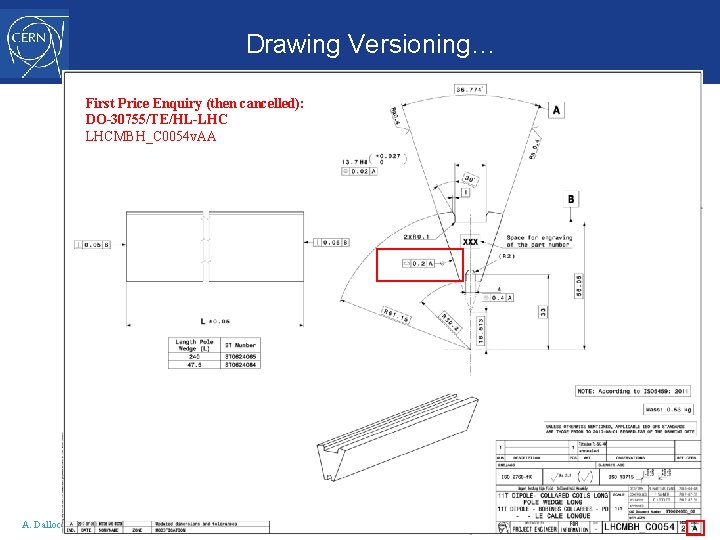
Drawing Versioning… First Price Enquiry (then cancelled): DO-30755/TE/HL-LHC LHCMBH_C 0054 v. AA A. Dallocchio, CERN – October 2020 3

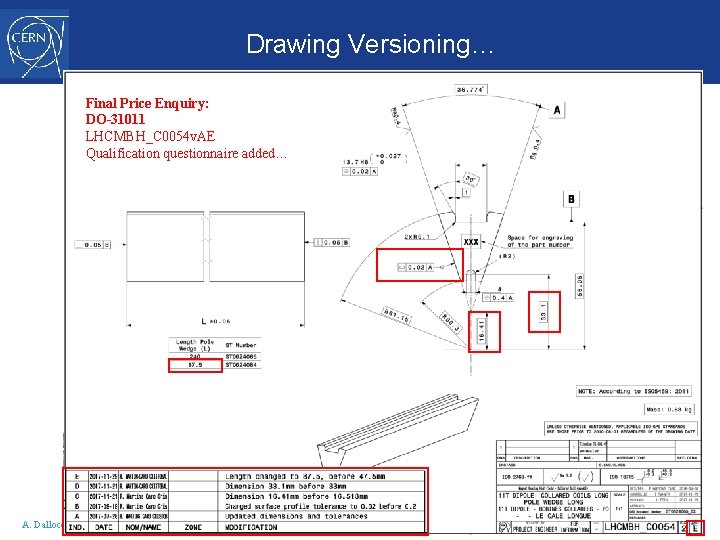
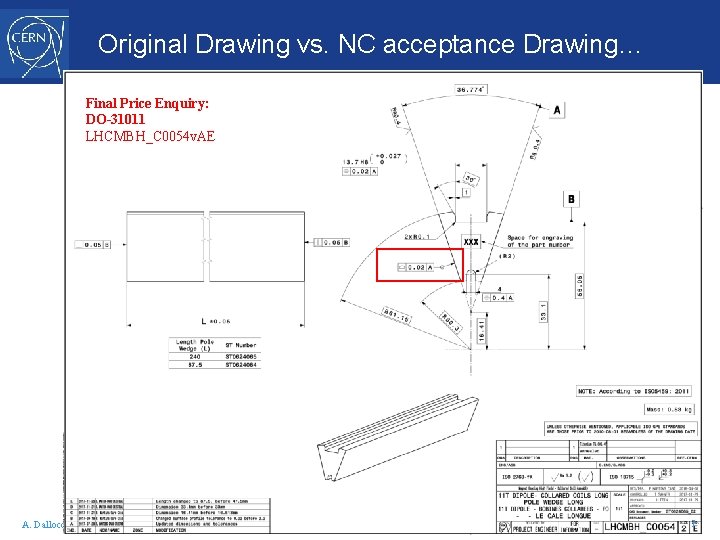
Drawing Versioning… Final Price Enquiry: DO-31011 LHCMBH_C 0054 v. AE Qualification questionnaire added… A. Dallocchio, CERN – October 2020 4

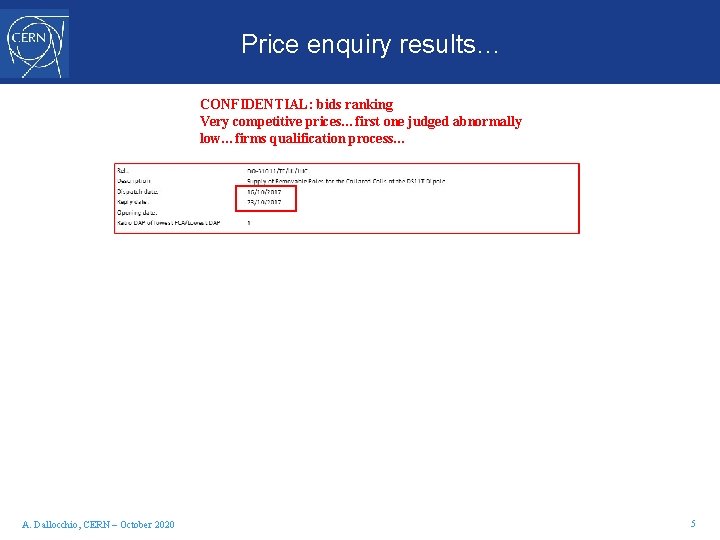
Price enquiry results… CONFIDENTIAL: bids ranking Very competitive prices…first one judged abnormally low…firms qualification process… A. Dallocchio, CERN – October 2020 5

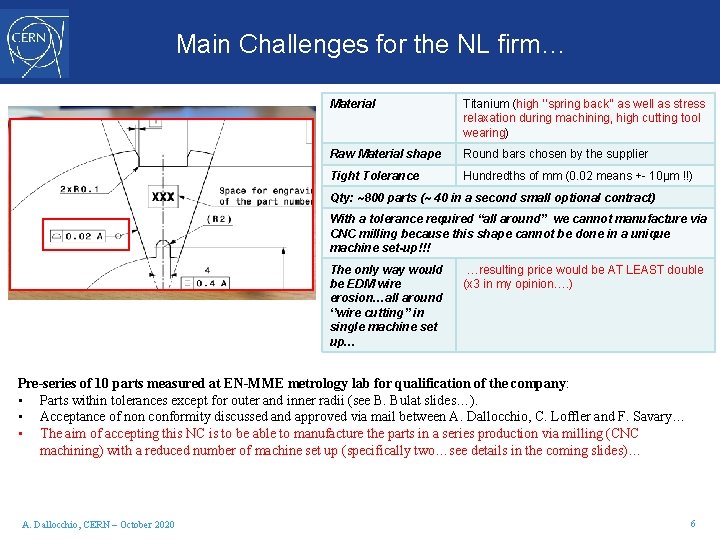
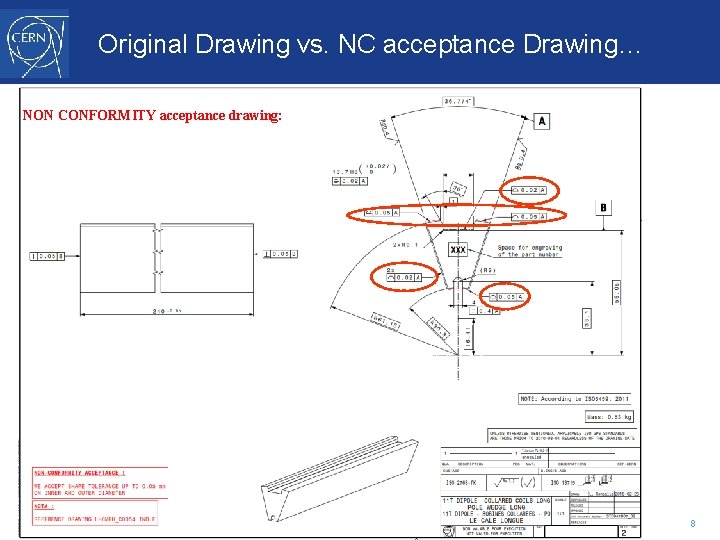
Main Challenges for the NL firm… Material Titanium (high ‘’spring back’’ as well as stress relaxation during machining, high cutting tool wearing) Raw Material shape Round bars chosen by the supplier Tight Tolerance Hundredths of mm (0. 02 means +- 10μm !!) Qty: ~800 parts (~ 40 in a second small optional contract) With a tolerance required “all around” we cannot manufacture via CNC milling because this shape cannot be done in a unique machine set-up!!! The only way would be EDM wire erosion…all around ‘’wire cutting’’ in single machine set up… …resulting price would be AT LEAST double (x 3 in my opinion…. ) Pre-series of 10 parts measured at EN-MME metrology lab for qualification of the company: • Parts within tolerances except for outer and inner radii (see B. Bulat slides…). • Acceptance of non conformity discussed and approved via mail between A. Dallocchio, C. Loffler and F. Savary… • The aim of accepting this NC is to be able to manufacture the parts in a series production via milling (CNC machining) with a reduced number of machine set up (specifically two…see details in the coming slides)… A. Dallocchio, CERN – October 2020 6

Original Drawing vs. NC acceptance Drawing… Final Price Enquiry: DO-31011 LHCMBH_C 0054 v. AE A. Dallocchio, CERN – October 2020 7

Original Drawing vs. NC acceptance Drawing… NON CONFORMITY acceptance drawing: A. Dallocchio, CERN – October 2020 8

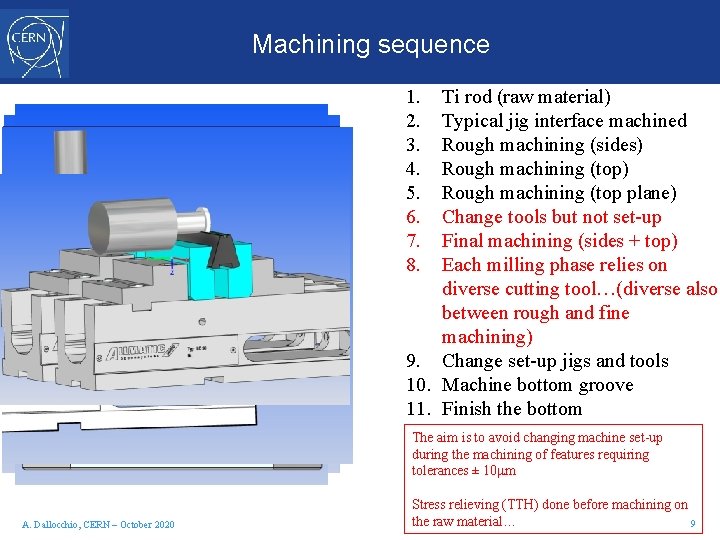
Machining sequence 1. 2. 3. 4. 5. 6. 7. 8. Ti rod (raw material) Typical jig interface machined Rough machining (sides) Rough machining (top plane) Change tools but not set-up Final machining (sides + top) Each milling phase relies on diverse cutting tool…(diverse also between rough and fine machining) 9. Change set-up jigs and tools 10. Machine bottom groove 11. Finish the bottom The aim is to avoid changing machine set-up during the machining of features requiring tolerances ± 10μm A. Dallocchio, CERN – October 2020 Stress relieving (TTH) done before machining on the raw material… 9

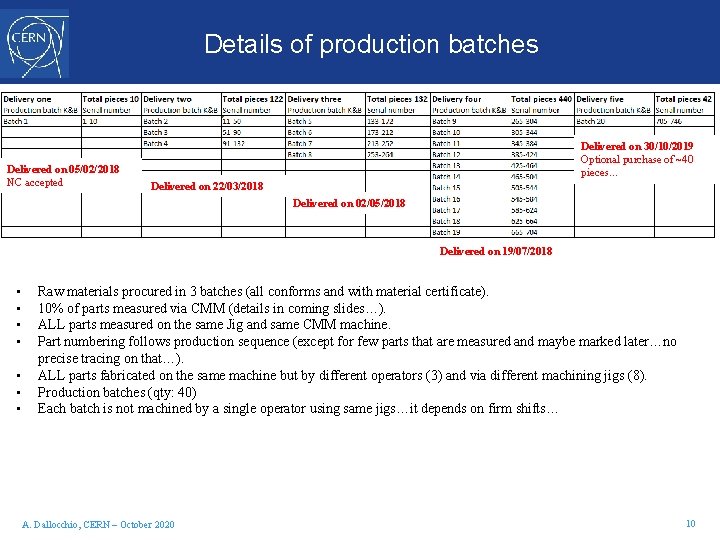
Details of production batches Delivered on 05/02/2018 NC accepted Delivered on 30/10/2019 Optional purchase of ~40 pieces… Delivered on 22/03/2018 Delivered on 02/05/2018 Delivered on 19/07/2018 • • Raw materials procured in 3 batches (all conforms and with material certificate). 10% of parts measured via CMM (details in coming slides…). ALL parts measured on the same Jig and same CMM machine. Part numbering follows production sequence (except for few parts that are measured and maybe marked later…no precise tracing on that…). ALL parts fabricated on the same machine but by different operators (3) and via different machining jigs (8). Production batches (qty: 40) Each batch is not machined by a single operator using same jigs…it depends on firm shifts… A. Dallocchio, CERN – October 2020 10

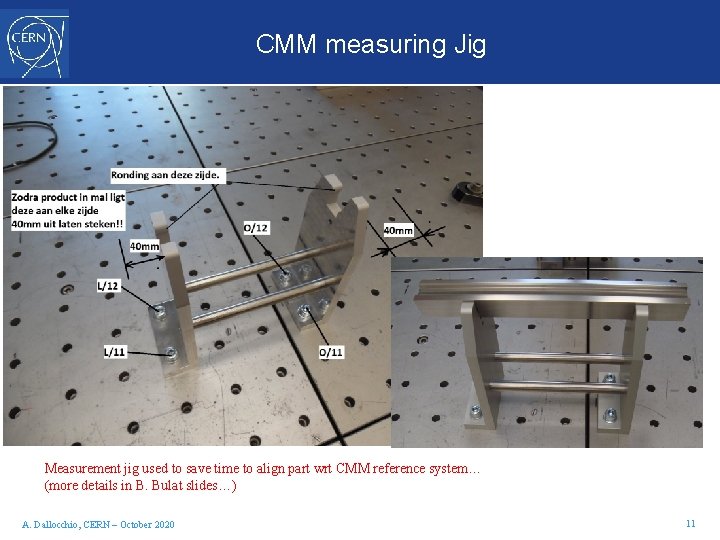
CMM measuring Jig Measurement jig used to save time to align part wrt CMM reference system… (more details in B. Bulat slides…) A. Dallocchio, CERN – October 2020 11

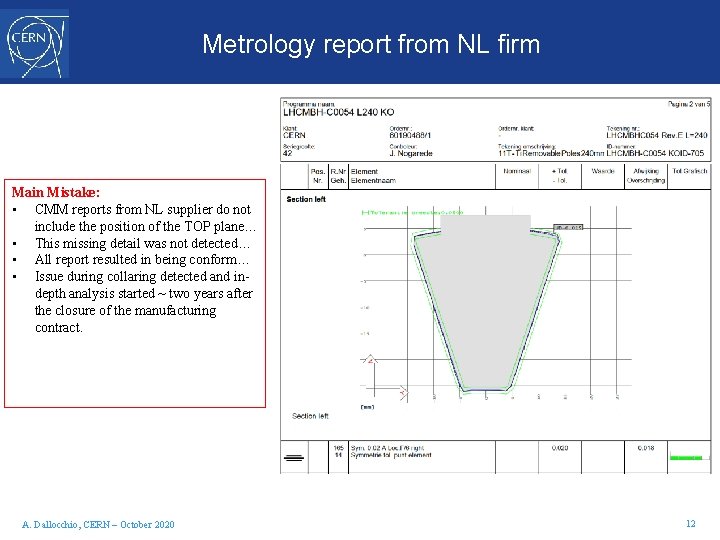
Metrology report from NL firm Main Mistake: • CMM reports from NL supplier do not include the position of the TOP plane… • This missing detail was not detected… • All report resulted in being conform… • Issue during collaring detected and indepth analysis started ~ two years after the closure of the manufacturing contract. A. Dallocchio, CERN – October 2020 12

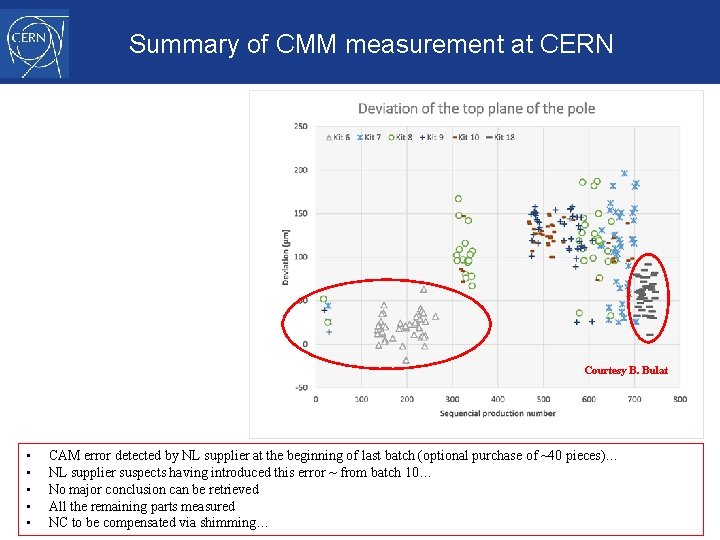
Summary of CMM measurement at CERN Courtesy B. Bulat • CAM error detected by NL supplier at the beginning of last batch (optional purchase of ~40 pieces)… • NL supplier suspects having introduced this error ~ from batch 10… • No major conclusion can be retrieved • All the remaining parts measured • Dallocchio, NC to CERN be compensated A. – October 2020 via shimming… 13

CONCLUSIONS …after round table discussion… Thanks for your attention! A. Dallocchio, CERN – October 2020 Appendix D - 14