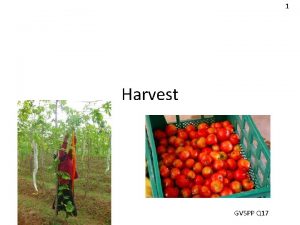
1 Harvest GVSPP Q 17 Harvest the crops


- Slides: 24

1 Harvest GVSPP Q 17


Harvest the crops at the right timing • Half-matured (brinjal, cucumber, pumpkin, etc. ) Postharvest ripening Seed extraction • Full-matured (tomato, okra, capsicum, bitter gourd, Luffa, etc. ) Seed extraction ü ü ü Colour Size Texture Dryness Days from flowering/pollination ※DO NOT harvest from Virus or Bacteria infected Plants 2

Harvest • Crops should be harvested at the right timing to maximize the quality of harvested seeds • Some crops can be harvested at half-matured stage to fully mature by postharvest ripening • The indications of harvesting timing can be recognized by colour, size, texture, and dryness (cracking) • To know more precise harvesting timing, days from flowering or pollination date can be used ※Plants that infected by virus and bacteria should not be harvested→ pathogens in high possibility translocated to the seeds 2’

3 Harvest Determination of harvesting timing by counting days Count the days from the date of flowering/pollination Record flowering/pollination date Indications of harvesting timing Crop Days to harvest Postharvest ripening Tomato Around 45 days Not necessary Pumpkin 40 - 60 days Around 20 days Brinjal Around 50 days 10 – 20 days B. gourd Around 30 days Not necessary Capsicum 60 – 70 days Not necessary Luffa 50 – 60 days Not necessary Cucumber 30 – 40 days 3 – 10 days W. melon 30 – 40 days 4 – 5 days

Harvest 3’ Determine the harvesting timing by counting days from flowering/pollination • Record the date of flowering/pollination • Considering flowering/pollination date as the day 1, following day is the day 2, and so on • When counting days reach to the indicated days for the particular crops (showed in table), crops are at the right timing to harvest

4 Postharvest GVSPP Q 18 -Q 21


Postharvest Ripening 5 Some crops can be harvested before full-mature, and let the fruits fully matured after harvesting Advantage of postharvest ripening • Improve seed maturity • Decrease plant stress • Distribute more nutrients to other fruits • Minimize the risk of damaging fruits in field Method of postharvest ripening • Store the fruits in well-ventilated and shady place for days after harvesting

Postharvest Ripening 5’ For the particular crops that can apply postharvest ripening, it is recommended to practice because; • Seed maturity is increased to improve quality • Lesser number of fruits gives less stress to the plant. Reducing plant stress as much as possible is important for the plant to stay healthily and vigorously • By reducing the number of fruit from the plant, other remained fruits can get more nutrients to improve fruit/seed quality • Risks of damaging fruits (by disease, pest, wild animals, or natural disaster) increase as the fruits stay in field for longer period. Earlier harvest helps reducing the risks of damaging the fruits • After harvesting, the fruits should be stored in wellventilated and shady place for several days. Postharvest ripening period varies in crops

Effect of Postharvest Ripening Germination Rate with different harvest and postharvest ripening days Source: Suzuki (1964) • Brinjal Days of postharvest ripening Harvesting days after flowering 0 5 10 15 20 50 34. 0% 58. 8% 99. 8% 97. 0% 99. 5% 60 96. 2% 95. 3% 99. 9% 70 99. 5% • Cucumber Source: TBIC (2012) Days of postharvest ripening Harvesting days after flowering 0 10 20 20 10. 0% 67. 5% 76. 8% 30 92. 5% 95. 0% 100% 40 97. 5% 95. 0% 85% 6

Effect of Postharvest Ripening 6’ Data in the tables is results of studies on postharvest ripening on brinjal and cucumber • The results show that there is no difference in seed germination between harvested at fully matured stage and earlier harvested and compensate days by postharvest ripening Brinjal: Germination rate of Fully matured (harvested at 70 days) brinjal = 99. 5% Harvested at 50 days and having postharvest ripening for 20 days =99. 5% (50+20=70 days) Harvested at 60 days and having postharvest ripening for 10 days =99. 9% (60+10=70 days) • By practicing postharvest ripening, fruits can be harvested not until waiting for fully matured in field without having seed germination problem

Seed Extraction 7 • Seeds should be extracted properly not to damage the seeds • Some crops require washing with water for seed extraction (tomato, brinjal, cucumber, etc. ). But do not wash the crops not requiring washing (Capsicum, Luffa, Okra, etc. )

Seed Extraction 7’ • Handle with care not to damage the seeds when extract the seed from fruits • Some crops need fermentation period (tomato, cucumber), some crops need water to extract seeds(brinjal), and some crops need to wash with water to clean the seeds (bitter gourd, snake gourd) when extracted. Such crops are okay to use water but avoid using for the crops that unnecessary to wash (capsicum, okra, luffa) • Seeds to contacting water may decrease seed germination or degrade seed appearance • See the technical manual for seed extraction methods for each crop

Drying 8 Drying of seed is a very important procedure that influencing the seed quality greatly →Seed has to be dried as soon as it can to prevent decreasing seed germination How? 1. Spread seeds evenly on a mat under the sun to dry moisture from seed surface 2. Avoid exposing seeds under direct sunlight when irradiation is too strong(11 am-2 pm) 3. Turn over seeds constantly to dry uniformly 4. After drying seed surface, further dry them in shade (dry in well-ventilated place. Avoid high temperature and humidity place)

Drying 8’ Drying of seed is a very important procedure that influencing the seed quality greatly →Seed has to be dried as soon as it can to prevent decreasing seed germination How? 1. Spread seeds evenly on a mat under the sun to dry moisture from seed surface 2. Avoid exposing seeds under direct sunlight when irradiation is too strong(11 am-2 pm) 3. Turn over seeds constantly to dry uniformly 4. After drying seed surface, further dry them in shade (dry in well-ventilated place. Avoid high temperature and humidity place)

Drying Dry wet seeds as soon as possible ✓ Place seeds on a mat to buffer heat from bottom Spread seeds evenly. Try not seeds lie on top of each other 9 × Do not dry seeds directly on concrete or on soil ✓ Better to dry seeds apart from the ground Turn over seeds to dry uniformly

Drying 9’ • Dry wet seed as soon as possible not to seed to absorb water • Seeds should be spread evenly. If seeds lie on top of the each other, seeds cannot be dried uniformly • Avoid drying seeds directly on concrete. Seeds are heated up from the bottom as concrete heated up by sunlight. Place a mat or something between seeds and ground to buffer heat up the seeds • It is better to place seeds at higher place from the ground where heat from the bottom can be buffered

Cleaning is to remove dust from the seeds →Improve physical seed appearance →Prevent seeds to absorb moisture How? • Winnowing • Sieving • Washing with water 10

Cleaning 10’ • Cleaning is to remove dust attach to the seeds • By doing seed cleaning, it improves seed physical appearance to help increasing commercial value • Moisture is a great enemy to seeds to maintain seed quality. Dust attach to the seeds helps absorbing moisture in air to increase seed moisture. Seeds without dust absorbs less moisture from air • Winnowing, sieving, washing are the ways to clean the seeds

11 Storing Avoid storing seeds in a high humidity and temperature condition Germination rate of tomato seeds at 372 days after storing under different conditions Source: Barton (1941) Relative Air Temperature Humidity 5℃ 10℃ 20℃ 30℃ (RH) 35% 94% 91% 90% 91% 55% 90% 89% 83% 76% 88% 76% 45% 0%

Storing 11’ • Seeds should be stored in low humidity and low temperature condition • Humidity and temperature influence the quality of seeds, especially seed germination • As it’s shown in the table, tomato seeds that stored under low humidity and low temperature have high germination rate even after storing for a year • On the other hand, tomato seeds that stored under high humidity and high temperature performed worst in germination

Storing • Pile seed bags on wooden pallet or shelf • Pile seed bags keeping distance from the ground and wall as much as possible Bagging Material: • Jute/fabric bag highly prevents seeds from moisture • Double layer plastic bag prevents more moisture than single layer plastic bag 12

Storing 12’ • Avoid piling seed bags directly on the ground (floor). Seed bags should be piled on wooden pallet or shelf to prevent moisture to percolate from the ground • Due to the temperature gap between day and night, walls of a building sometimes get wet by dew condensation. Direct contact of seed bags to the walls should be avoided • Seeds should be stored in bags. Jute/fabric bag prevents seeds from moisture to a large degree • If a plastic bag is used for bagging, better to make it double layer to protect seed from moisture • Older seeds cause seed quality to deteriorate quicker than fresher seeds. The old seeds should be discarded and renewed the seed stock periodically
 The primary harvesting machine for field crops is the:
 Cover crops
 The jumano built villages and grew crops near the
 Crops
Crops Maturity indices of mango
 Pleiotrophy
 Golden crops foe
 Mayans agriculture techniques
 Because you speak english unnaturally
 My crops doing well
 What is greece capital city
 Advantage of gmo
 Cover crops
 High nitrogen fertilizer uk
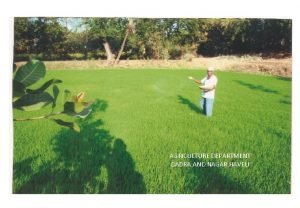
 Irrigation projects in dadra & nagar haveli
 Mexican crops
 Ancient egypt agriculture
 Horticultural crops classification
 Thesis title about crops
 What is mixed cropping
 Pictures of food crops
 What type of food did the iroquois eat
 Rdna technology applications
 Why does kat want rue for an ally
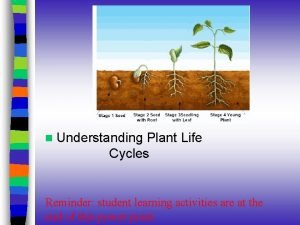
 Life cycle of a plant
