017 Fitting Marking Out Identify the range and
- Slides: 33

017 Fitting Marking Out Identify the range and use of marking out equipment available

Objectives • After the completion of this unit, student should be able to: • • • Identify different marking out tools and their usage. Select the appropriate tool required for marking out. Mark out work-pieces according to the dimensions given in engineering drawings. Distinguish the different hand tools and their uses. Select the correct tool for the task. State the care and safe use of hand tools.

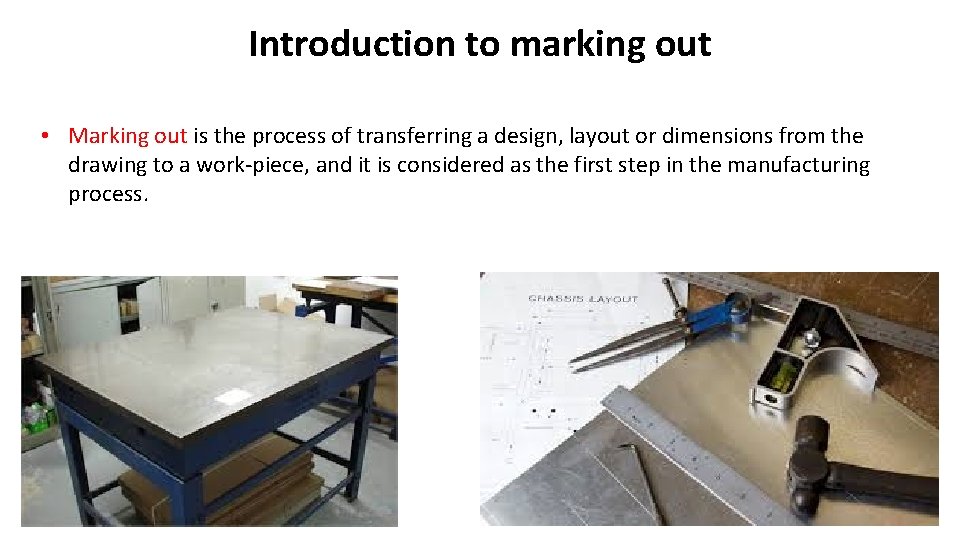
Introduction to marking out • Marking out is the process of transferring a design, layout or dimensions from the drawing to a work-piece, and it is considered as the first step in the manufacturing process.

Marking Out • Marking out usually means the marking of lines on metal, usually before commencement of work. These can be straight lines or circles or centres. • Reasons for marking out: • To provide guidelines to work to – in some cases it is the only guide to control size and shape of component. Satisfactory only when limited accuracy is permissible. • To provide guide only to machinists in setting-up and cutting operations. • The actual dimensional control is achieved by the use of the machine controls and precision measuring equipment.

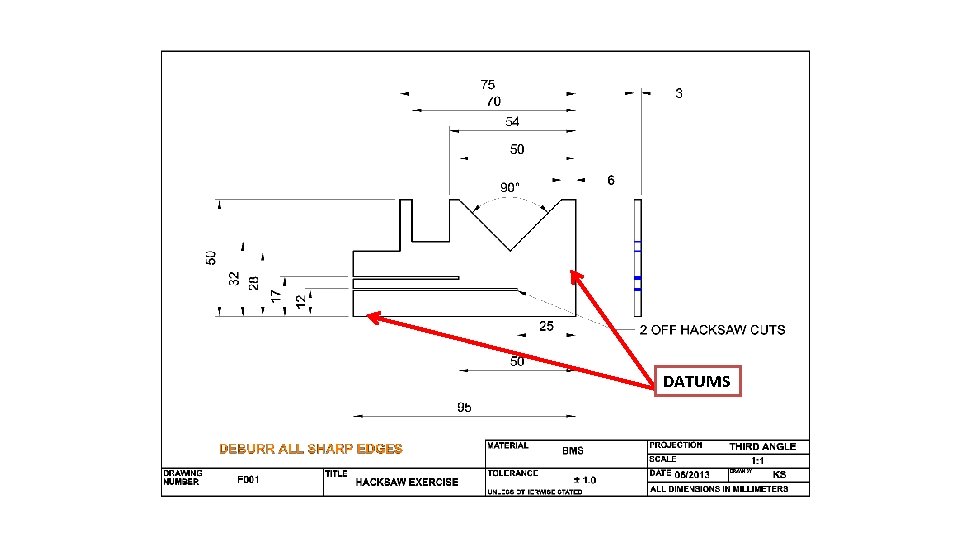
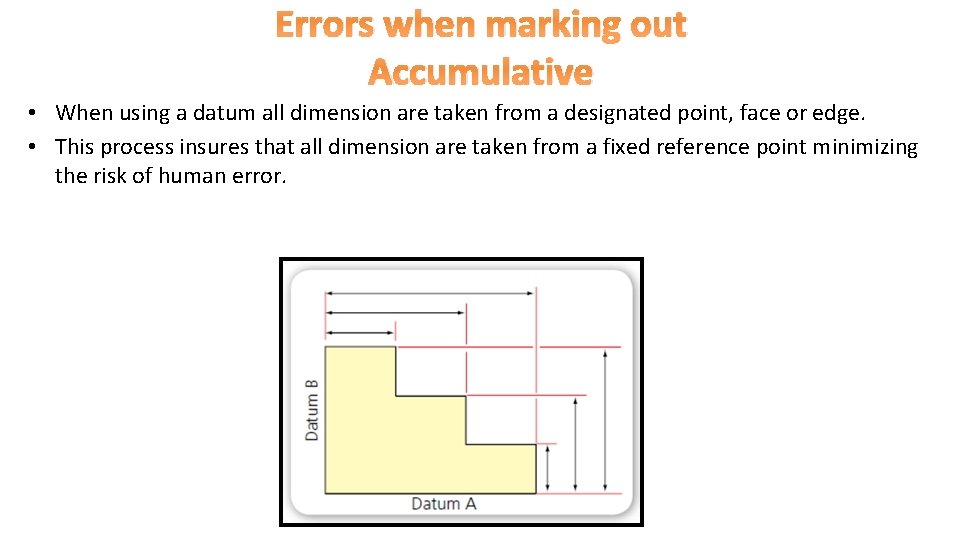
Datum Points • Datum points are used in marking out. • A datum point is really just a starting point. • If more than one measurement is required, it makes good sense to make all measurements from a reference or datum point. • So in marking out, a datum point is where all measurements start or where they are taken from.

DATUMS

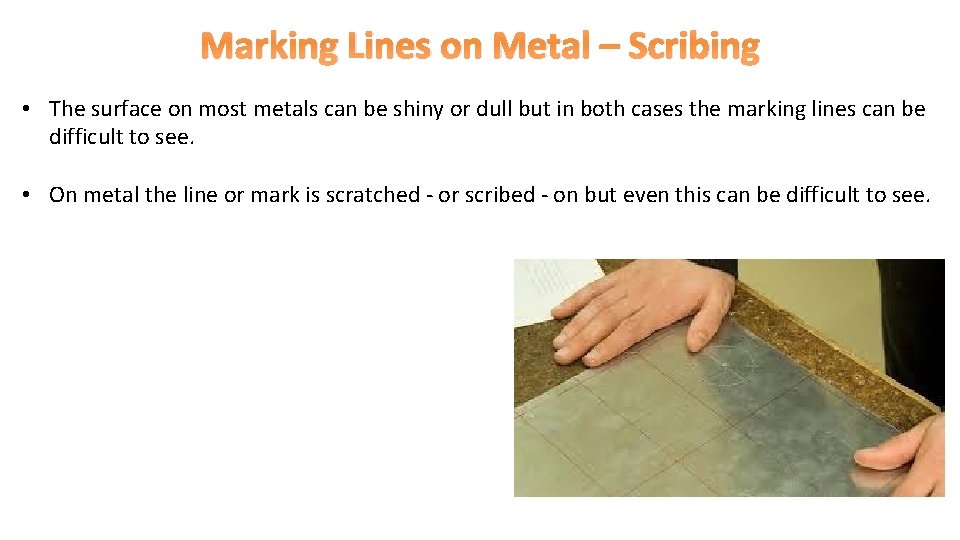
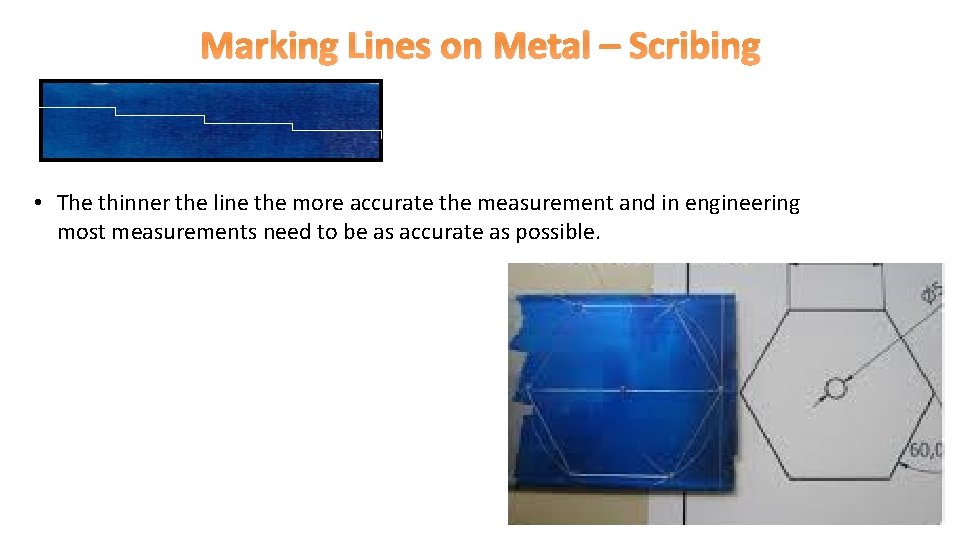
Marking Lines on Metal – Scribing • The surface on most metals can be shiny or dull but in both cases the marking lines can be difficult to see. • On metal the line or mark is scratched - or scribed - on but even this can be difficult to see.

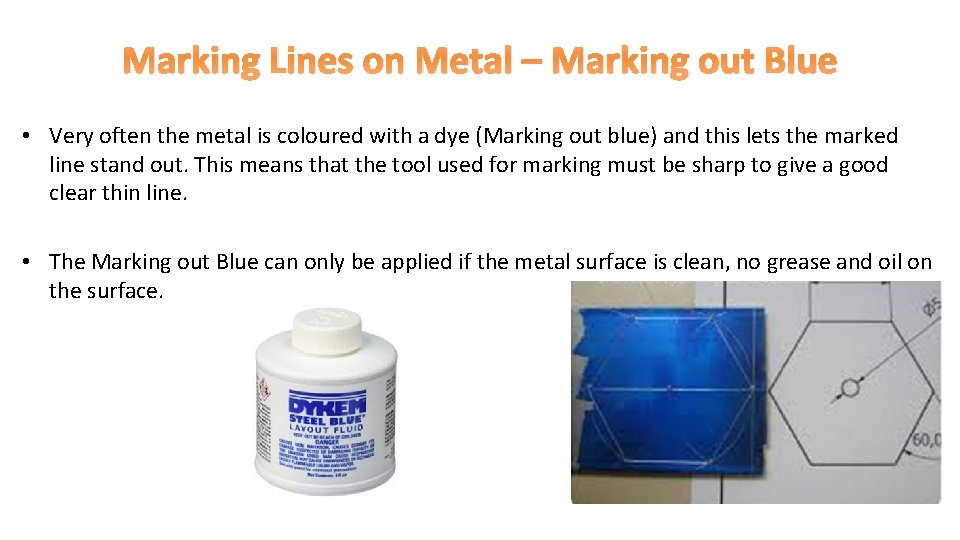
Marking Lines on Metal – Marking out Blue • Very often the metal is coloured with a dye (Marking out blue) and this lets the marked line stand out. This means that the tool used for marking must be sharp to give a good clear thin line. • The Marking out Blue can only be applied if the metal surface is clean, no grease and oil on the surface.

Marking Lines on Metal – Scribing • The thinner the line the more accurate the measurement and in engineering most measurements need to be as accurate as possible.

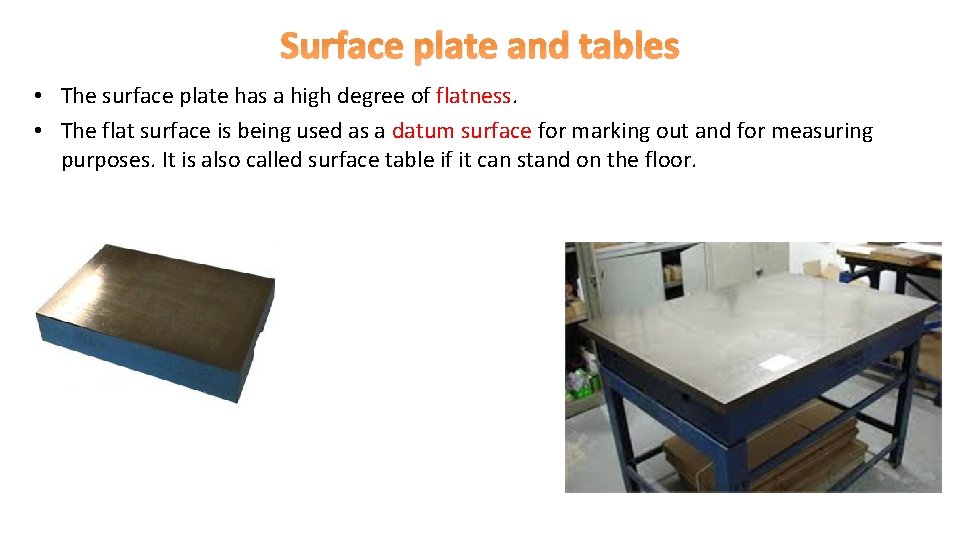
Surface plate and tables • The surface plate has a high degree of flatness. • The flat surface is being used as a datum surface for marking out and for measuring purposes. It is also called surface table if it can stand on the floor.

Maintaining Surface plate and tables u You should 1 - Keep the surface in a good condition. 2 - Keep the surface lightly oiled to prevent corrosion. 3 - Take care when placing marking out tools on the surface. u You should not 1 - Place anything on the surface that would damage it. 2 - Drop tools on the surface. 3 - Hammer on the surface.

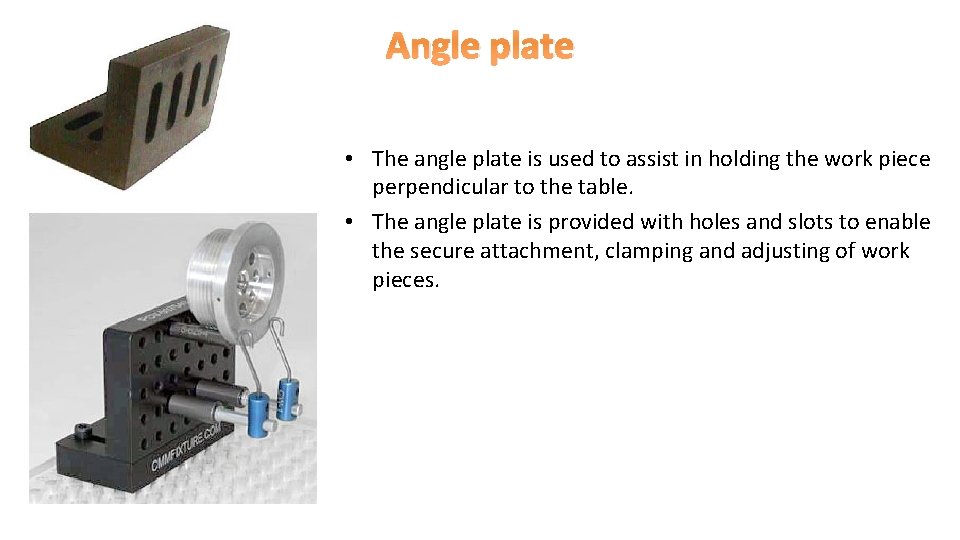
Angle plate • The angle plate is used to assist in holding the work piece perpendicular to the table. • The angle plate is provided with holes and slots to enable the secure attachment, clamping and adjusting of work pieces.

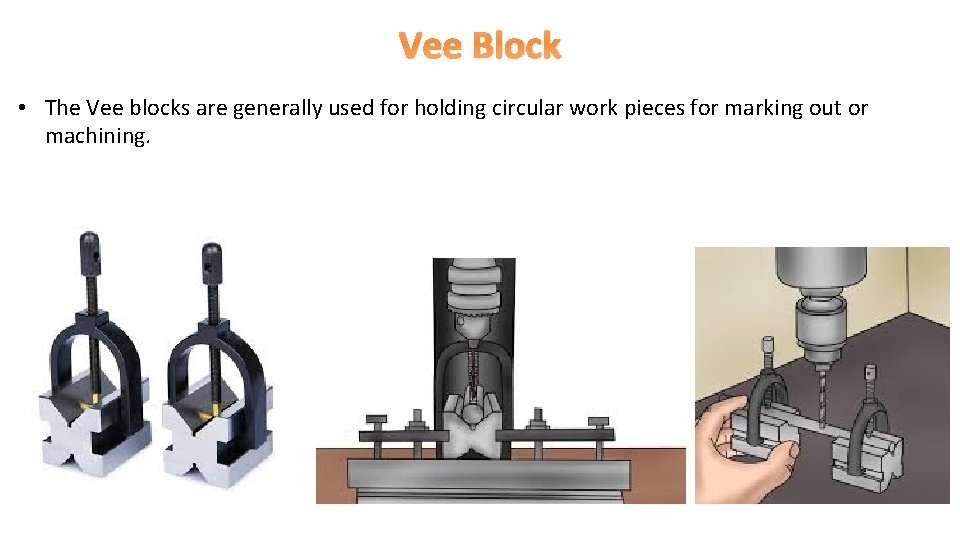
Vee Block • The Vee blocks are generally used for holding circular work pieces for marking out or machining.

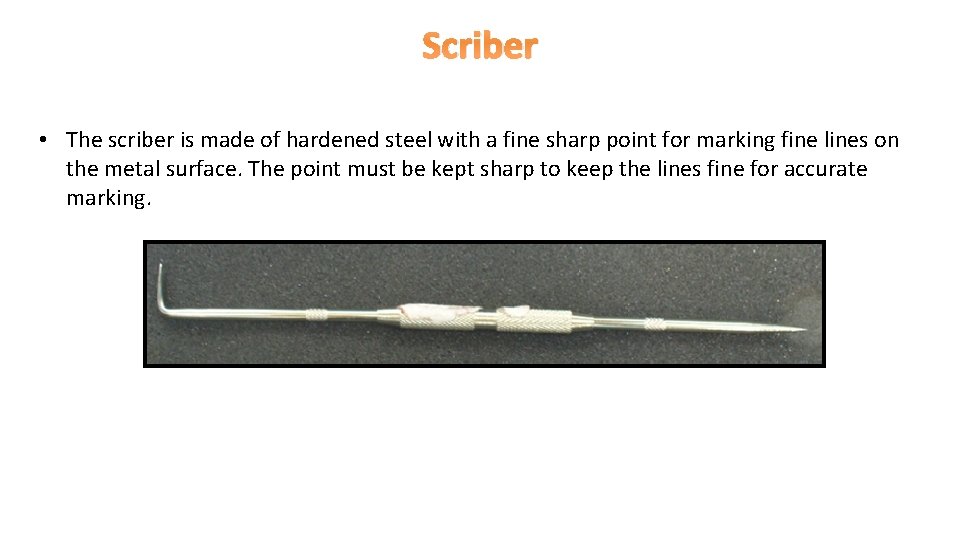
Scriber • The scriber is made of hardened steel with a fine sharp point for marking fine lines on the metal surface. The point must be kept sharp to keep the lines fine for accurate marking.

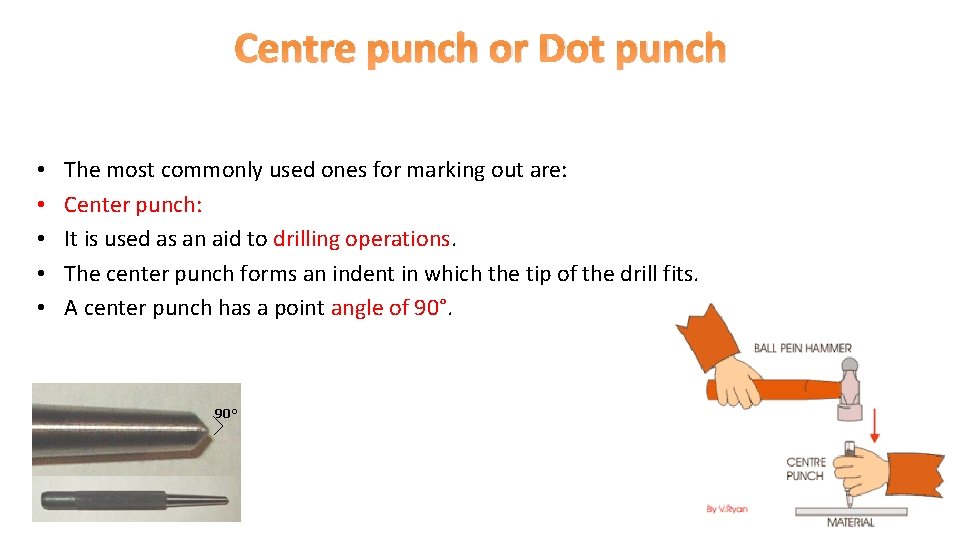
Centre punch or Dot punch • • • The most commonly used ones for marking out are: Center punch: It is used as an aid to drilling operations. The center punch forms an indent in which the tip of the drill fits. A center punch has a point angle of 90°

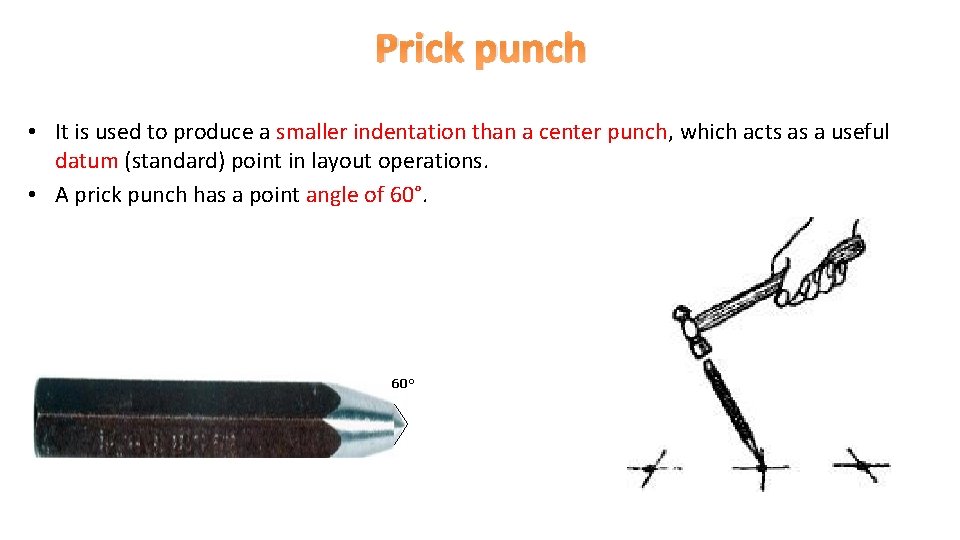
Prick punch • It is used to produce a smaller indentation than a center punch, which acts as a useful datum (standard) point in layout operations. • A prick punch has a point angle of 60°

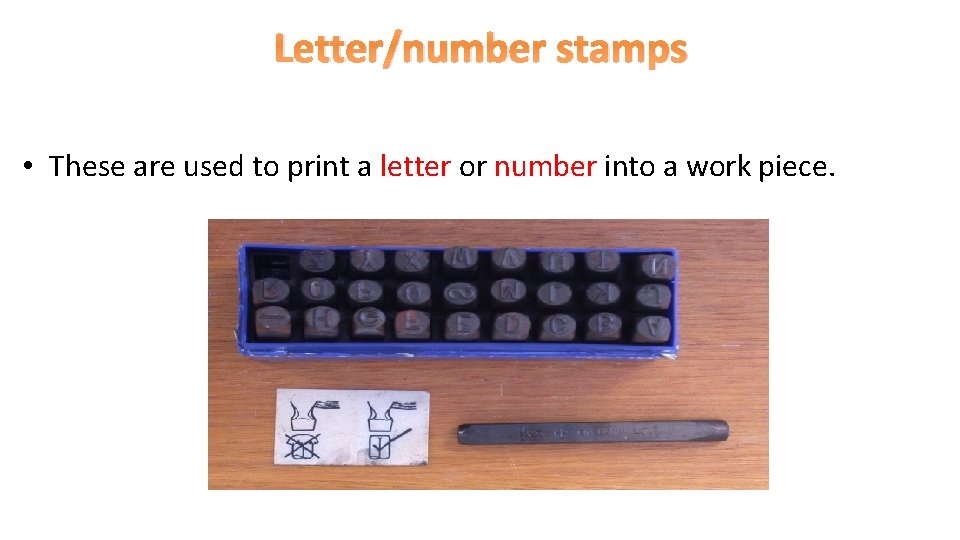
Letter/number stamps • These are used to print a letter or number into a work piece.

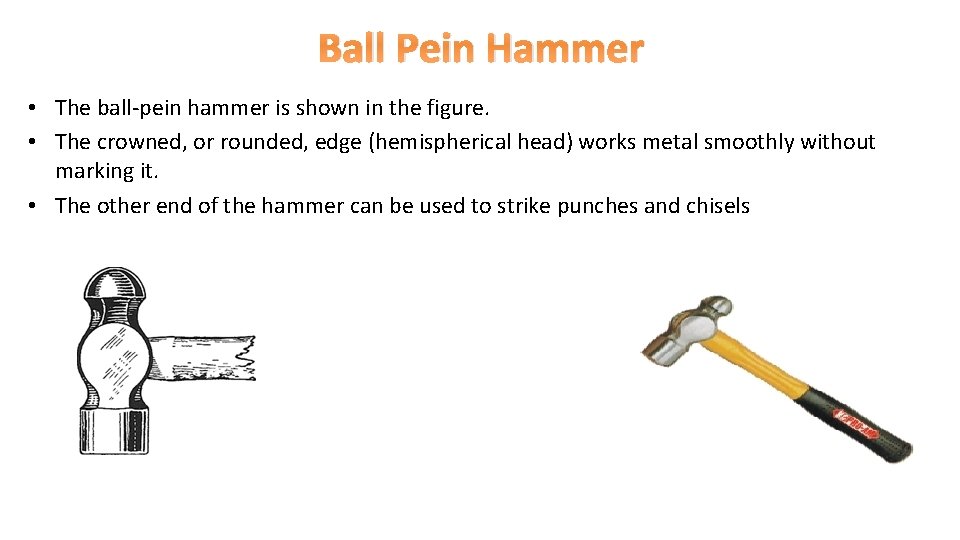
Ball Pein Hammer • The ball-pein hammer is shown in the figure. • The crowned, or rounded, edge (hemispherical head) works metal smoothly without marking it. • The other end of the hammer can be used to strike punches and chisels

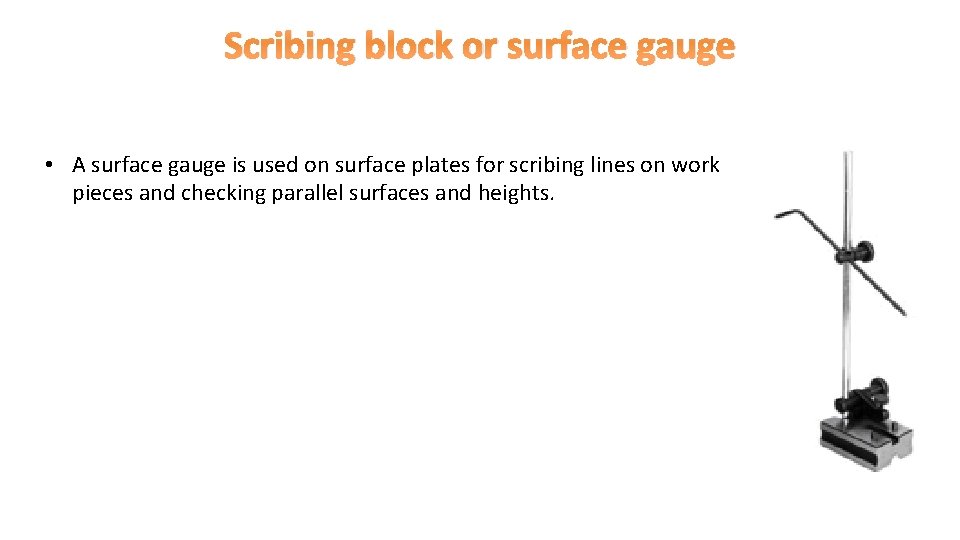
Scribing block or surface gauge • A surface gauge is used on surface plates for scribing lines on work pieces and checking parallel surfaces and heights.

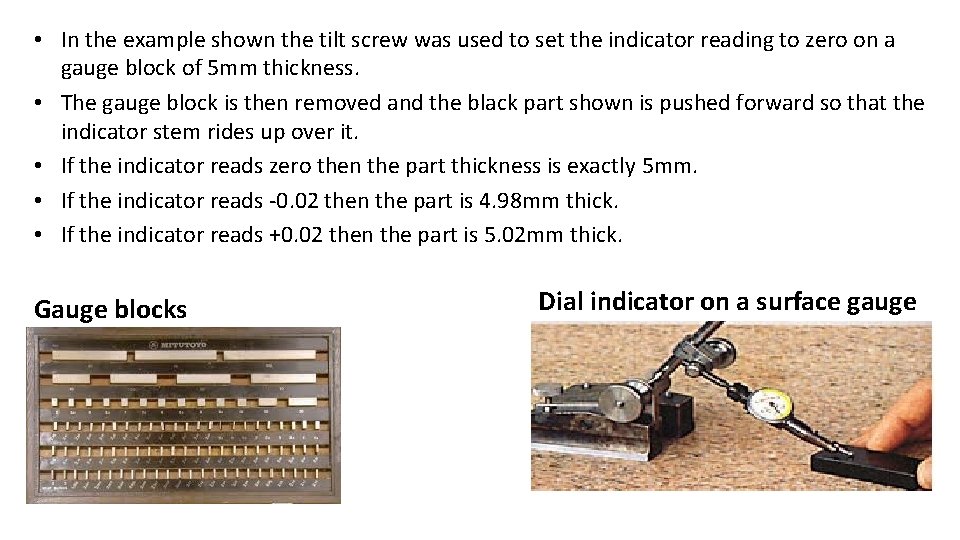
• In the example shown the tilt screw was used to set the indicator reading to zero on a gauge block of 5 mm thickness. • The gauge block is then removed and the black part shown is pushed forward so that the indicator stem rides up over it. • If the indicator reads zero then the part thickness is exactly 5 mm. • If the indicator reads -0. 02 then the part is 4. 98 mm thick. • If the indicator reads +0. 02 then the part is 5. 02 mm thick. Gauge blocks Dial indicator on a surface gauge

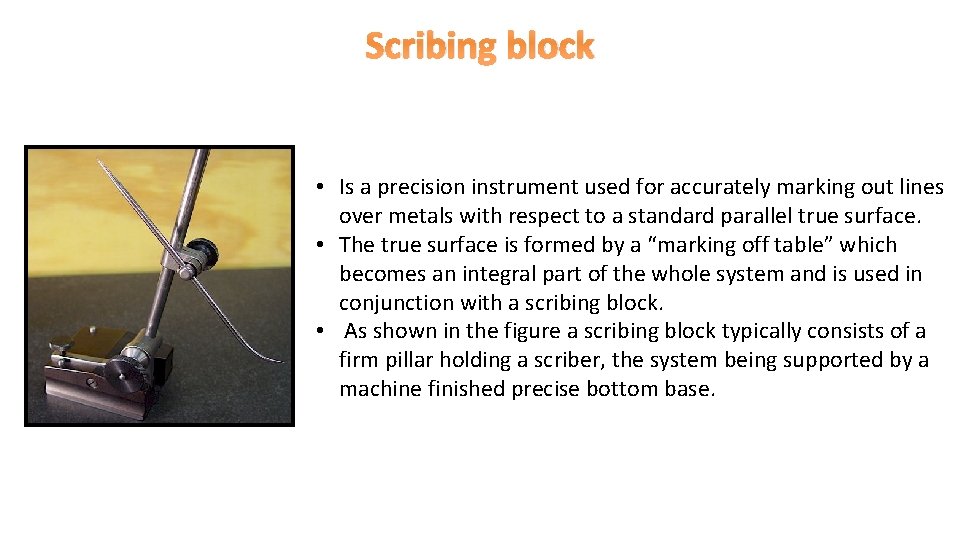
Scribing block • Is a precision instrument used for accurately marking out lines over metals with respect to a standard parallel true surface. • The true surface is formed by a “marking off table” which becomes an integral part of the whole system and is used in conjunction with a scribing block. • As shown in the figure a scribing block typically consists of a firm pillar holding a scriber, the system being supported by a machine finished precise bottom base.

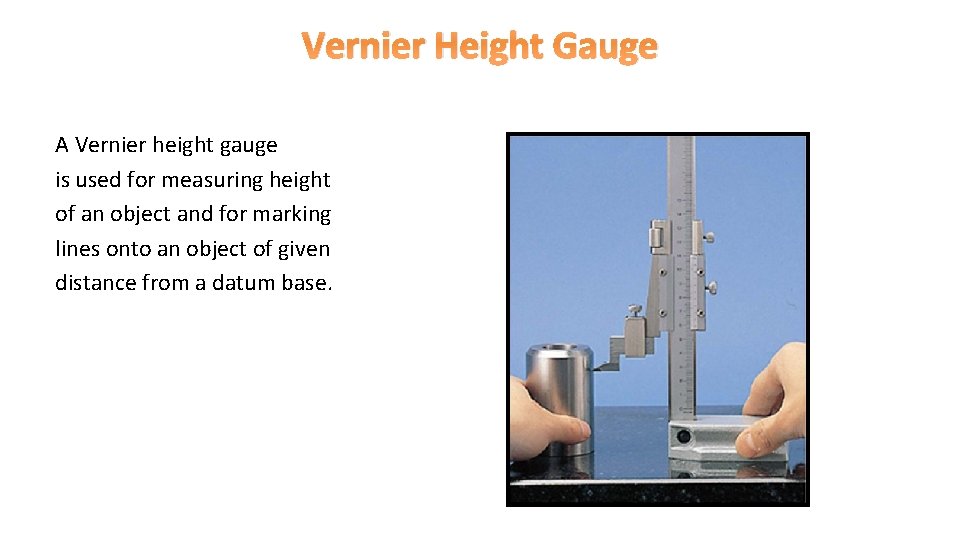
Vernier Height Gauge A Vernier height gauge is used for measuring height of an object and for marking lines onto an object of given distance from a datum base.

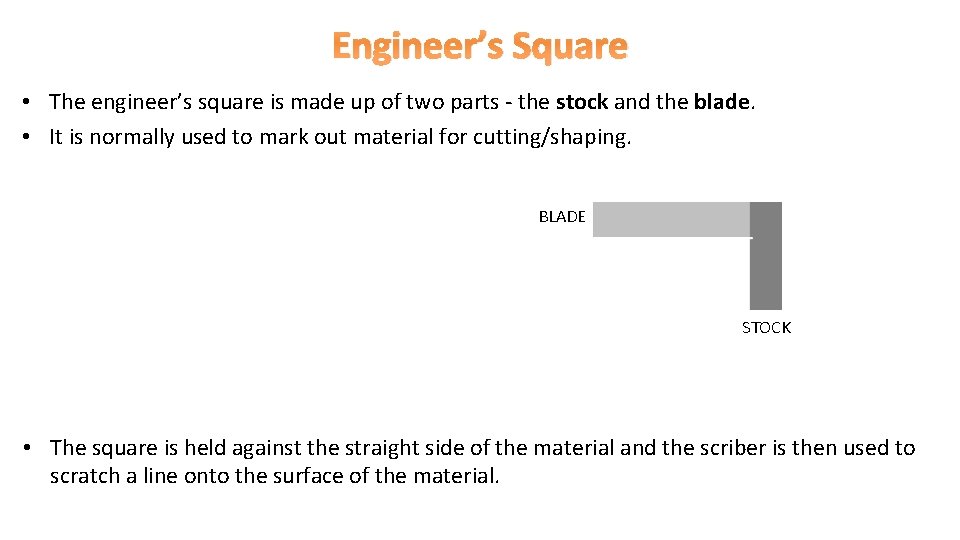
Engineer’s Square • The engineer’s square is made up of two parts - the stock and the blade. • It is normally used to mark out material for cutting/shaping. BLADE STOCK • The square is held against the straight side of the material and the scriber is then used to scratch a line onto the surface of the material.

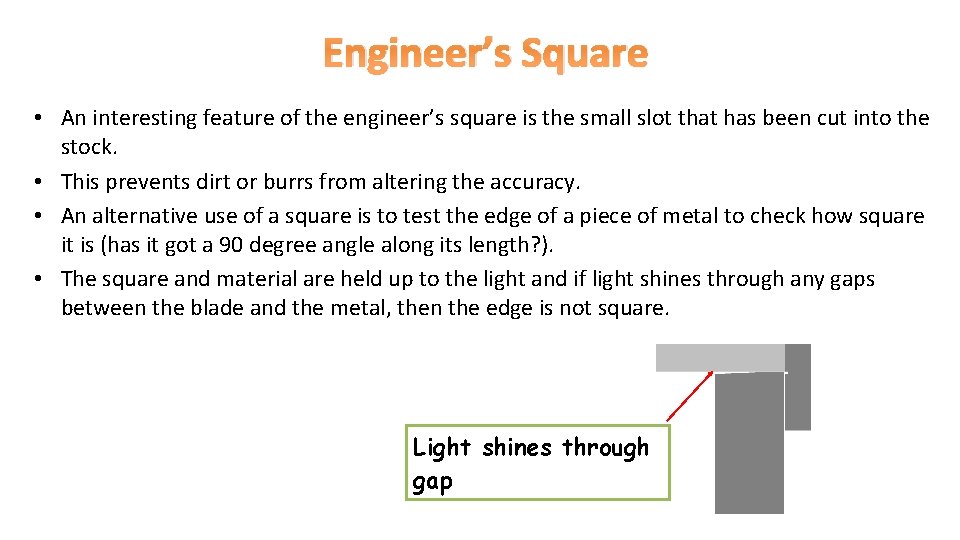
Engineer’s Square • An interesting feature of the engineer’s square is the small slot that has been cut into the stock. • This prevents dirt or burrs from altering the accuracy. • An alternative use of a square is to test the edge of a piece of metal to check how square it is (has it got a 90 degree angle along its length? ). • The square and material are held up to the light and if light shines through any gaps between the blade and the metal, then the edge is not square. Light shines through gap

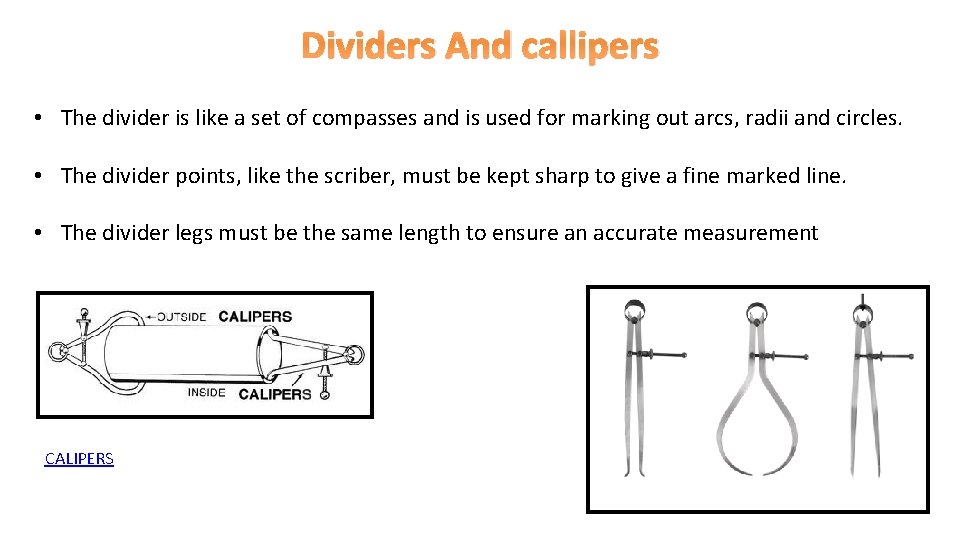
Dividers And callipers • The divider is like a set of compasses and is used for marking out arcs, radii and circles. • The divider points, like the scriber, must be kept sharp to give a fine marked line. • The divider legs must be the same length to ensure an accurate measurement CALIPERS

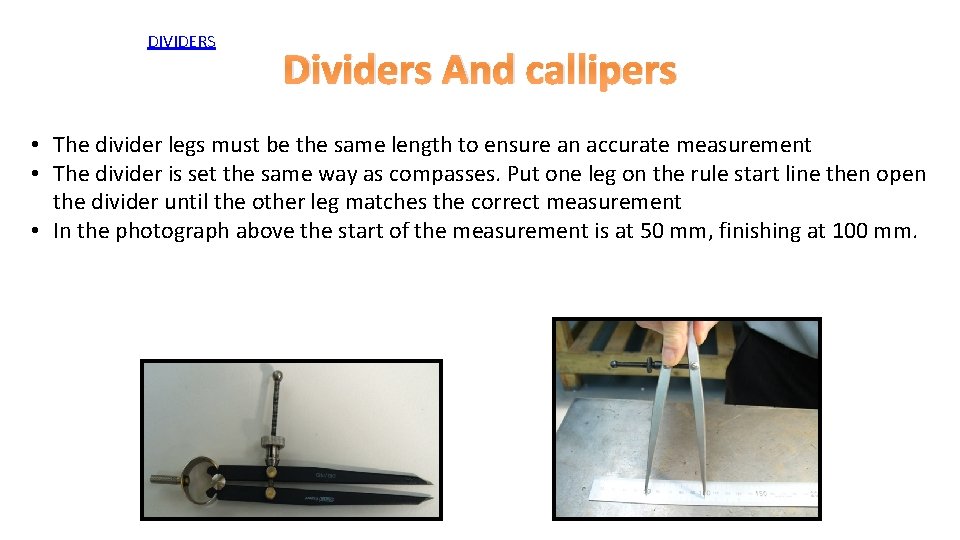
DIVIDERS Dividers And callipers • The divider legs must be the same length to ensure an accurate measurement • The divider is set the same way as compasses. Put one leg on the rule start line then open the divider until the other leg matches the correct measurement • In the photograph above the start of the measurement is at 50 mm, finishing at 100 mm.

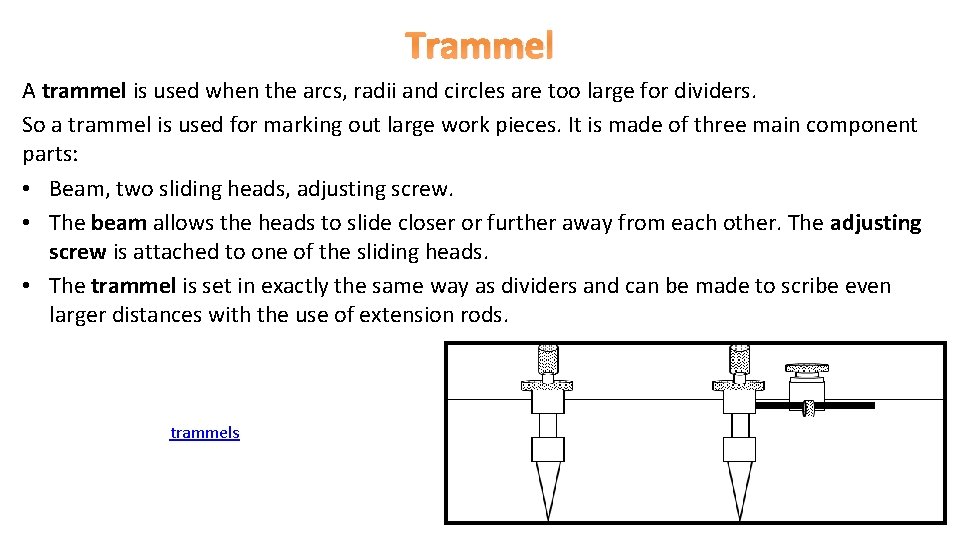
Trammel A trammel is used when the arcs, radii and circles are too large for dividers. So a trammel is used for marking out large work pieces. It is made of three main component parts: • Beam, two sliding heads, adjusting screw. • The beam allows the heads to slide closer or further away from each other. The adjusting screw is attached to one of the sliding heads. • The trammel is set in exactly the same way as dividers and can be made to scribe even larger distances with the use of extension rods. trammels

Errors when marking out

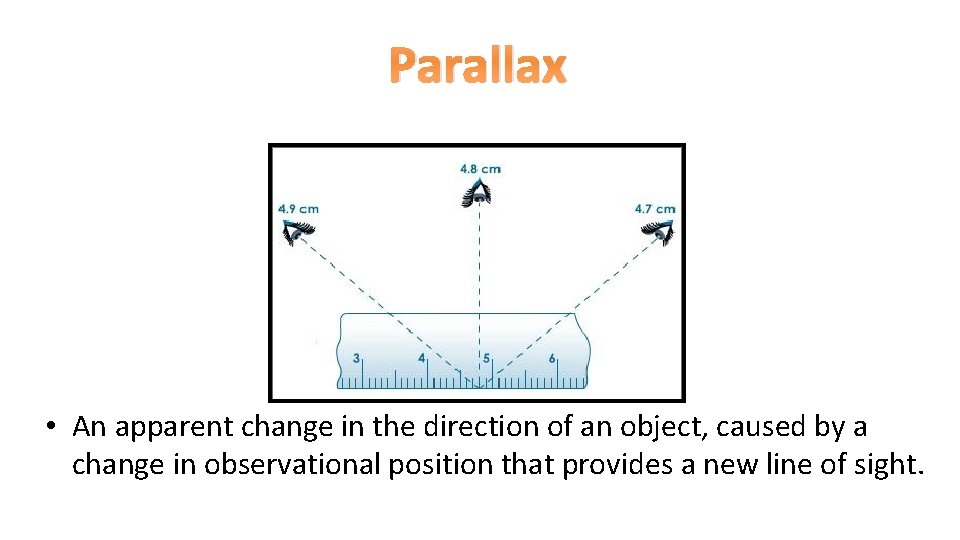
Parallax • An apparent change in the direction of an object, caused by a change in observational position that provides a new line of sight.

Errors when marking out Accumulative • When using a datum all dimension are taken from a designated point, face or edge. • This process insures that all dimension are taken from a fixed reference point minimizing the risk of human error.

Errors when marking out Accumulative • Eg. If an engineer was to mark out a point from a datum incorrectly, and then mark out another point from that incorrectly. • The second marking would have a combined error of the two. • So separately the two dimension may be in tolerance, but the two may have a combined error which may be out of tolerance. • To minimize this all dimension should be taken from a datum.

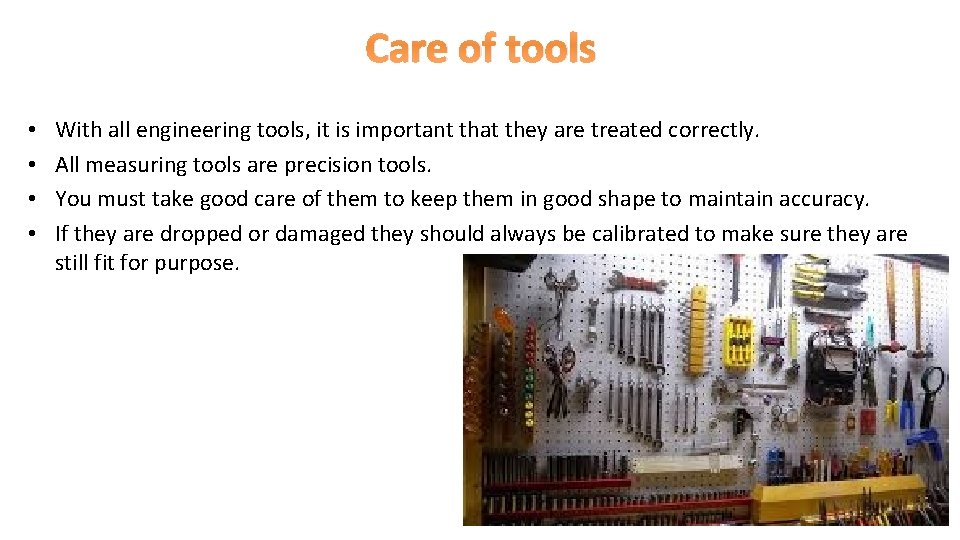
Care of tools • • With all engineering tools, it is important that they are treated correctly. All measuring tools are precision tools. You must take good care of them to keep them in good shape to maintain accuracy. If they are dropped or damaged they should always be calibrated to make sure they are still fit for purpose.

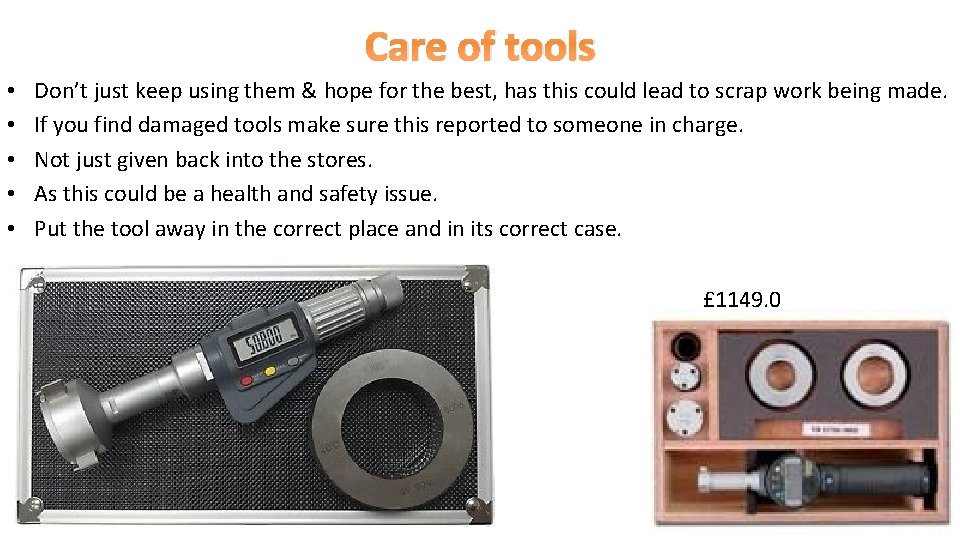
Care of tools • • • Don’t just keep using them & hope for the best, has this could lead to scrap work being made. If you find damaged tools make sure this reported to someone in charge. Not just given back into the stores. As this could be a health and safety issue. Put the tool away in the correct place and in its correct case. £ 1149. 0